


So you’ve managed to build an eCommerce site to sell your products and services. Congratulations!
At this stage, we bet you’ve created a home page, product page, and other necessary website pages. The only thing you probably need is a checkout page connected to popular payment options to start selling and earning some bucks.
The good news is that building a Shopify-style checkout page is a lot easier than you think. In this post, I’ll share how you can create a one-page checkout for your WooCommmerce store using the Aero checkout plugin.

What is the Aero Checkout Plugin?
Aero Checkout is a plugin that lets users build a Shopify-style checkout page.
No need to build a checkout page from scratch. By default, the plugin has ready-to-use checkout templates, one-page checkouts, and embed forms that you can easily add to your website.
Here’s an example of a checkout page you can create with this tool.

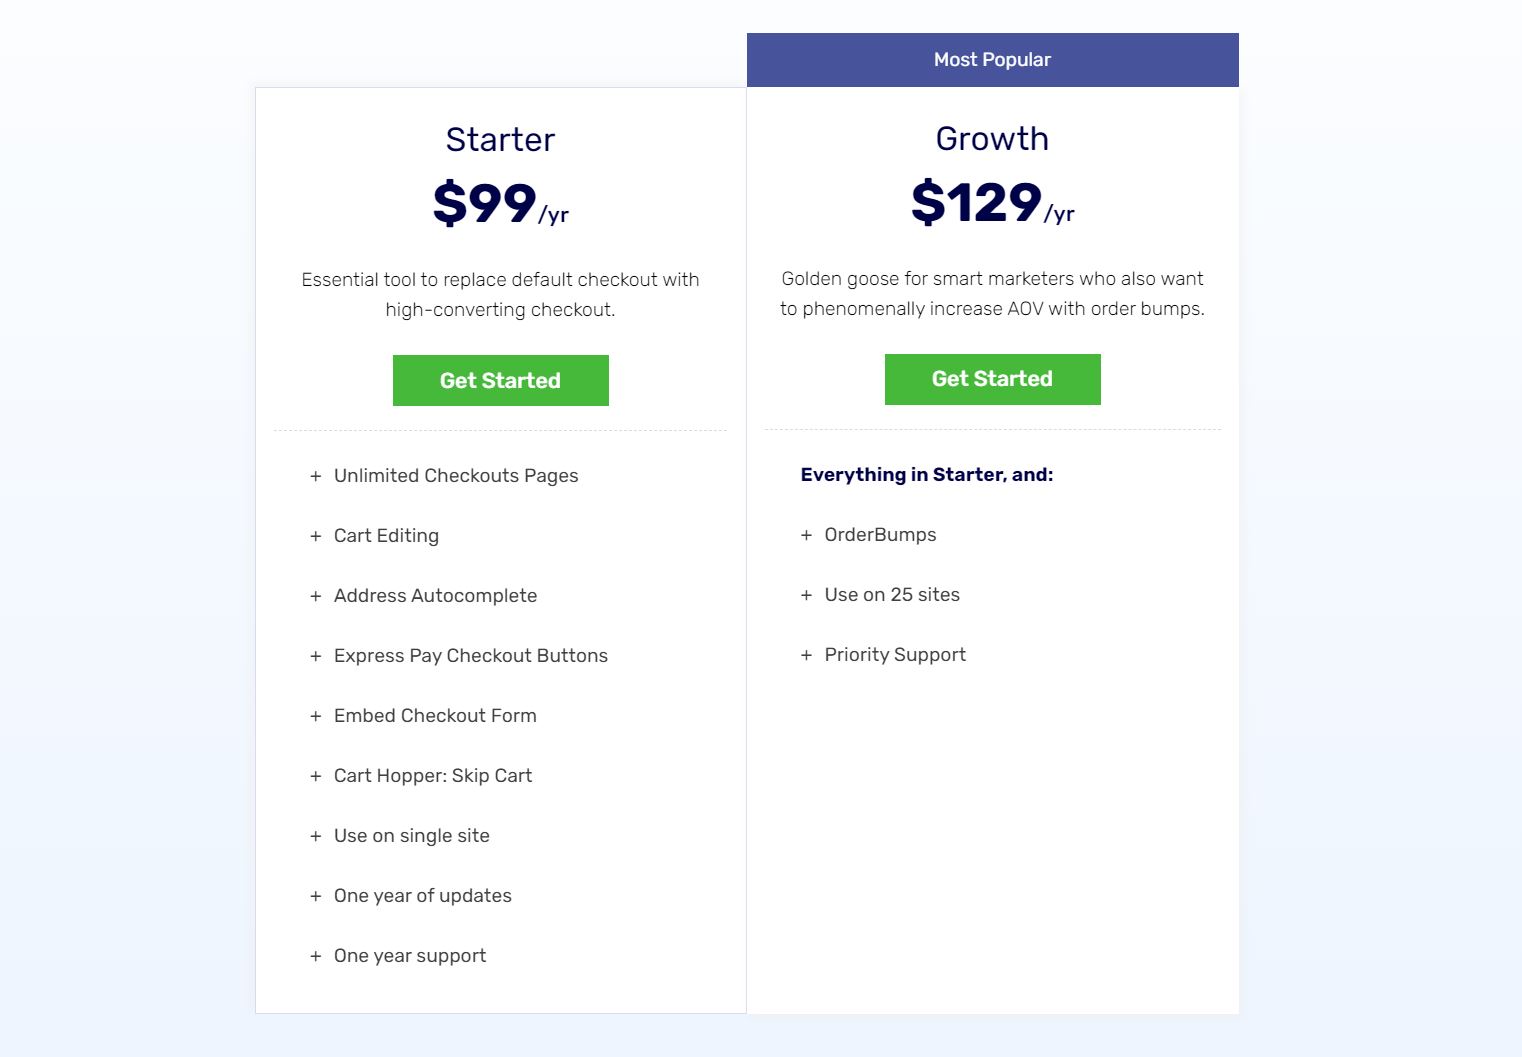
Aero Checkout is available within the WooFunnels Funnel Builder. You can easily streamline your checkout flow by choosing from their paid plans like the Starter and Growth package.
Getting Started
At this stage, we’ll assume you already have your own WooCommerce store.
Once that’s done, here’s how you can build your own checkout page.
- Create a WooFunnels Funnel Builder account.
- Get the Aero Checkout plugin as a bonus add-on.
- Select a subscription plan (they have a 14-day money-back guarantee and a refund period). Remember to use our 15% discount by clicking here.
- Install the Funnel Builder plugin on WordPress.org.
- Activate the plugin through the ‘Plugins’ menu in WordPress.
How to Create a Checkout Page Funnel
Before anything else, we have to add a checkout page in our sales funnel.
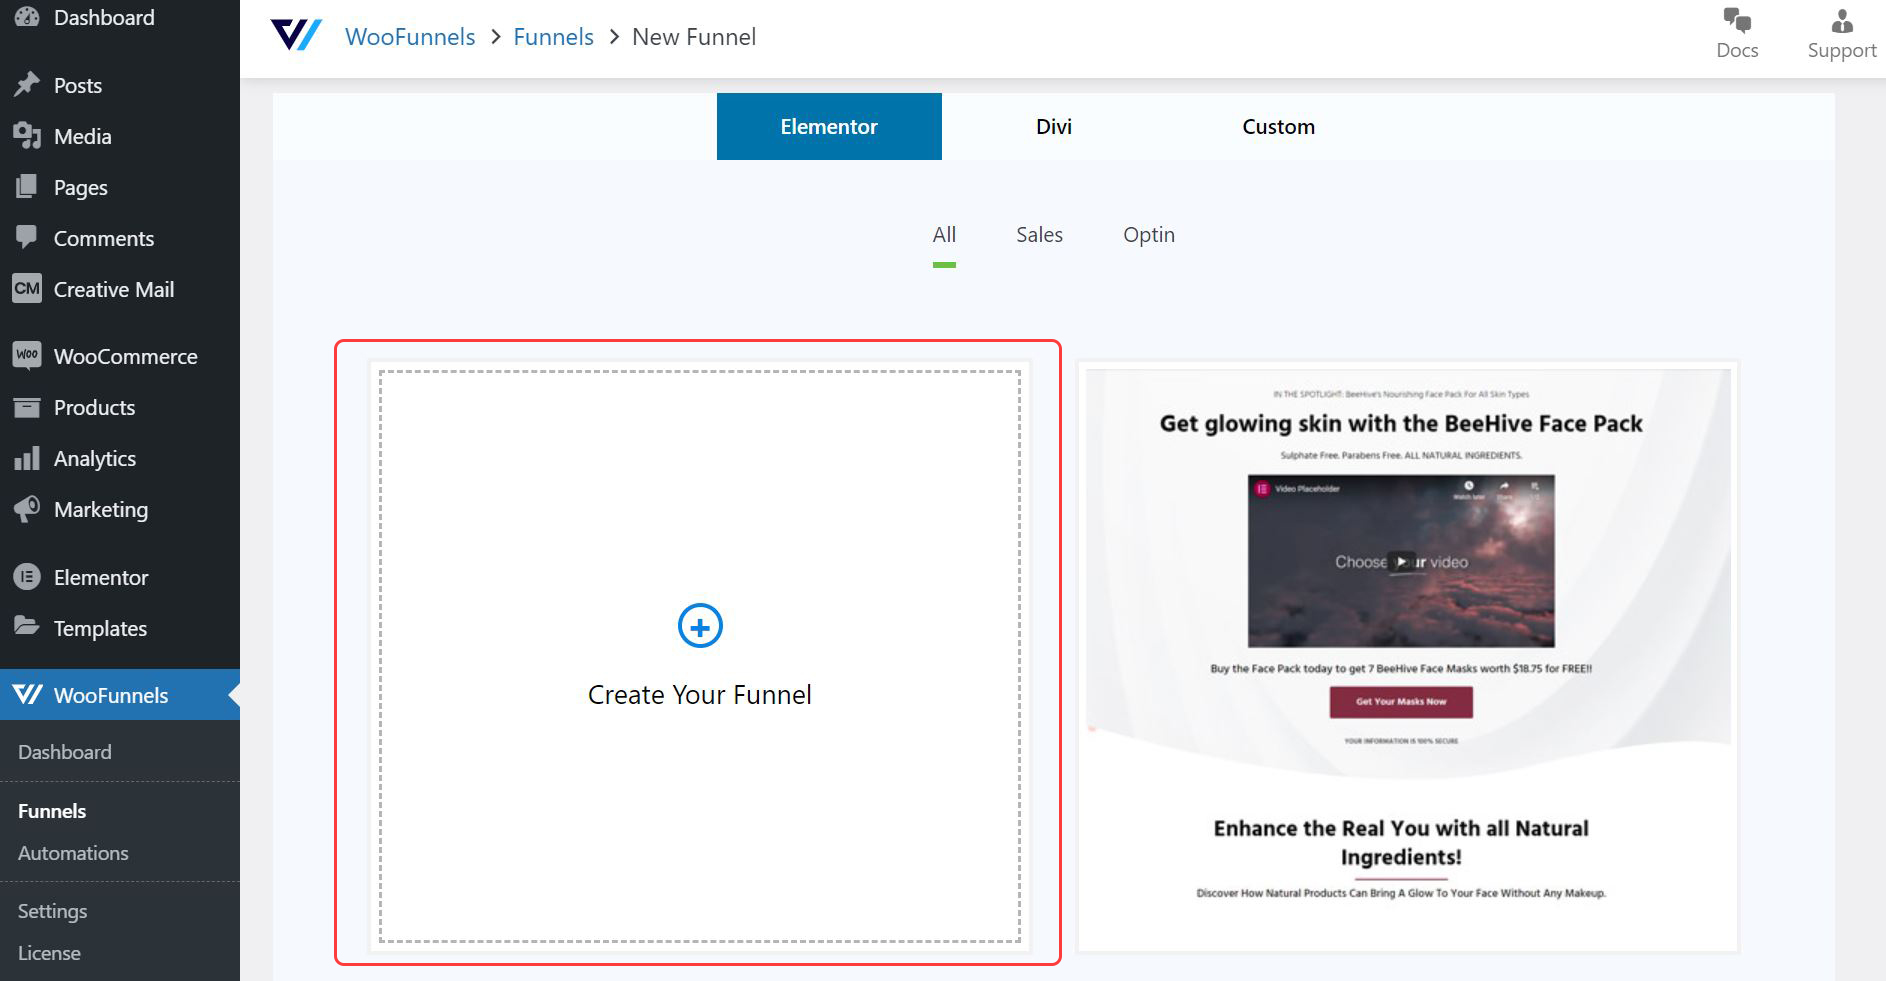
1. Head to the WooFunnels > Funnels

2. Click the Add New button to reach the checkout page builder.

3. In the Design tab, you’ll find several templates for sales pages in your ecommerce store. Since we want to add a checkout page in our funnel, select Create Your Funnel.
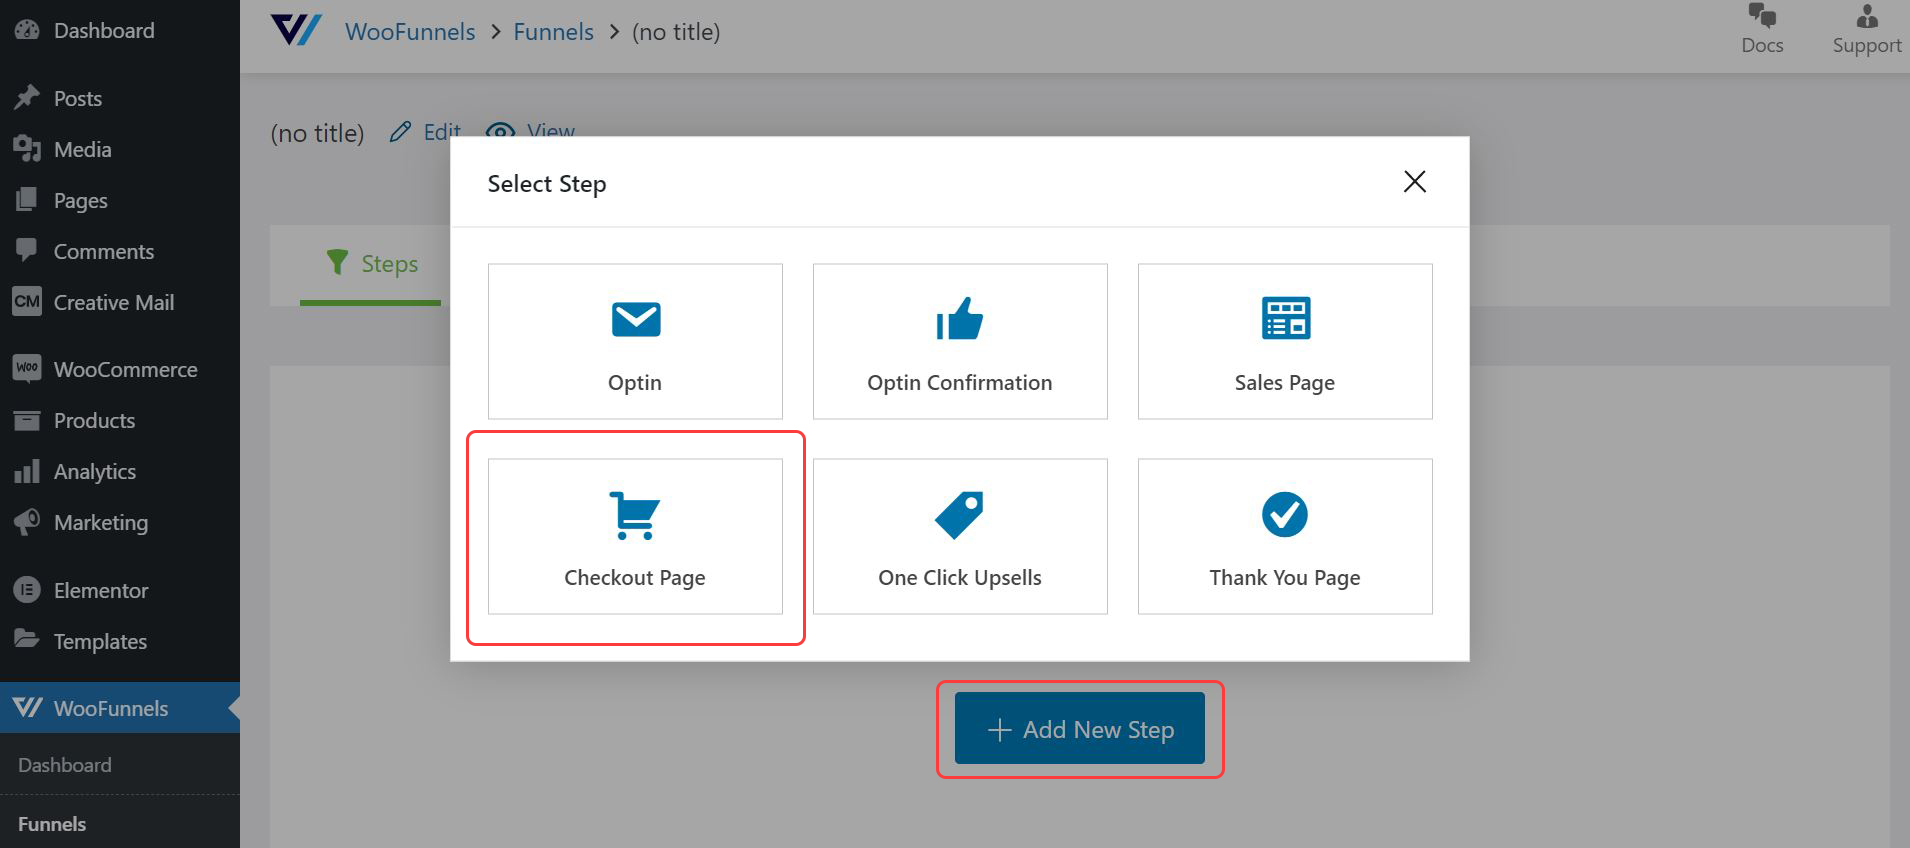
4. Choose the +Add New Step option in the center of the page. You’ll then see a pop-up with a series of funnel-related steps like a sales page, one-click upsells, and thank you page.
For this example, we’ll choose the Checkout page option.
5. Add a name for the checkout page.
We’ll go with the name Checkout page 1 for this tutorial.
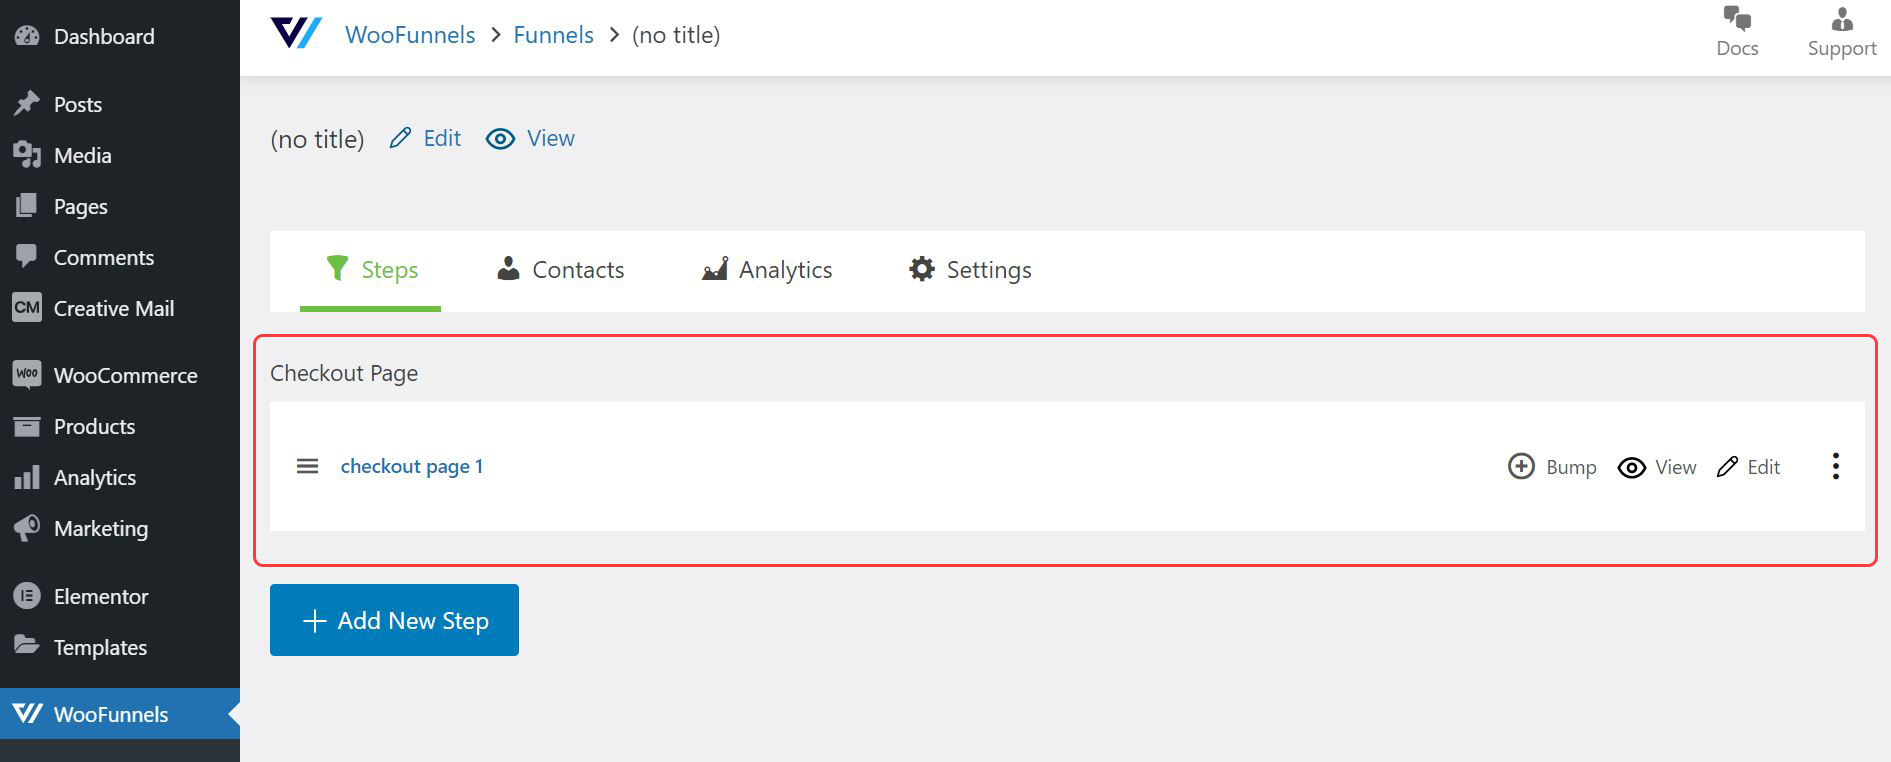
That’s it for creating a checkout page funnel, now let’s focus on building and designing the page.
How to Build a One-Page Checkout with Aero
Let’s get to work and build a checkout page.
1. Select the checkout page funnel that you previously created.
2. Under the Design tab, you’ll find a series of checkout page templates.
There are three ways you can create a checkout page via Customizer, Elementor, Divi, or you can customize your own checkout page. Meanwhile, templates range from One Step, Two Step, or Three Step format.
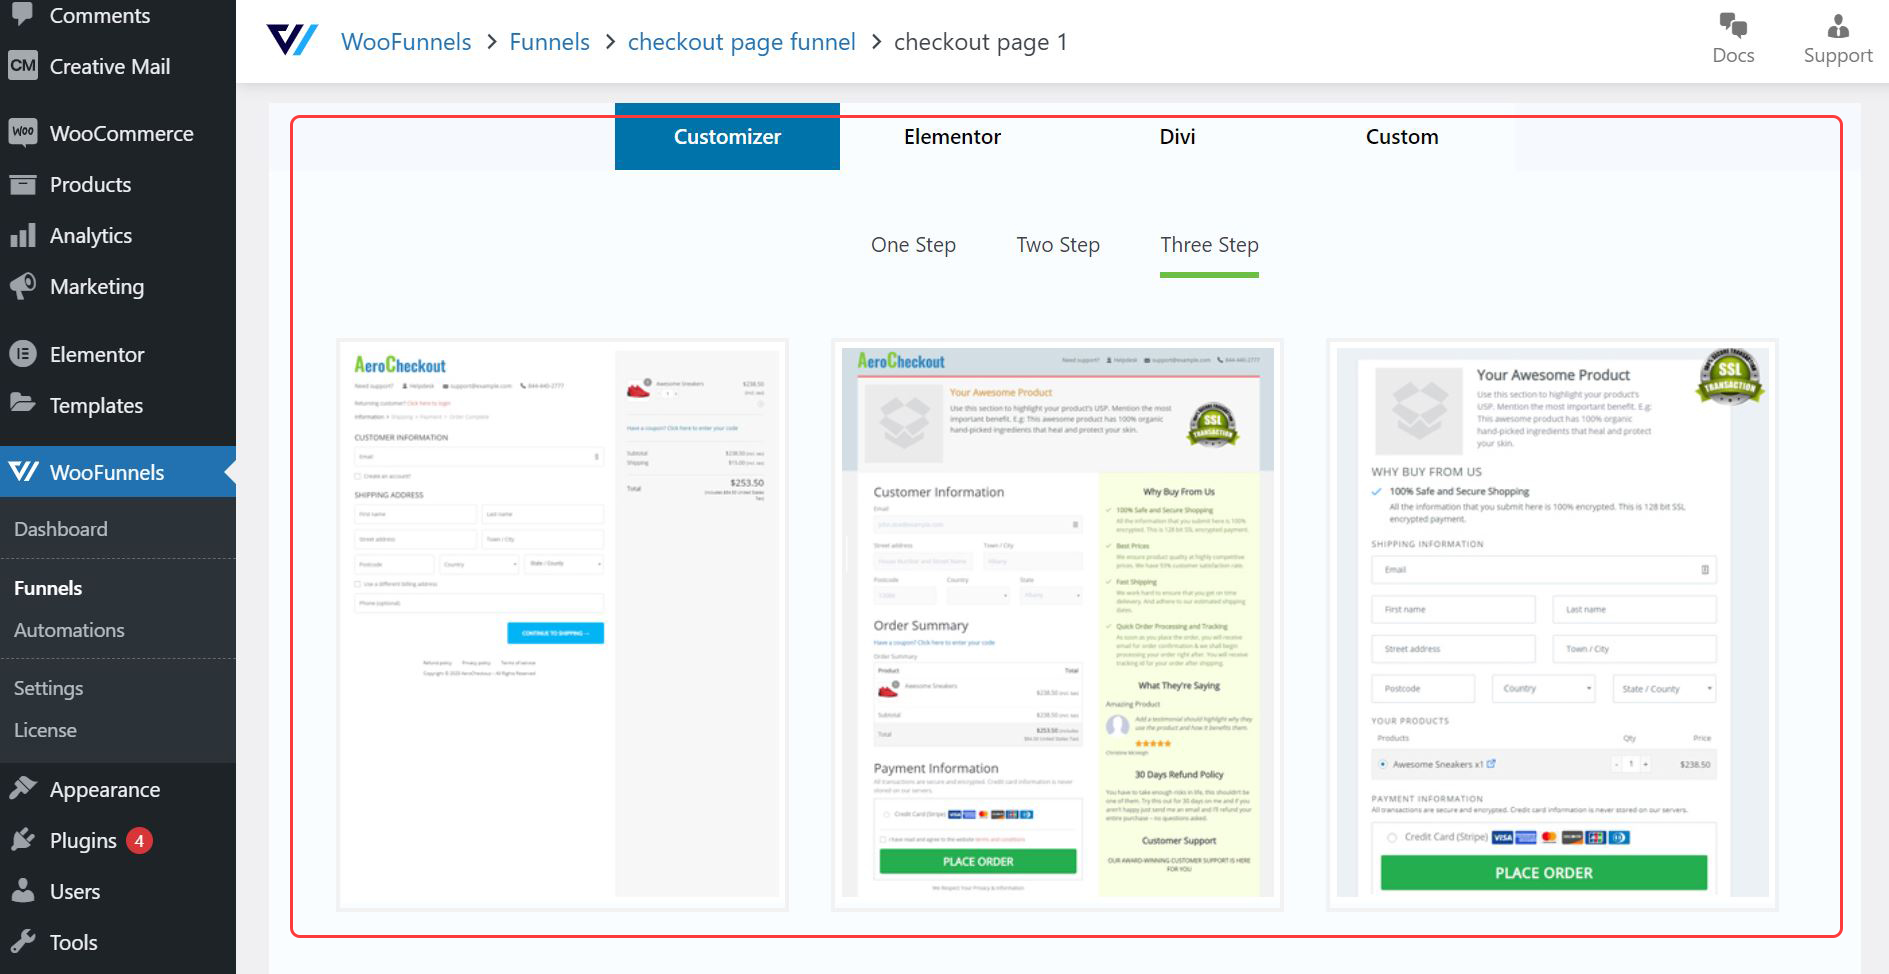
3. The Customizer is a built-in feature with pre-made templates to choose from. Just click the Import button and you can literally build a checkout page within 30 seconds.
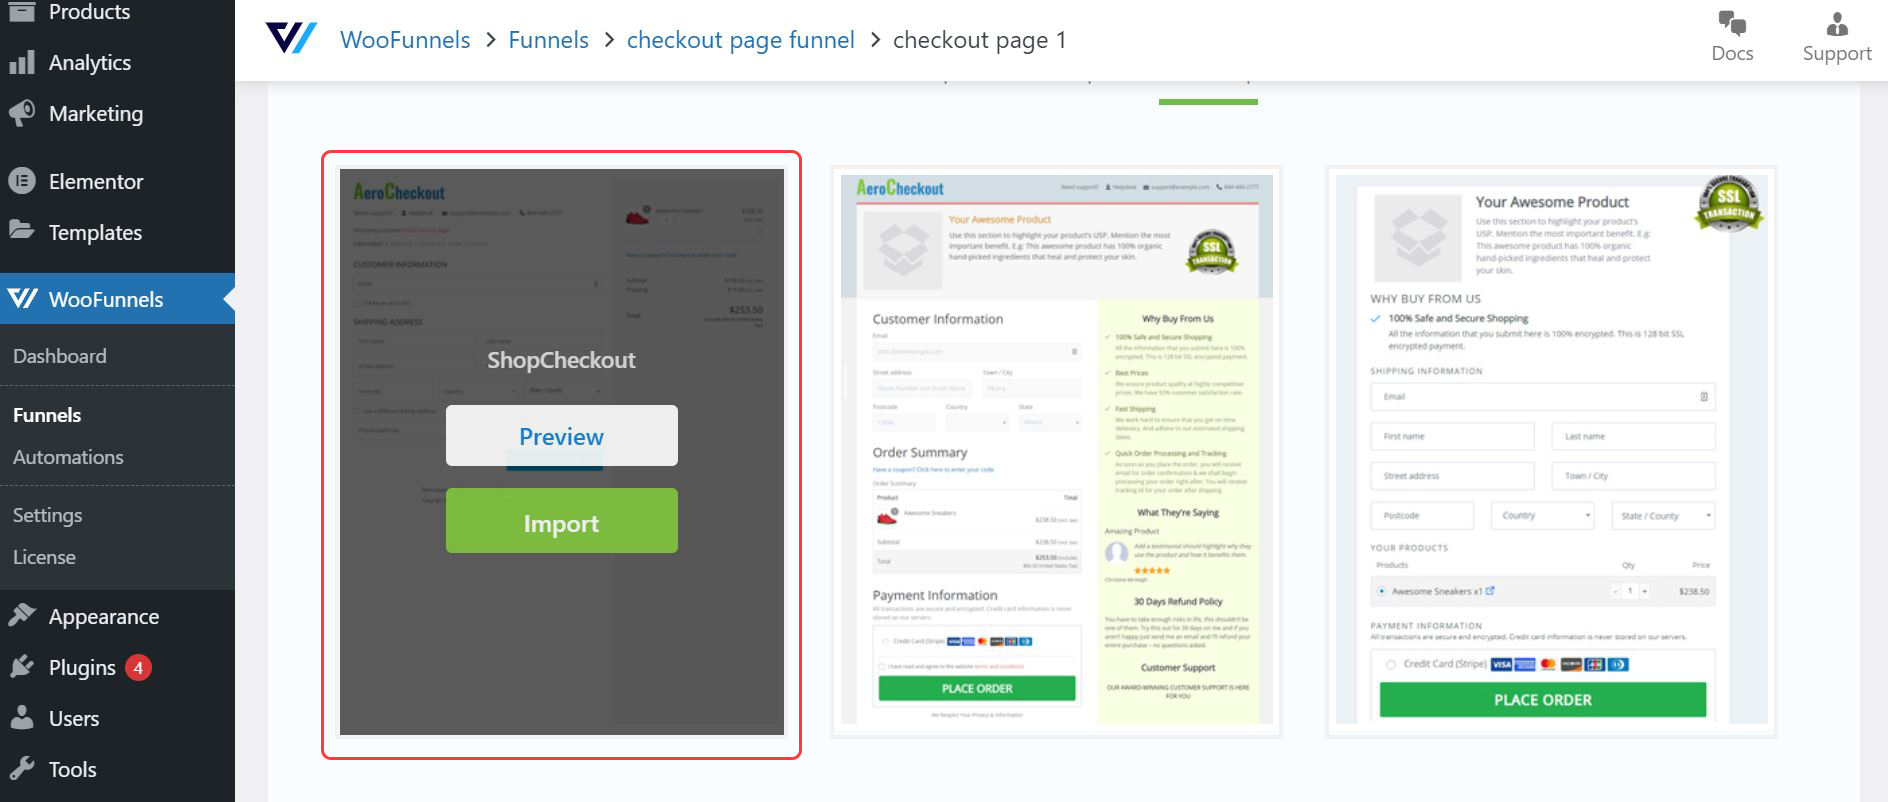
Select the “Preview” option.
As you can see the template has everything you need on a checkout page. There are fields for contact information, order breakdown, and a clickable button for payment.
Ecommerce store owners who want more options can pick a template from Elementor or Divi, or create their own custom checkout page.
How to Add a Logo to Your WooCommerce Checkout Page
A business name and logo ensure the checkout page aligns with your brand identity. It will also make the page credibile and trustworthy, especially for first time customers.
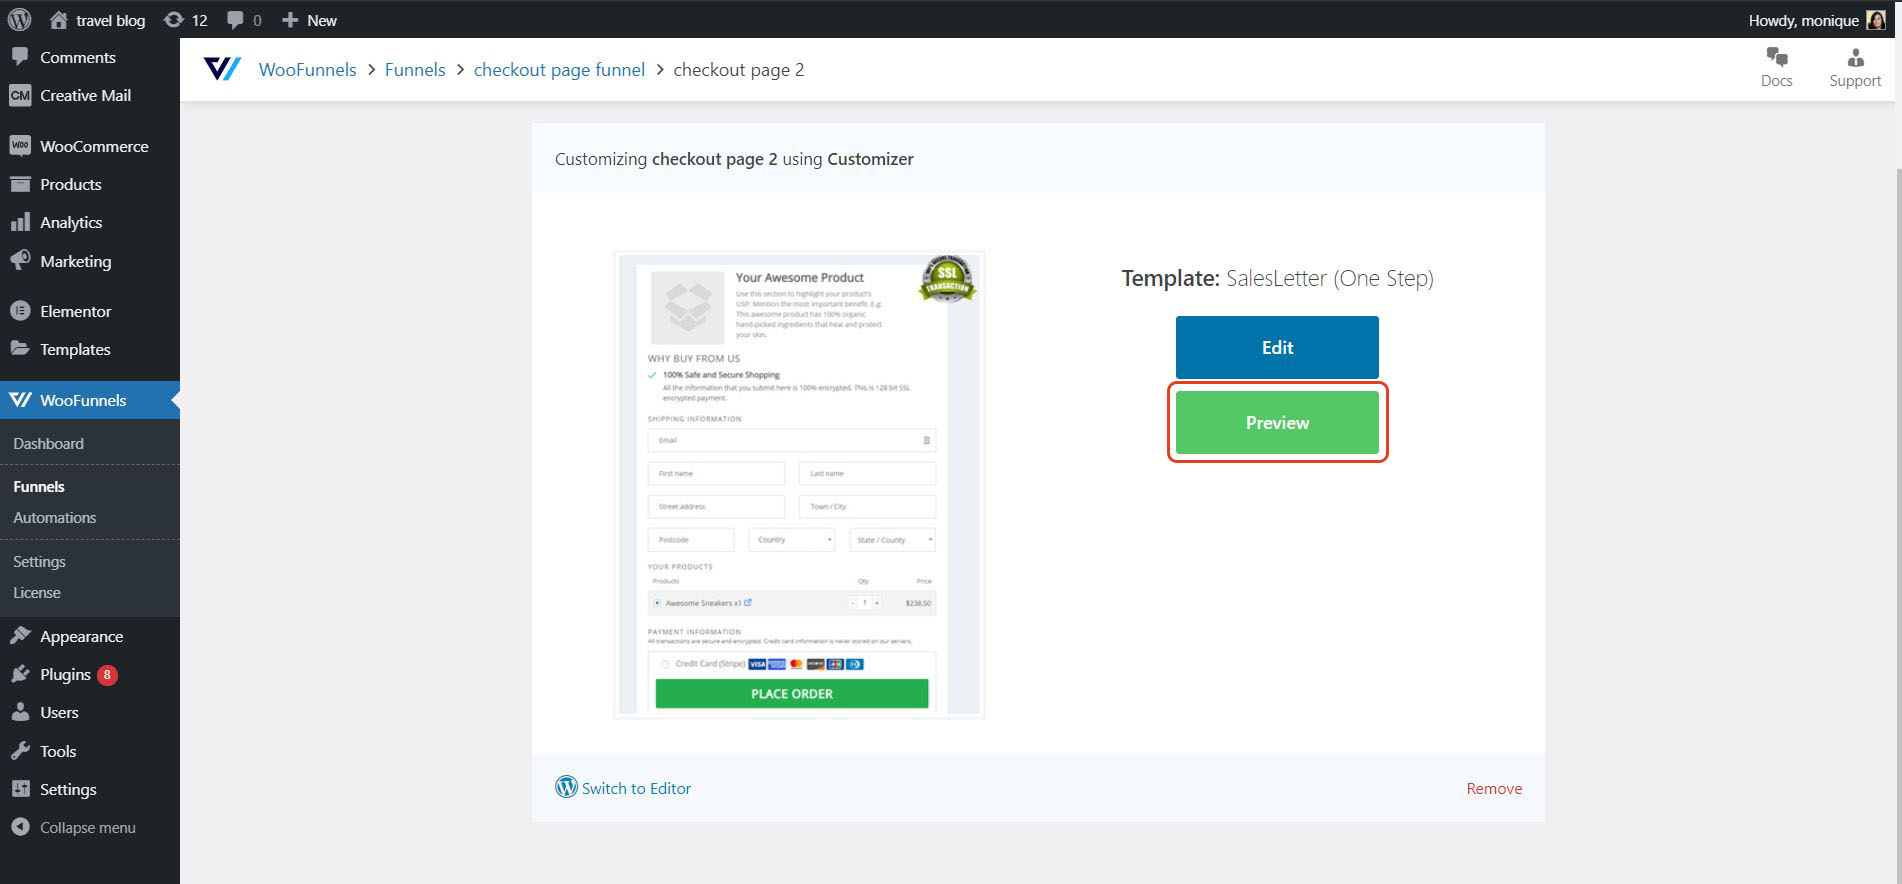
Once you’ve imported the template in the previous step, click the “Edit” button in the dashboard.

A new dashboard with the menu option and on the left-hand side and the checkout template on the right-hand side will appear. Next, click the pencil icon beside the logo.
In the Header > Logo, you have the option to remove the default Aero Checkout logo and replace it with your brand’s specific logo.
Scroll down further and you’ll find additional options to edit header text and helpdesk information.
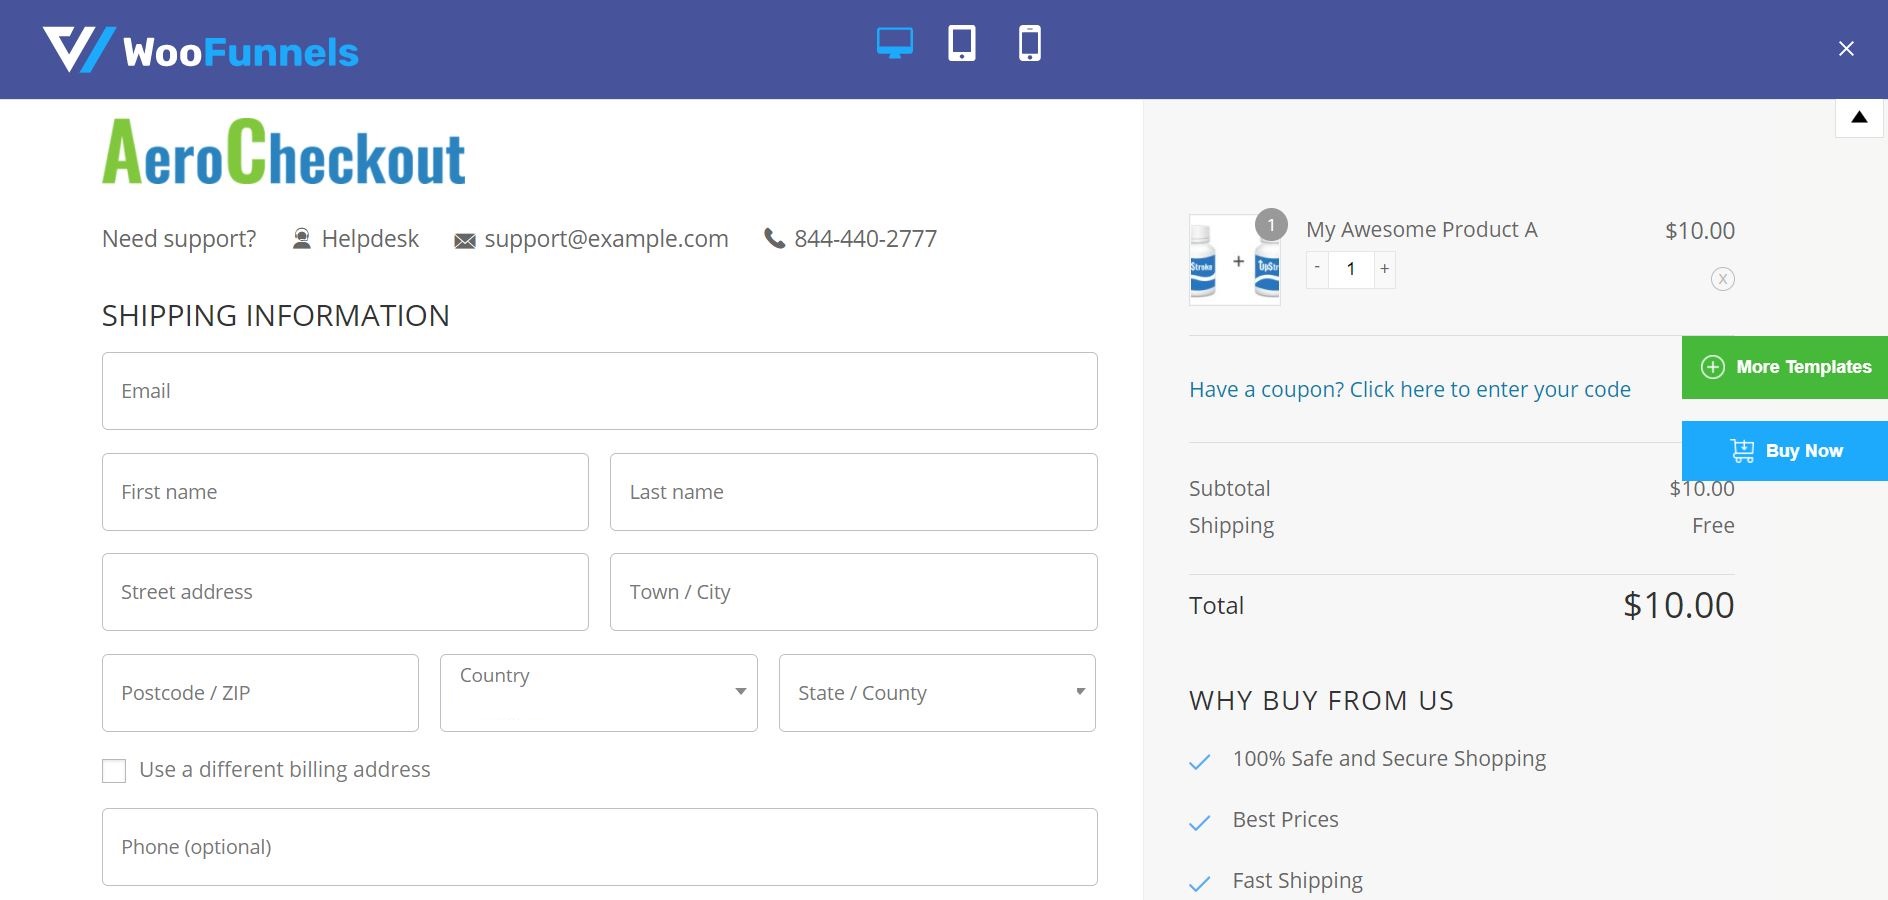
Here’s an example of a customized header.
How to Make More Customizations to the Checkout Page
Besides the header, Aero Checkout allows you to make changes to the form, product list, and other relevant parts of the landing page.
Similar to editing the header, click the pencil icon to edit the section you want.
Let’s try to edit the fields for the customer information section.

You’ll find that the left menu has options to edit the typography, buttons, and fields on the checkout page. There’s no need to learn the basics of coding to make the changes you want.

If there are other page elements that you would like to personalize, then select the pencil icon on the page. You can also browse through other options in the main menu to make specific modifications.
These other options include the ability to customize the:
- Testimonials
- Customer support
- Benefits
- Product list
- Checkout form
- Widget visibility
- … among many others.
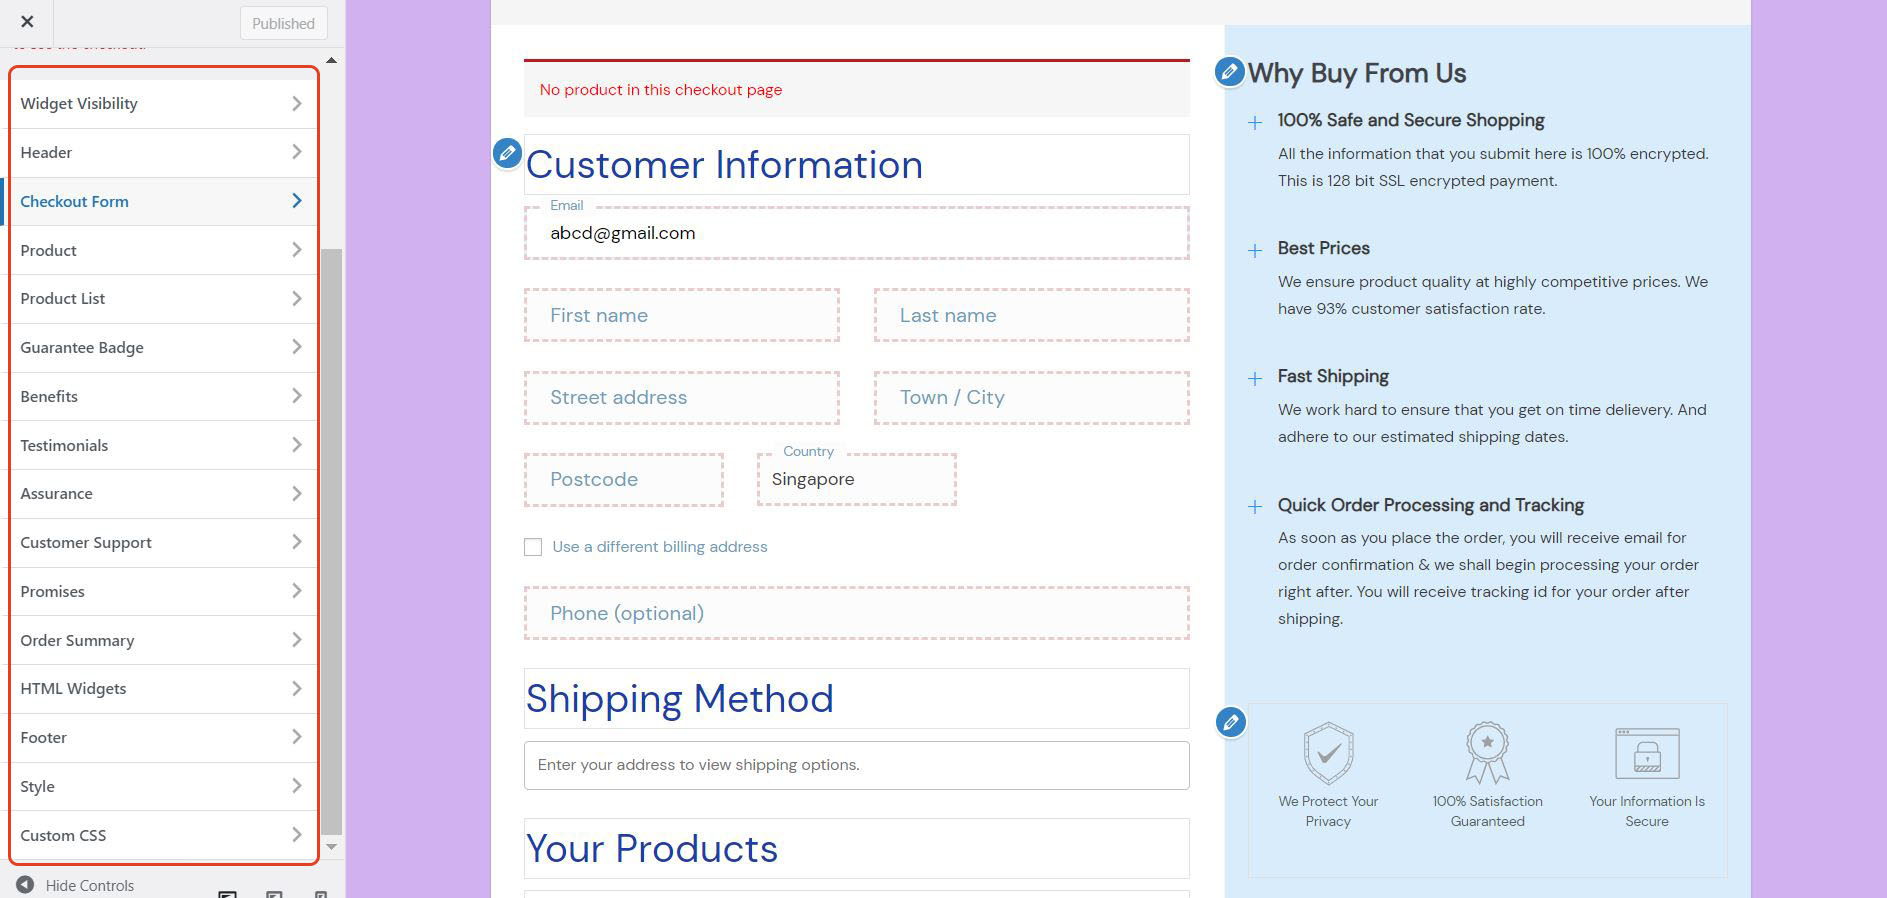
Here’s an example of a page with a fully customized form field.

How to Enable Express Checkout
Of course, customers want to checkout quickly based on their preferred payment method.
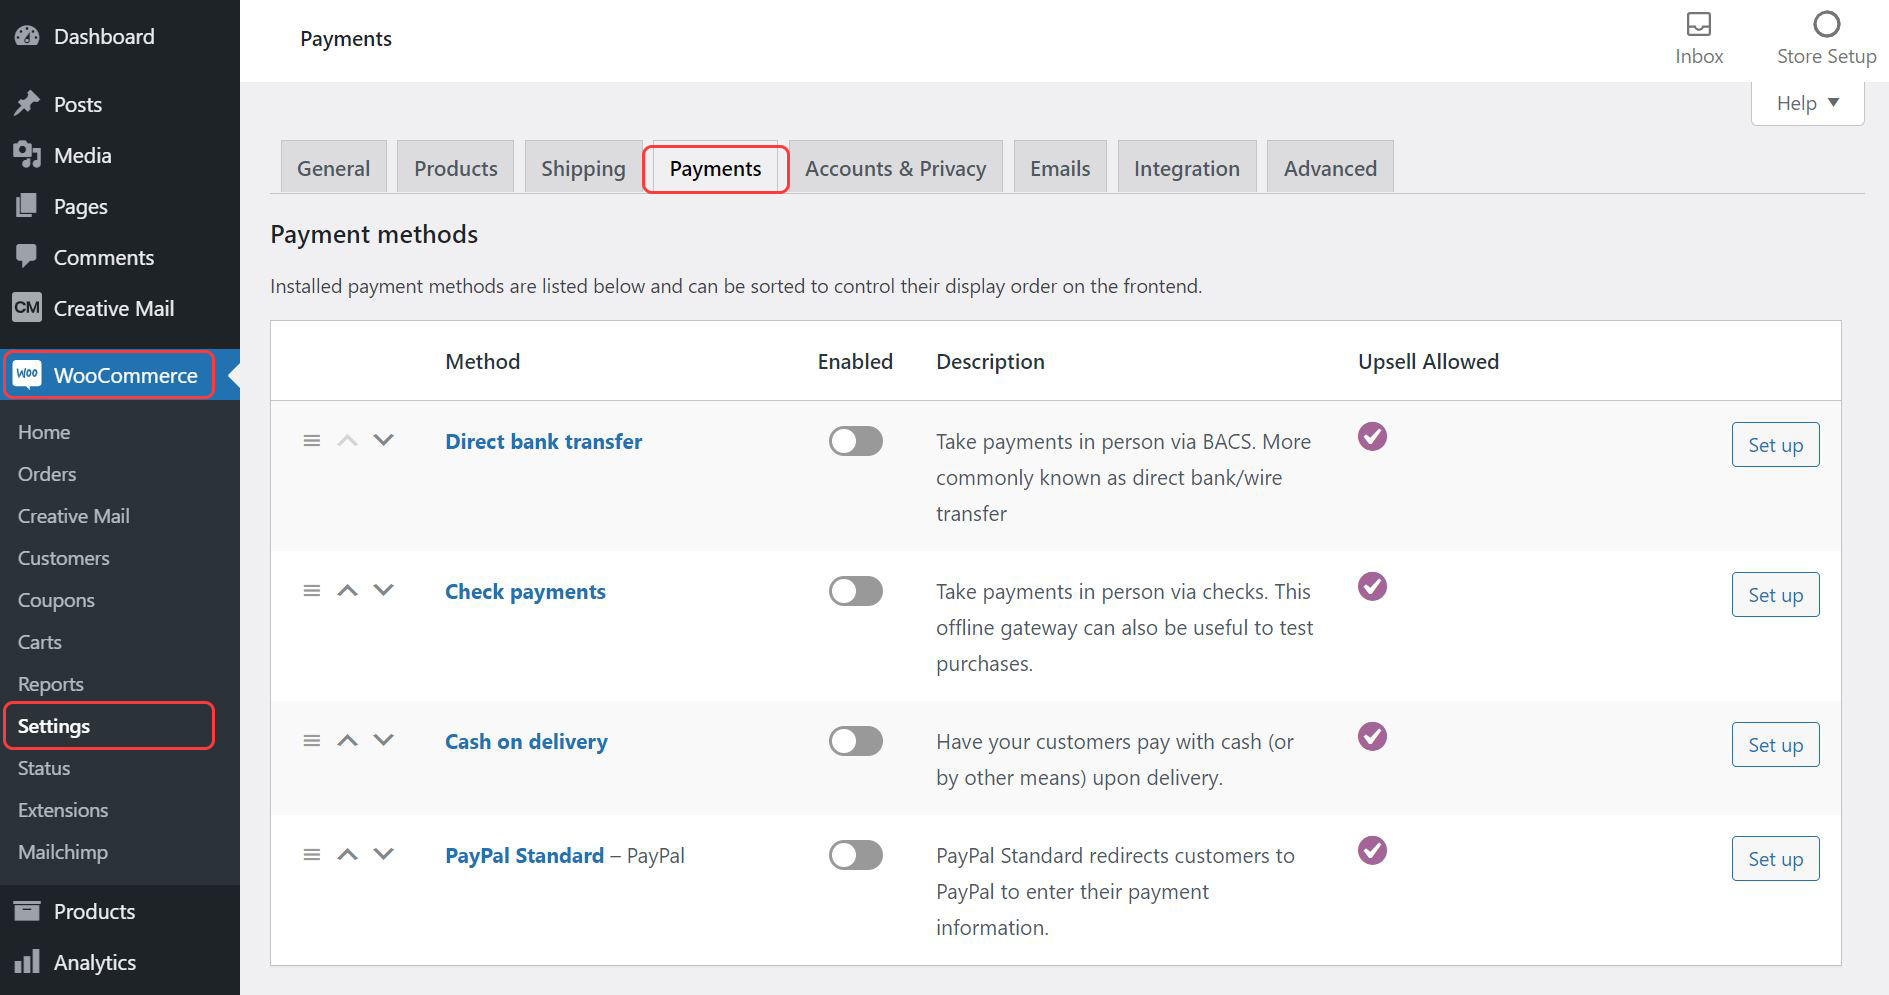
That’s precisely why you’ll be happy to learn that the WooFunnels Funnel Builder offers Express payment options for Amazon Pay, Paypal Express, Google Pay, and Apple Pay.
The first step is to make sure the desired payment method is already activated in your WooCommerce store. You can get this done by going to the WooCommerce > Settings > Payments and enabling your preferred method.
After you’ve set up the payment options for your eCommerce store, here’s what you need to do:
Return to the checkout page funnel you created through WooFunnels and select Optimizations.
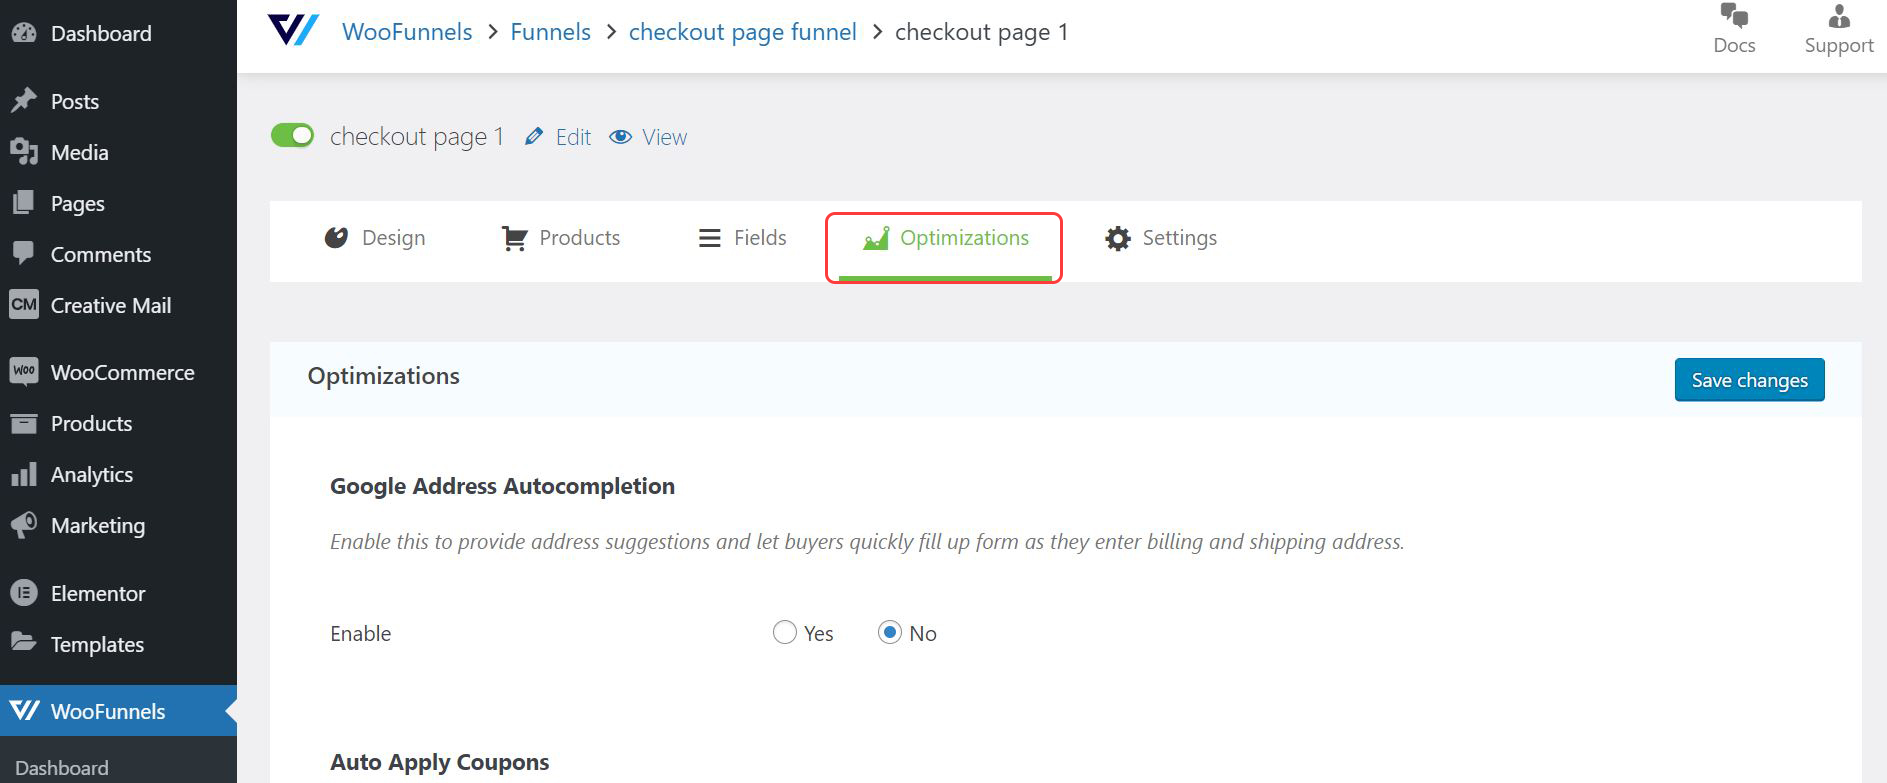
Head to the Smart Buttons for Express Checkout > Enable > Yes for a fast and convenient checkout process.
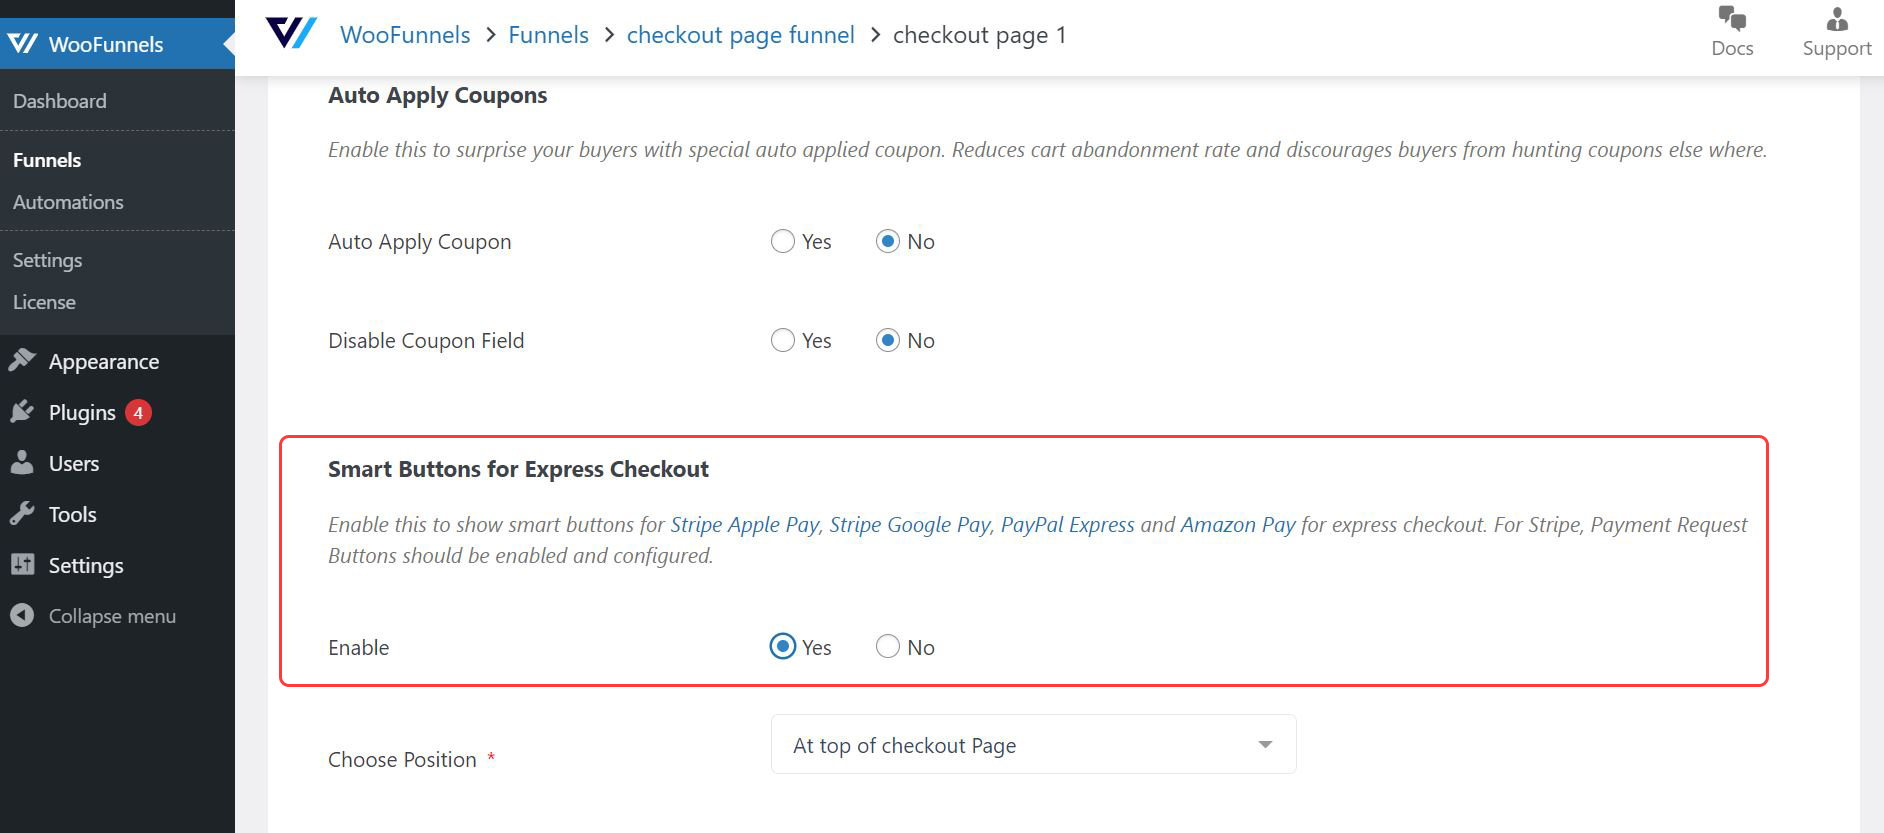
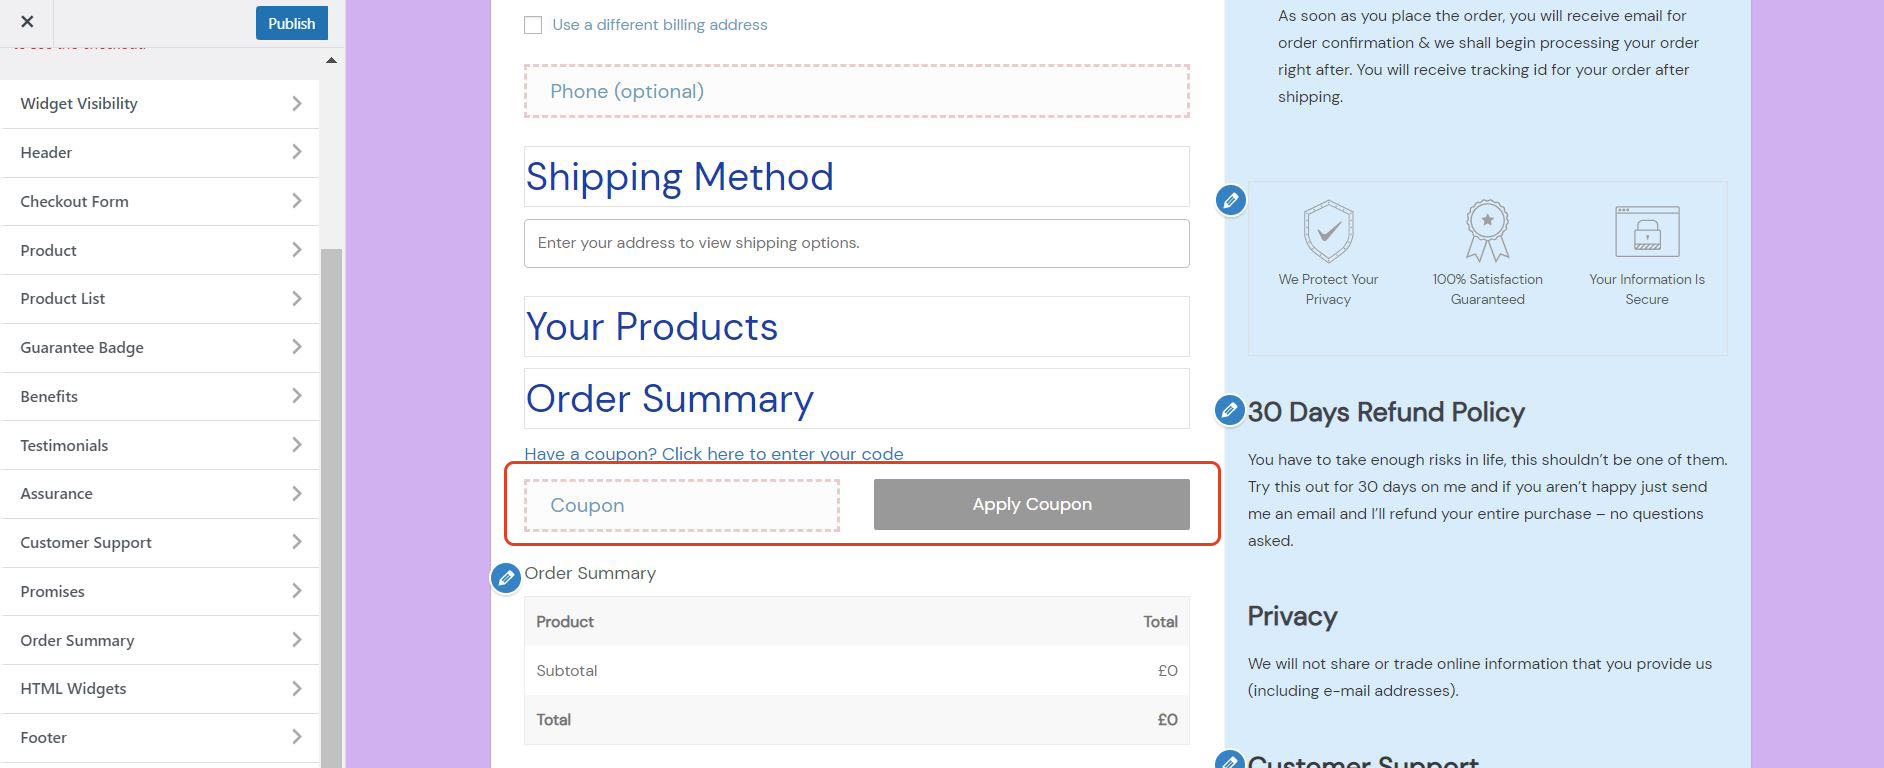
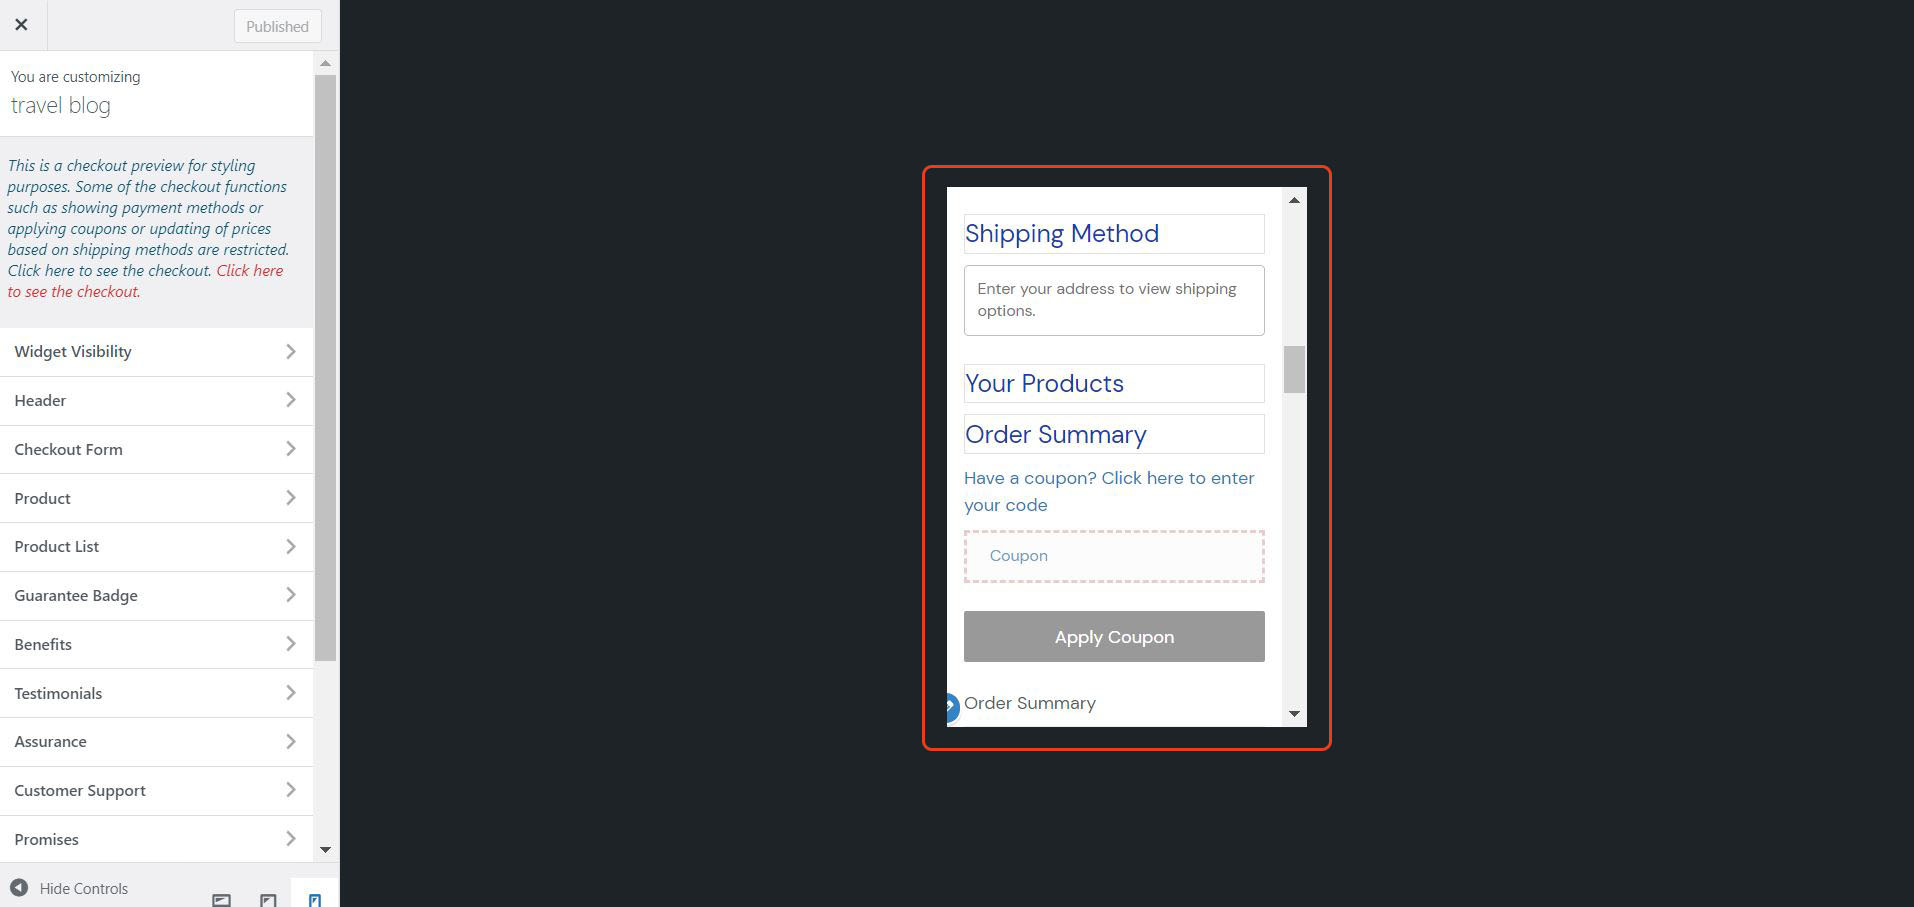
How to Add Coupons to Checkout Page
Many eCommerce stores utilize coupons that customers can use during special sales. Coupon codes can also be given as rewards from a loyalty program or a referral program.
Placing a text box for a coupon code can be done by returning to the Optimizations menu in the previous section. Select Auto Apply Coupons > Yes and indicate your Coupon code. Make sure that the Disable Coupon Field section is set to No to add the coupon field.
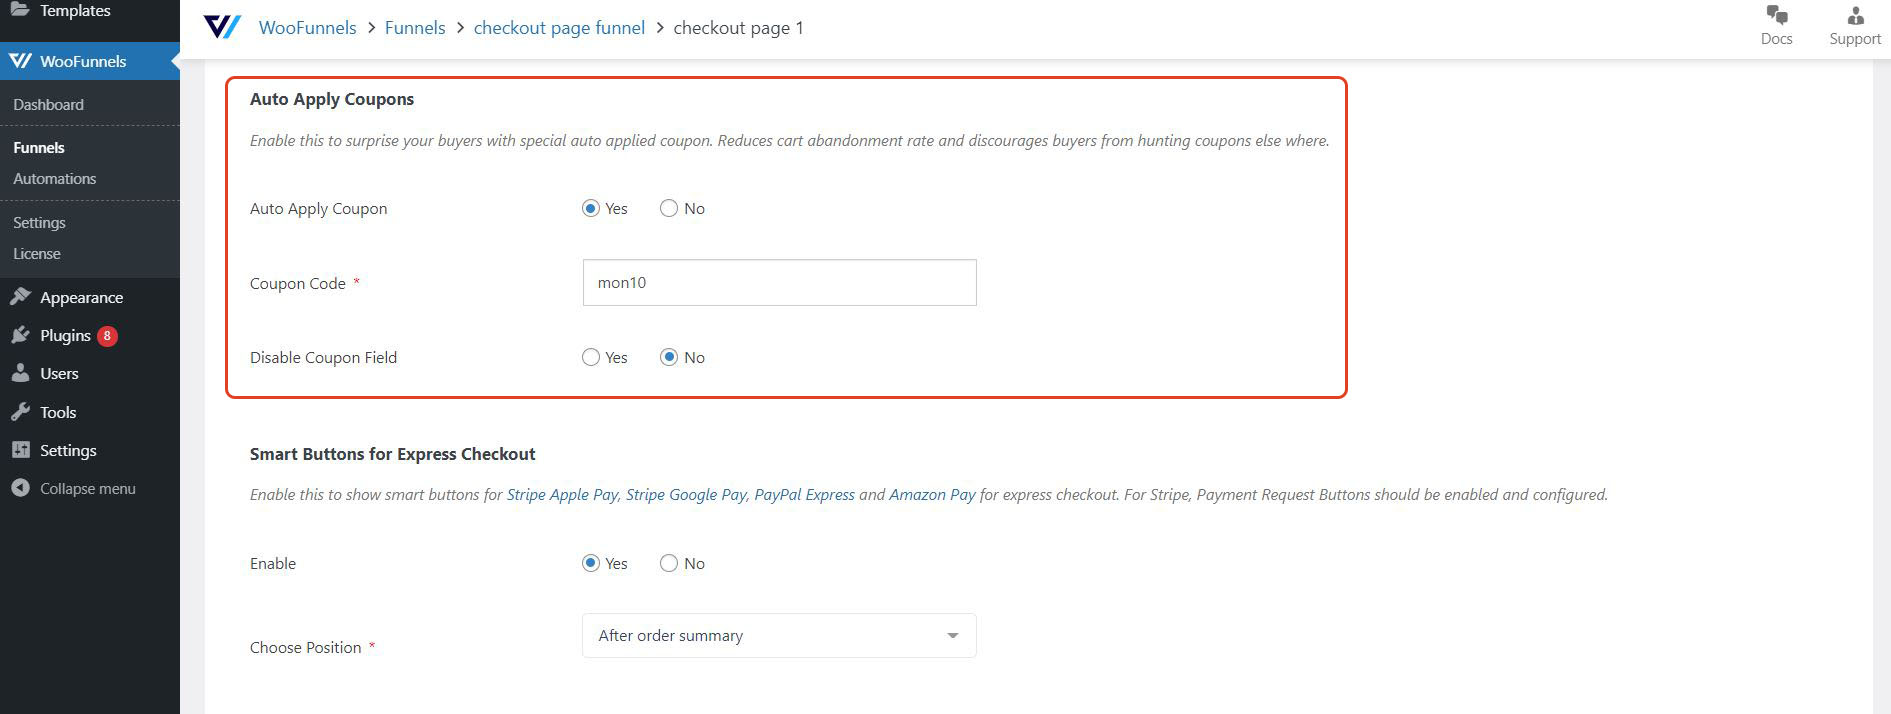
As long as the right options are selected, a coupon field will appear in the template by default.
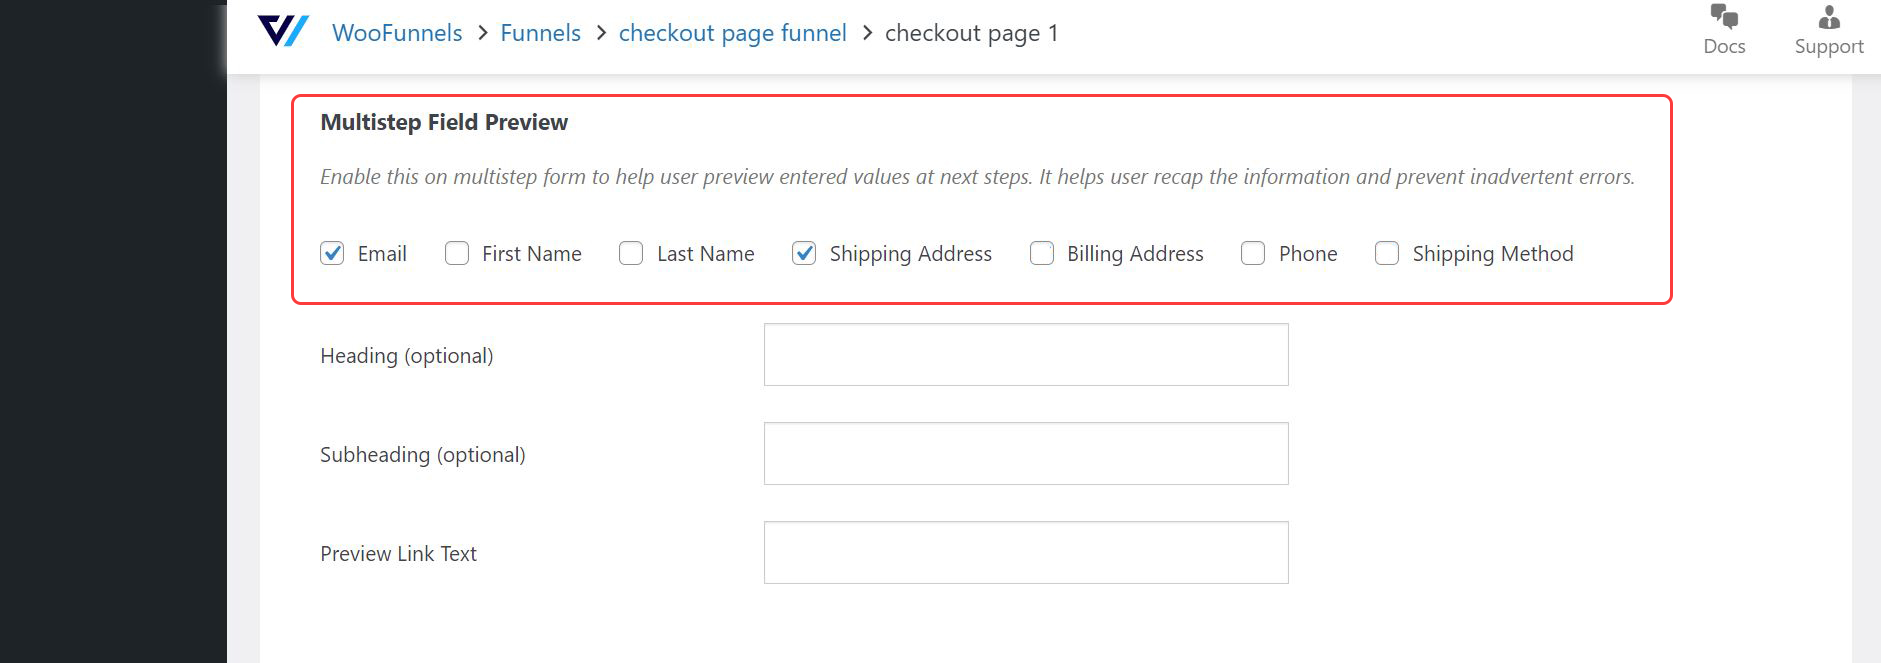
How to Enable Multi-Step Preview
A multi-step preview lets customers input their information in stages. Throughout the process, they can easily access and edit the information they’ve inserted in prior steps. This is ideal for eCommerce stores opting for a two-step or three-step checkout process.
Just like express checkout, you can activate it in the Optimizations section. Under the Multistep Field Preview, check the box of specific fields you would like to display throughout the checkout process.
In this case, I checked the box for Email and Shipping Address.
In a previous step, we’ve discussed that templates range from One Step, Two Step, or Three Step format.
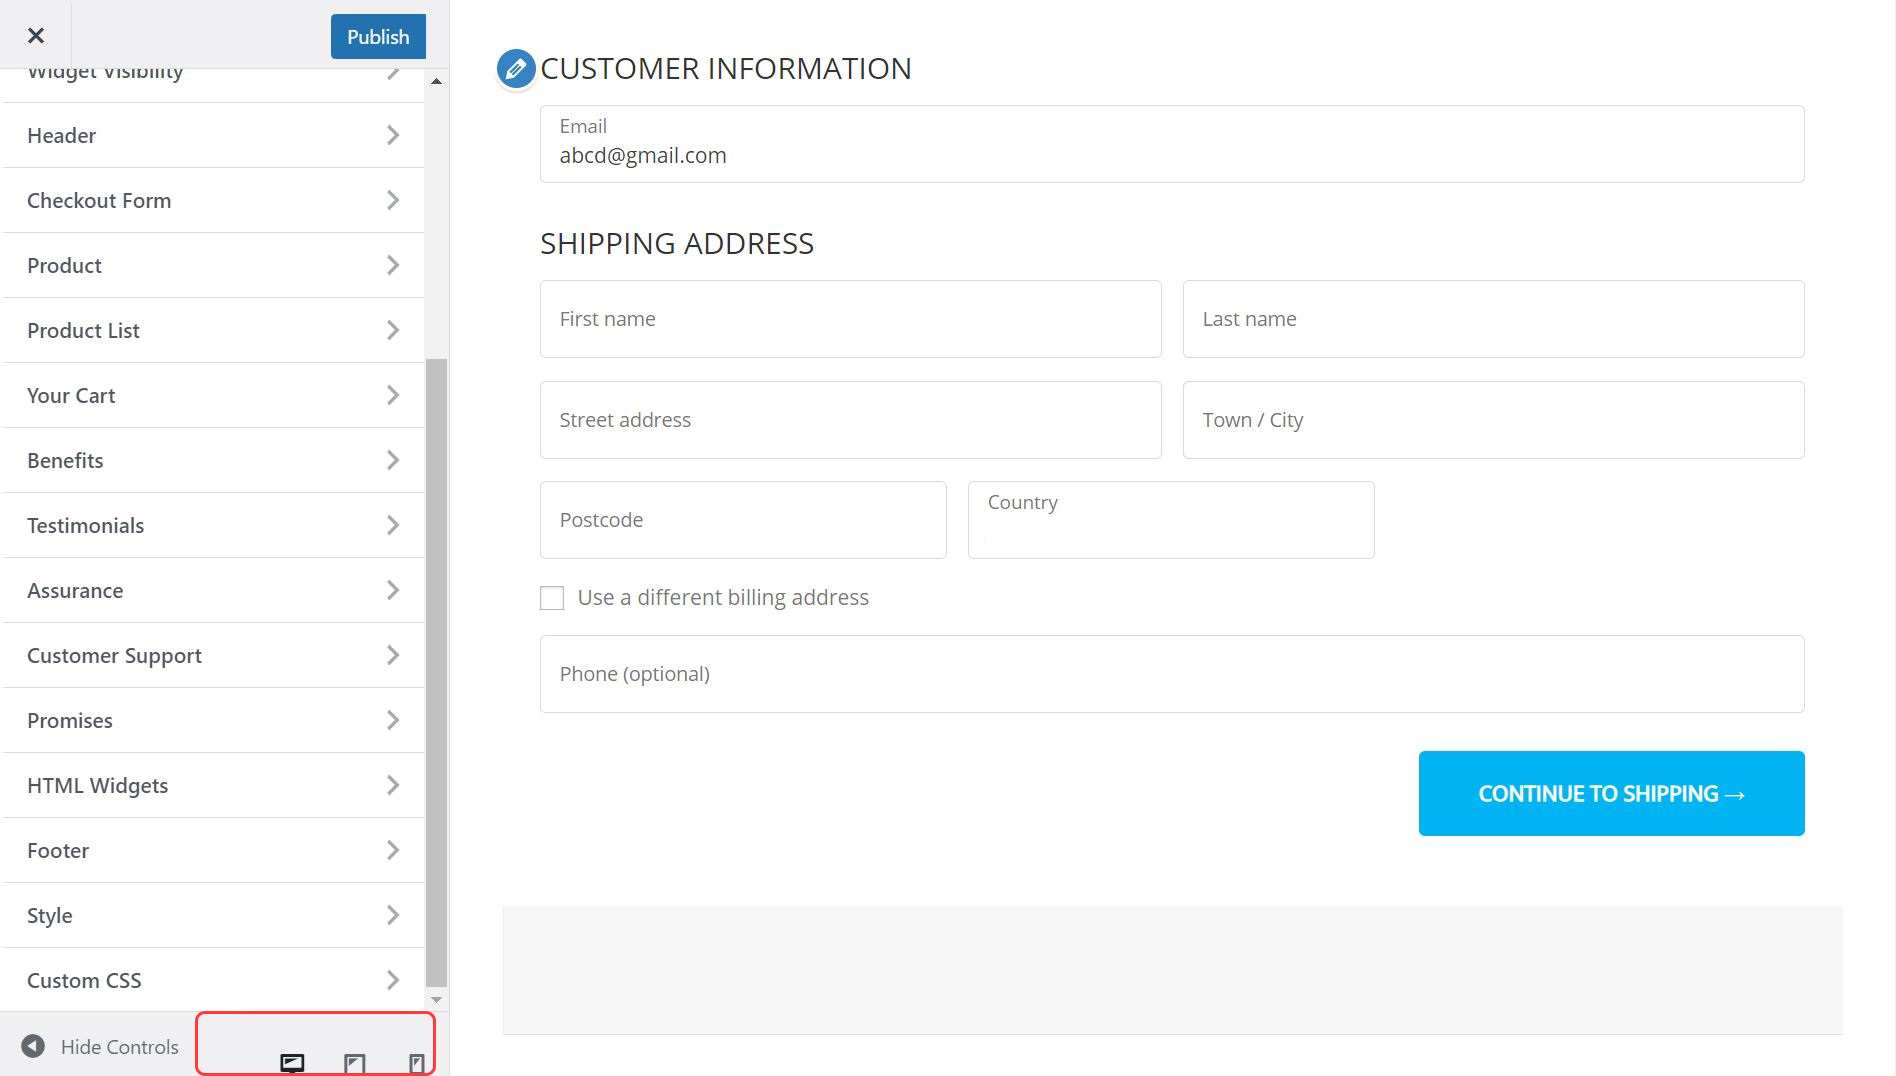
If you opt for the three-step format, here’s how the first template would look.
The first step has the customer information section such as the email, name, and address of the customer.
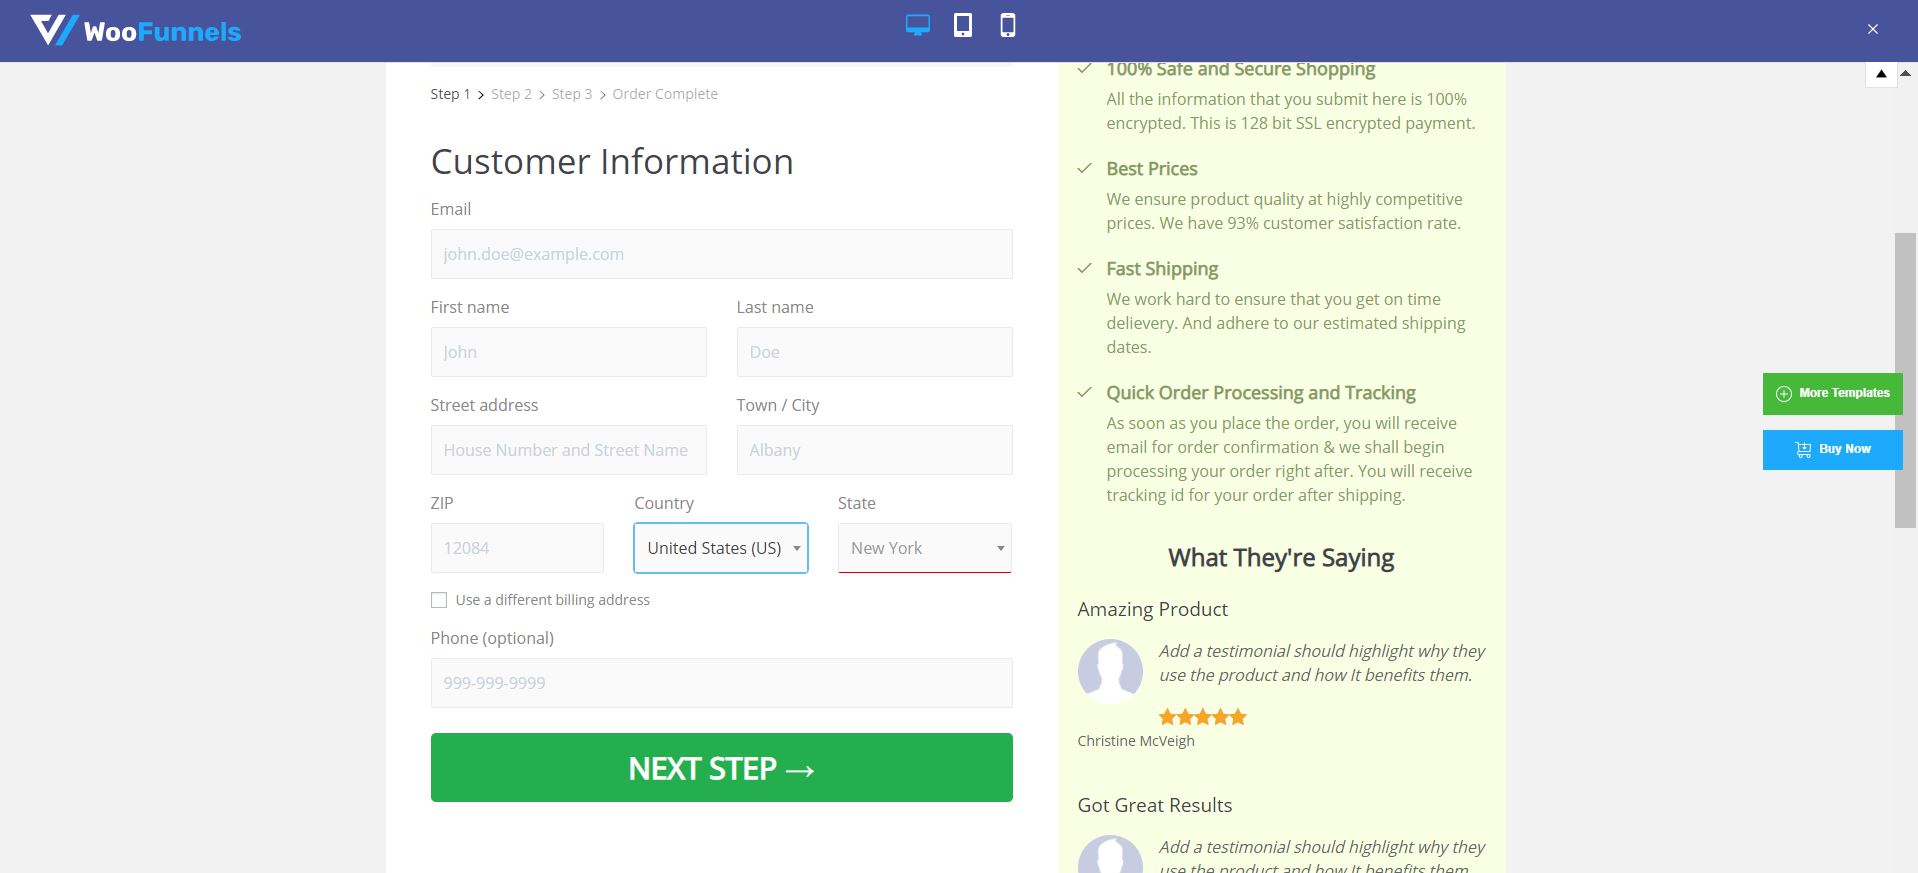
The second step is the shipping and product details. Since we enabled multi-step shipping, the email and address also appear in the second step.
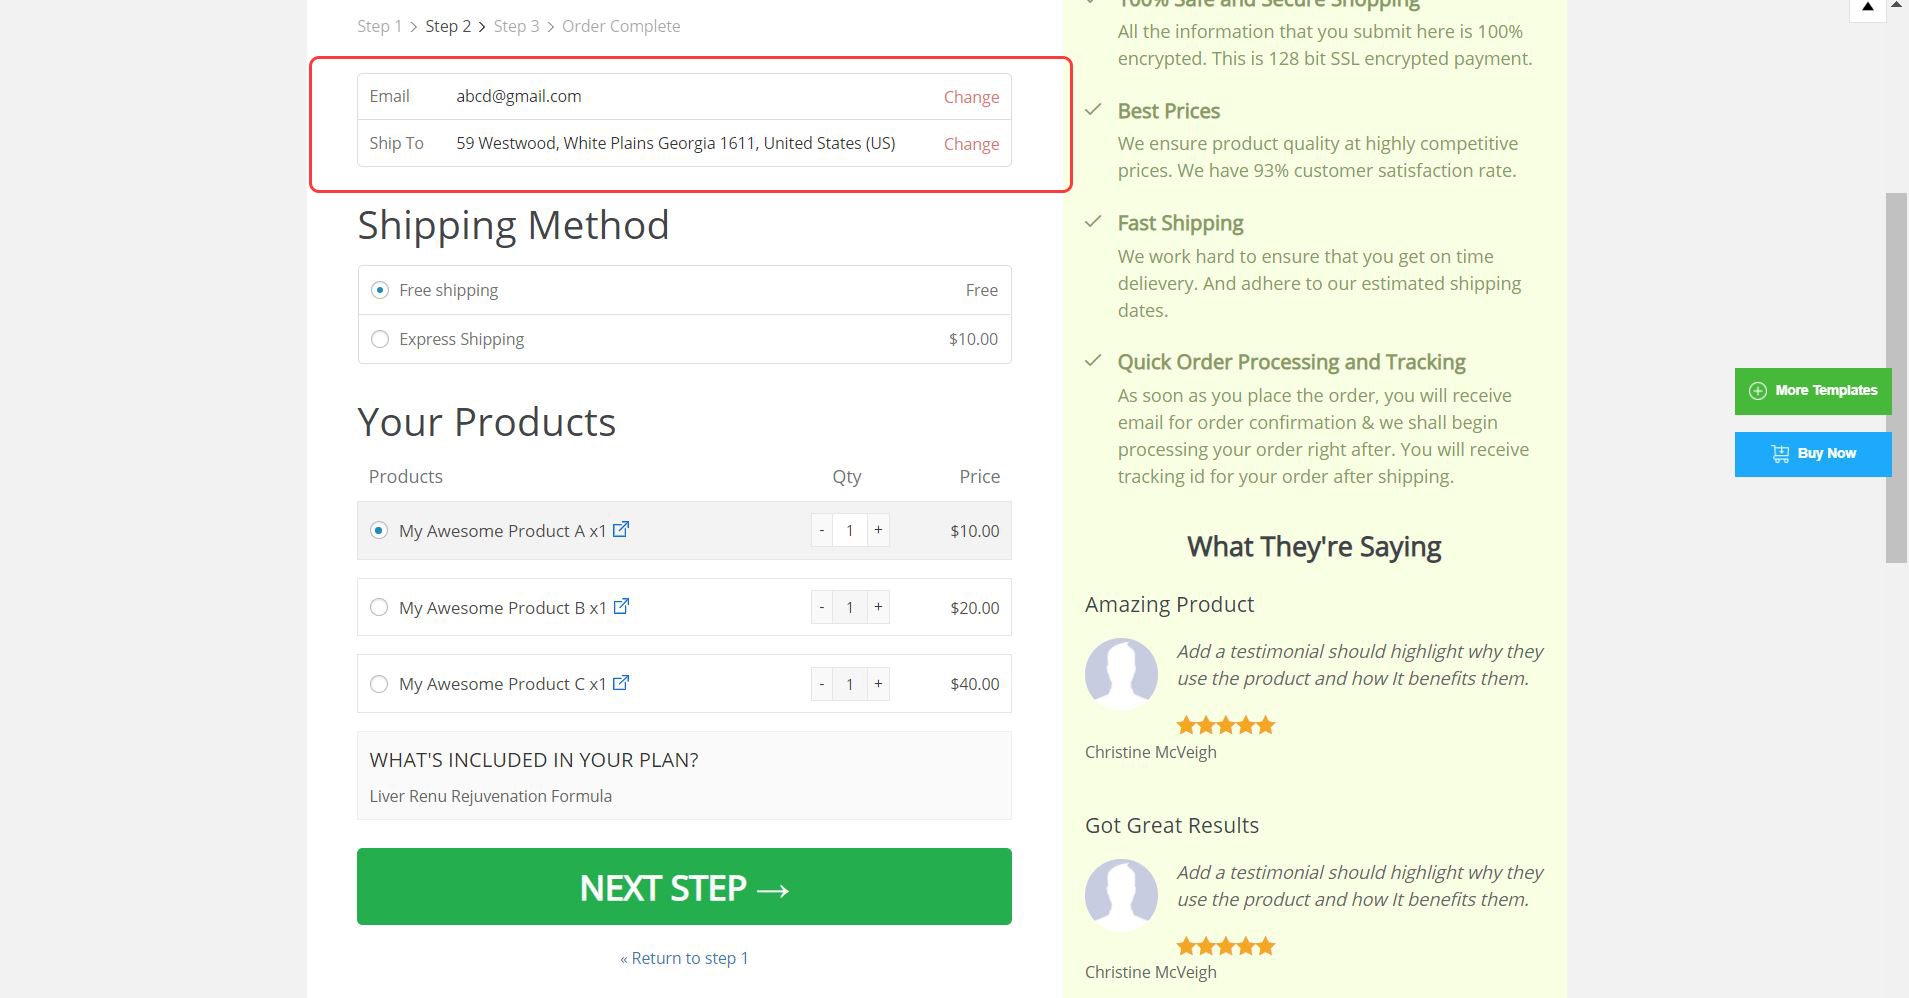
In the final step or the checkout phase, you’ll find the order summary and payment information. Since the multi-step checkout option is enabled, you’ll find information from previous steps such as the email, shipping address, and shipping method.

How to View the Checkout Page on Mobile, Tablet, or Desktop
One of the main perks of Aero Checkout is that templates are automatically optimized for mobile devices.
You can access the mobile or tablet view by clicking on the icons at the bottom of the left menu.
A look at their mobile view reveals that the form fields and text are sufficient in size for mobile users. They also have a clickable “apply coupon” button:
More importantly, there is also a clickable checkout or “place order” button:

Final Thoughts on the Shopify-style Checkout Page from Aero Checkout
Aero Checkout is a convenient plugin that lets you create checkout pages in an instant. I personally love the pre-made templates that you can easily import and customize based on your preferences. On top of this, you can enable express checkout and multi-step preview with the click of a button.
At $99/year, it seems to be a slightly expensive add-on for your WooCommerce site. However, remember that the checkout page is one of the most crucial aspects of the customer acquisition process. That said, its starter plan seems to be a pretty good deal for WooCommerce entrepreneurs who want the perks of a Shopify-style checkout page.
Overall, you should really give this a try if you want to have a hassle-free checkout process.
