


Searching for a way to accept cryptocurrency payments on your WordPress site?
Cryptocurrency can lower your transaction costs, eliminate fraudulent chargebacks, bypass geographic barriers, and open up a new pool of potential customers, which is why cryptocurrencies have been generating such buzz.
With CoinGate, you can easily add a cryptocurrency payment gateway to your WooCommerce store. Or, you can also add simple cryptocurrency buy buttons to any WordPress site, even if you’re not using WooCommerce.
Visitors can send money using any one of 70+ supported cryptocurrencies and you can seamlessly receive money in a single cryptocurrency or fiat currency according to your preferences.
In our hands-on CoinGate review, we’ll show you how CoinGate works and what it’s like to use CoinGate to accept cryptocurrency on your WordPress site.
Let’s dig in…

CoinGate Review: How It Works
At a high level, CoinGate works like this:
A shopper goes to check out using WooCommerce. At checkout, they choose CoinGate as their payment method. You can either make CoinGate your only payment method or just include it as an option along with more traditional payment methods like credit and debit cards.
Then, the shopper sees a payment form where they can select their preferred cryptocurrency from a list of 70+ options. They’ll then see the wallet to send money to along with the exact amount of that cryptocurrency to send.
Once they send the payment and the network confirms it, the order status will automatically update in WooCommerce and you’ll also see that order in your CoinGate account. Customers will also be able to track their payments in real-time, starting from when it’s first detected to when it’s actually been confirmed.

From there, you can choose to receive the money in a single cryptocurrency (e.g. all payments in Bitcoin) or in a single fiat currency such as USD or Euro.
That’s one of the most notable differentiators – customers can send money using any one of the 70+ cryptocurrencies, but you can receive everything in your preferred currency instead of needing to deal with keeping track of 70+ different currencies.
In terms of the conversion rates, you get real-time rates for all the transactions. I’ll discuss pricing in more detail later on, but the basic idea is that CoinGate just charges a flat 1% fee for its services and real-time conversions.
The CoinGate WordPress plugin adds a CoinGate payment gateway to your WooCommerce store.
However, if you’re not using WooCommerce, you could still add a CoinGate payment button/link to your site without needing to install a plugin. You could include this in any post or page – so don’t feel like you must be using WooCommerce.
With that being said, I’m going to focus mainly on the CoinGate WooCommerce gateway in this post.
Either way, the setup process is quite simple and you can be up and running in very little time.
How to Configure CoinGate on WordPress and Accept Payments
Now that you know what CoinGate does, let’s get into how to configure it and start accepting cryptocurrency payments on your WooCommerce store.
The actual technical setup process of connecting CoinGate to WordPress only takes a few minutes and doesn’t require any special technical knowledge.
Here’s how the process works…
1. Sign Up for a Free CoinGate Account
To get started, you’ll need to register for a free CoinGate account via the CoinGate website.
Once you’re in your account dashboard, you’ll also need to create a business account, which is required to use the API and payment features. Again, this is free to do and only takes a minute or so.

Note – you can see a list of CoinGate Business supported countries here – not all countries are eligible to join.
2. Install and Configure the CoinGate Plugin
Next, you can install the official CoinGate plugin on your WooCommerce store. It’s listed at WordPress.org, so you can install it right from your WordPress dashboard.
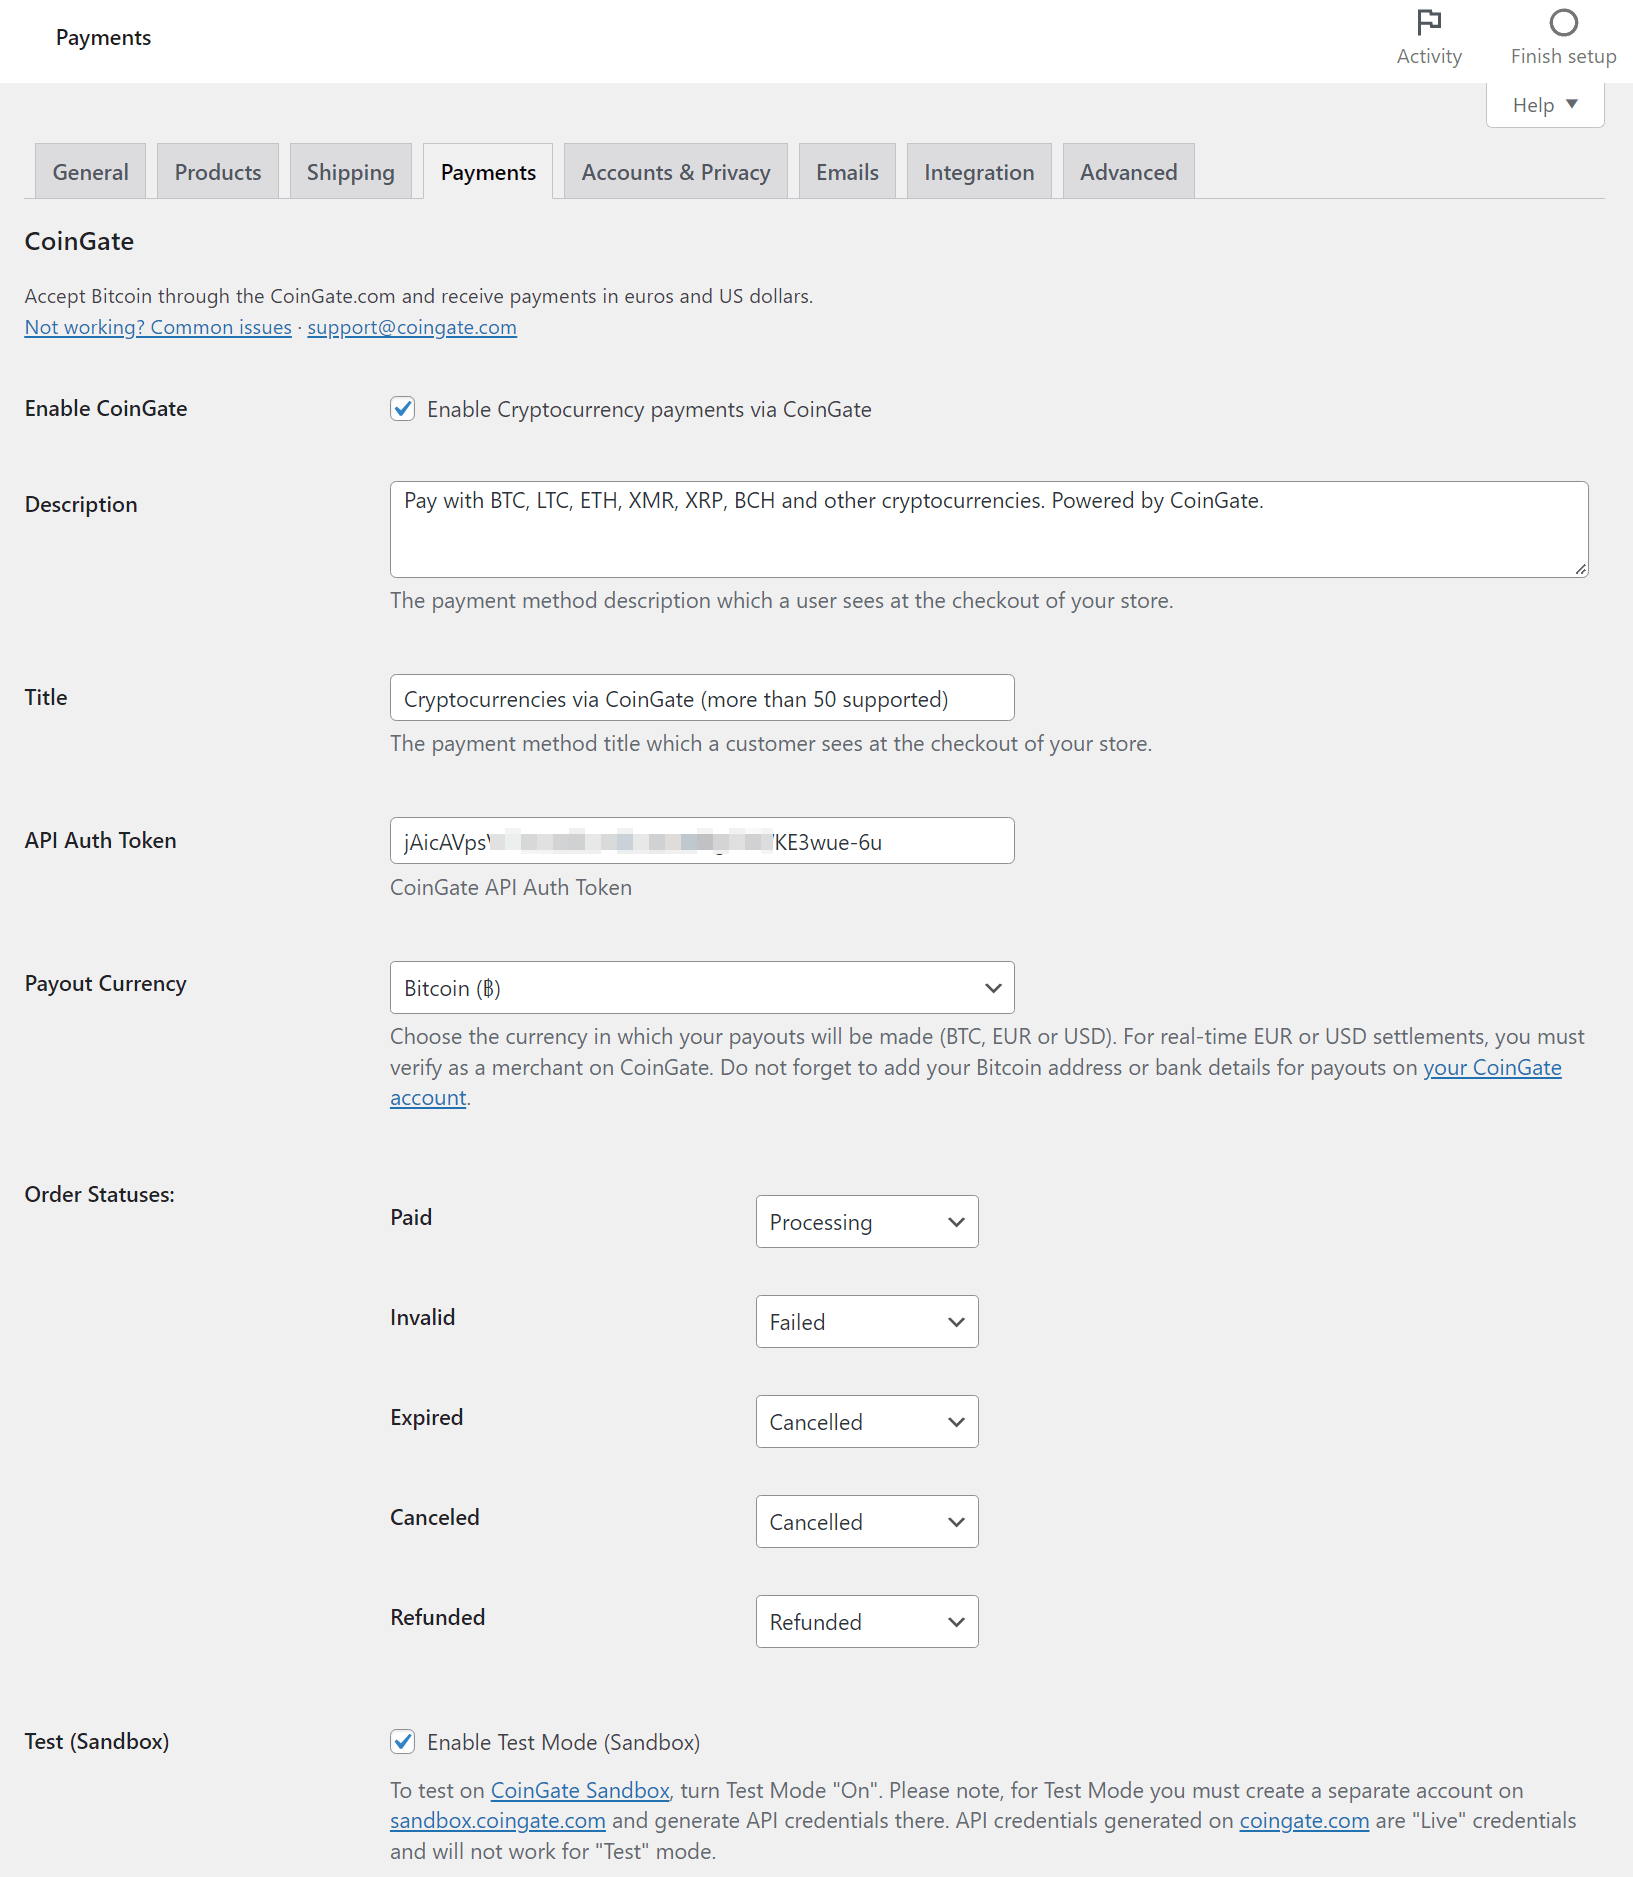
Once you activate the plugin, head to WooCommerce → Settings → Payments and activate the new CoinGate payment gateway option. Then, click the Set Up button next to CoinGate to configure the gateway:

Here, you’ll want to do two things:
- Enter the CoinGate API Auth Token to connect your store to CoinGate. More on this next.
- Configure how you want the gateway to function. For example, you can customize the text, choose a different payout currency, and adjust the order statuses for various payment stages if needed.
If you’re testing things, you can also enable the CoinGate test sandbox mode that lets you accept test payments using testnet Bitcoin. To use test mode, you’ll need to create a separate account at the CoinGate Sandbox website.
How to Create Your CoinGate API Key
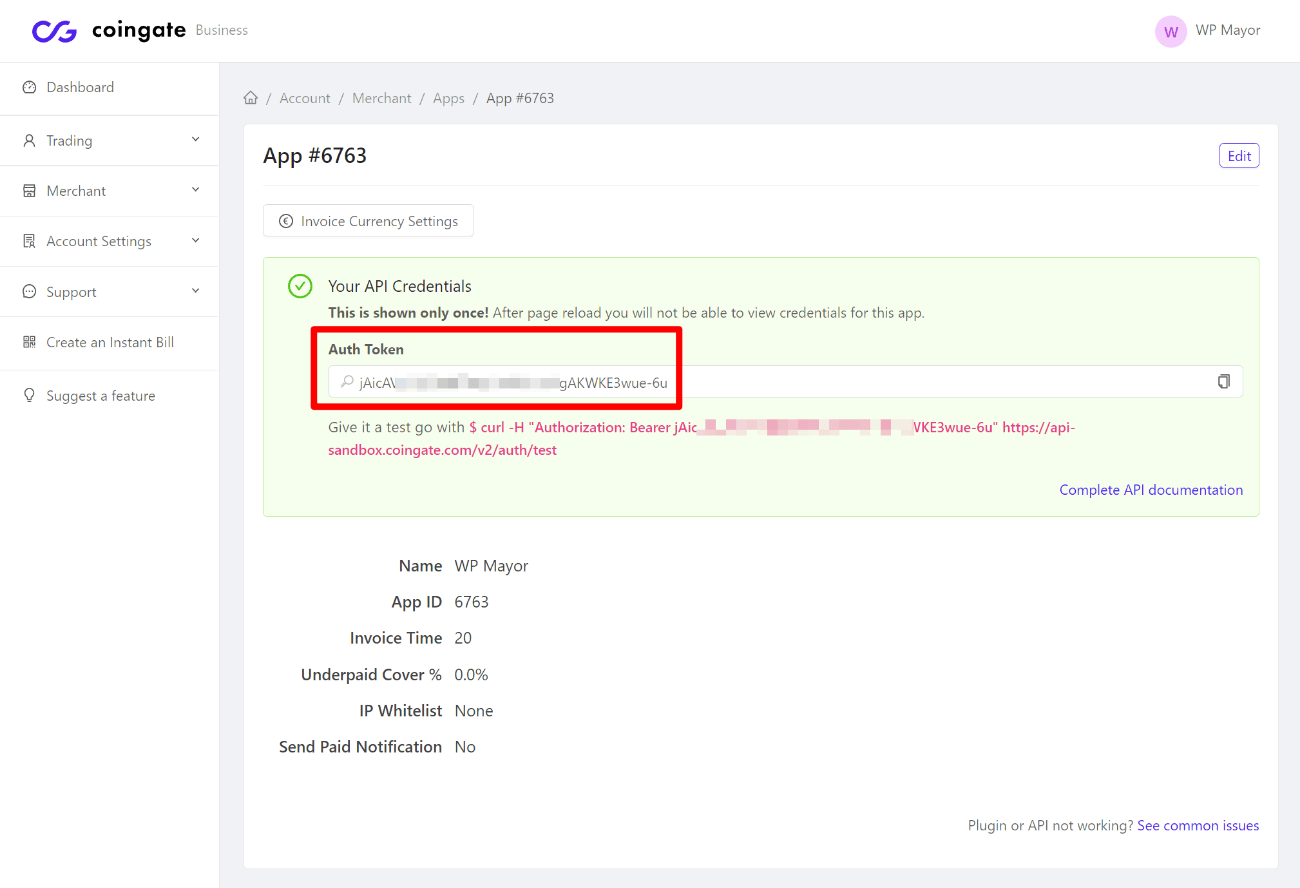
To create the API key that you need to connect WooCommerce to CoinGate, you need to open your CoinGate Business account dashboard and go to Merchant → API → Apps → New App:

Then, you can fill out the form to configure your app:

Once you submit the form, you’ll get the API key that you can add to the WooCommerce settings dashboard:
And that’s it! Once you’ve configured the payment gateway settings, you’re ready to start accepting payments.
How It Works for Customers
When customers go to check out using the regular WooCommerce checkout, they’ll see CoinGate as one of the payment method options:
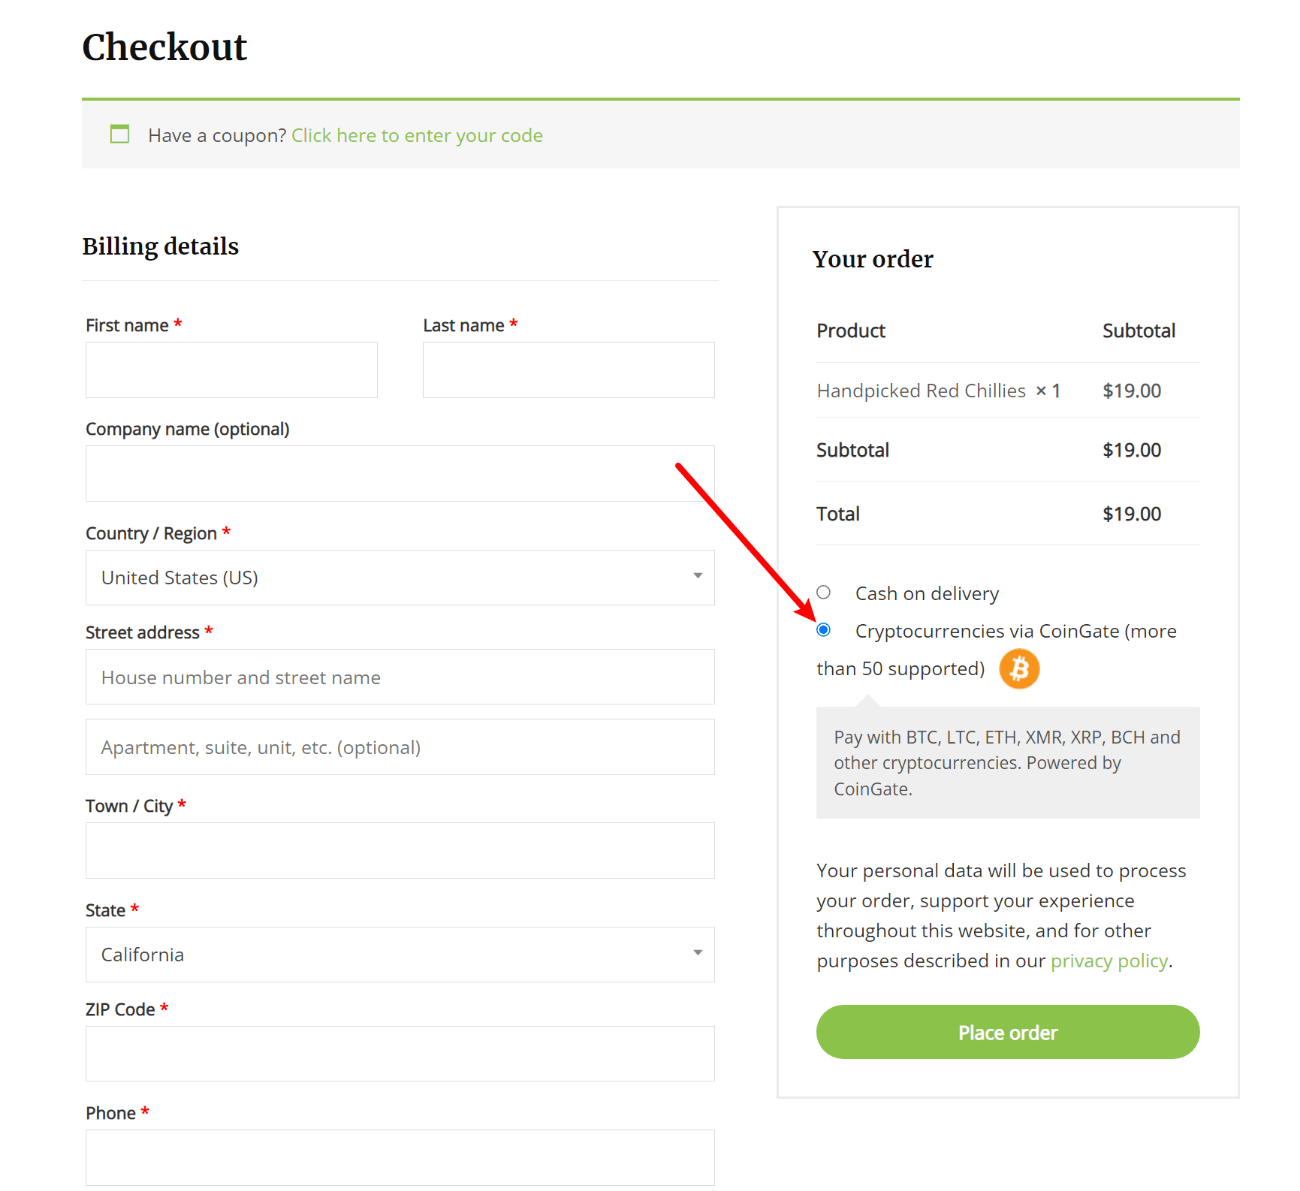
Remember – you can customize the text that appears on the checkout page in the CoinGate plugin settings area.
After selecting CoinGate and clicking Place Order, the shopper will be temporarily redirected to the CoinGate payment form. They can choose their preferred currency from the list of 70+ options and enter an email to receive a receipt:

For example, they could choose Bitcoin and then click the Pay with Bitcoin button.
On the next screen, they’ll see the QR code and wallet details for where to send the money:
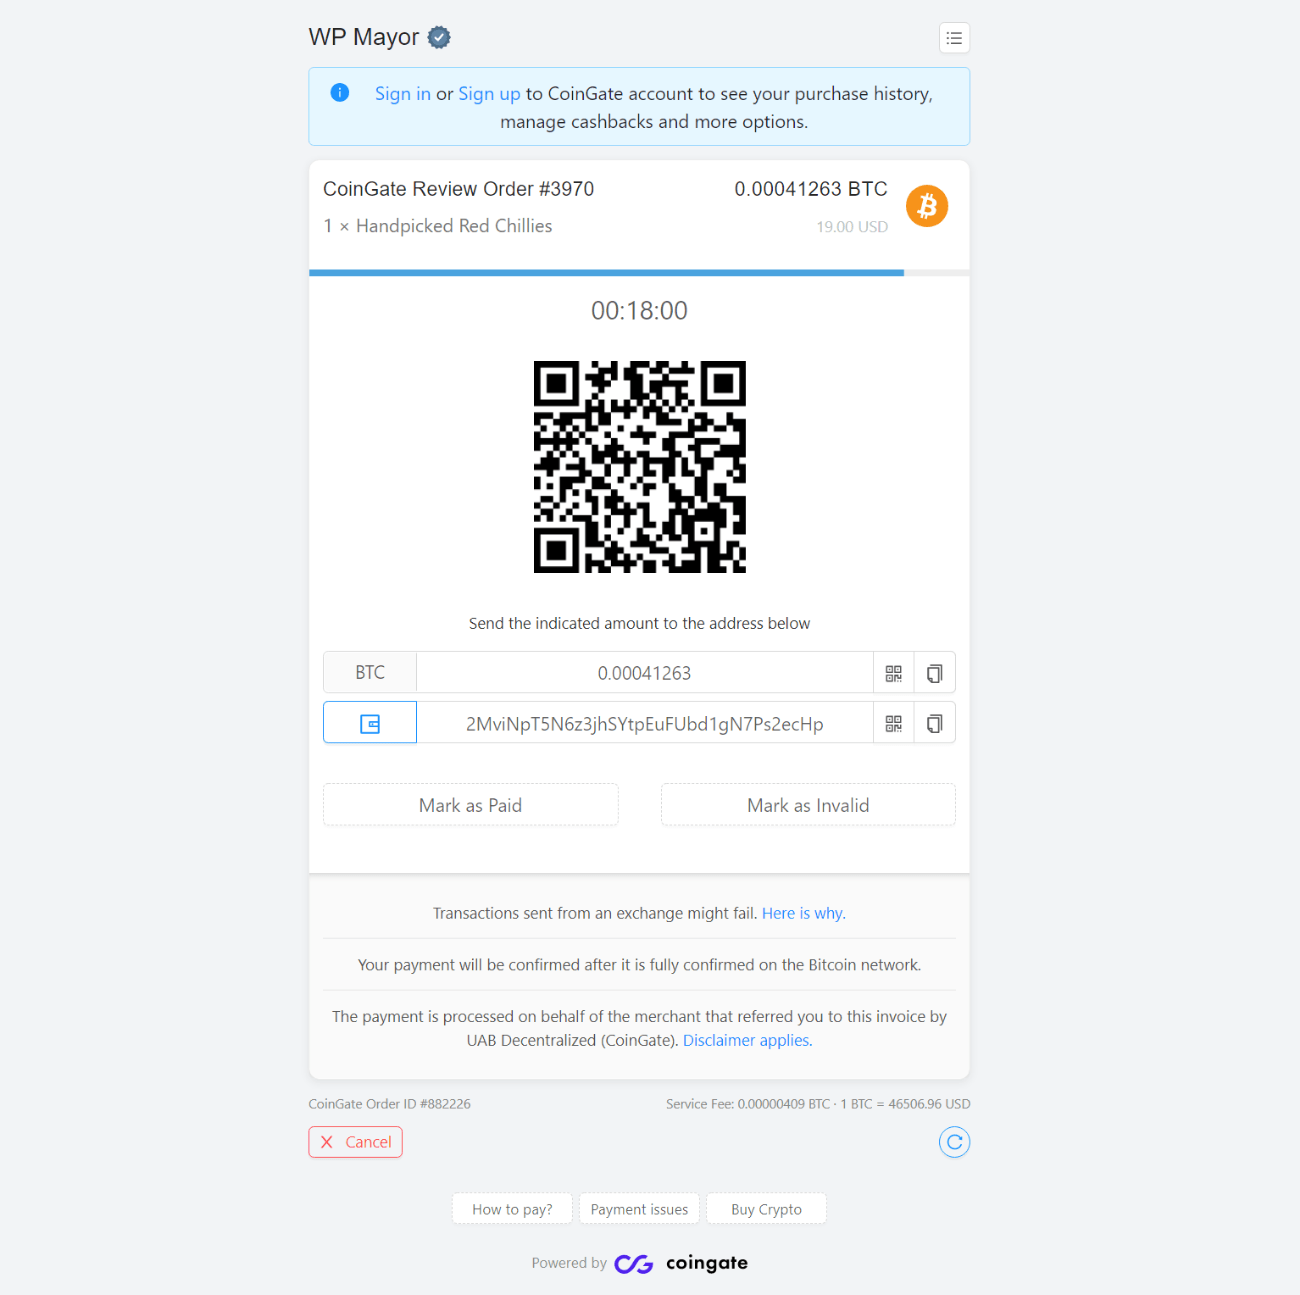
By default, shoppers only have 20 minutes to send the money, but you can adjust this time limit in the API app settings.
For the purposes of this test, I sent some testnet Bitcoin to the wallet using this Bitcoin Testnet Faucet.
As soon as I sent the money, the payment page automatically updated instantly to show that the payment had been detected in the blockchain:
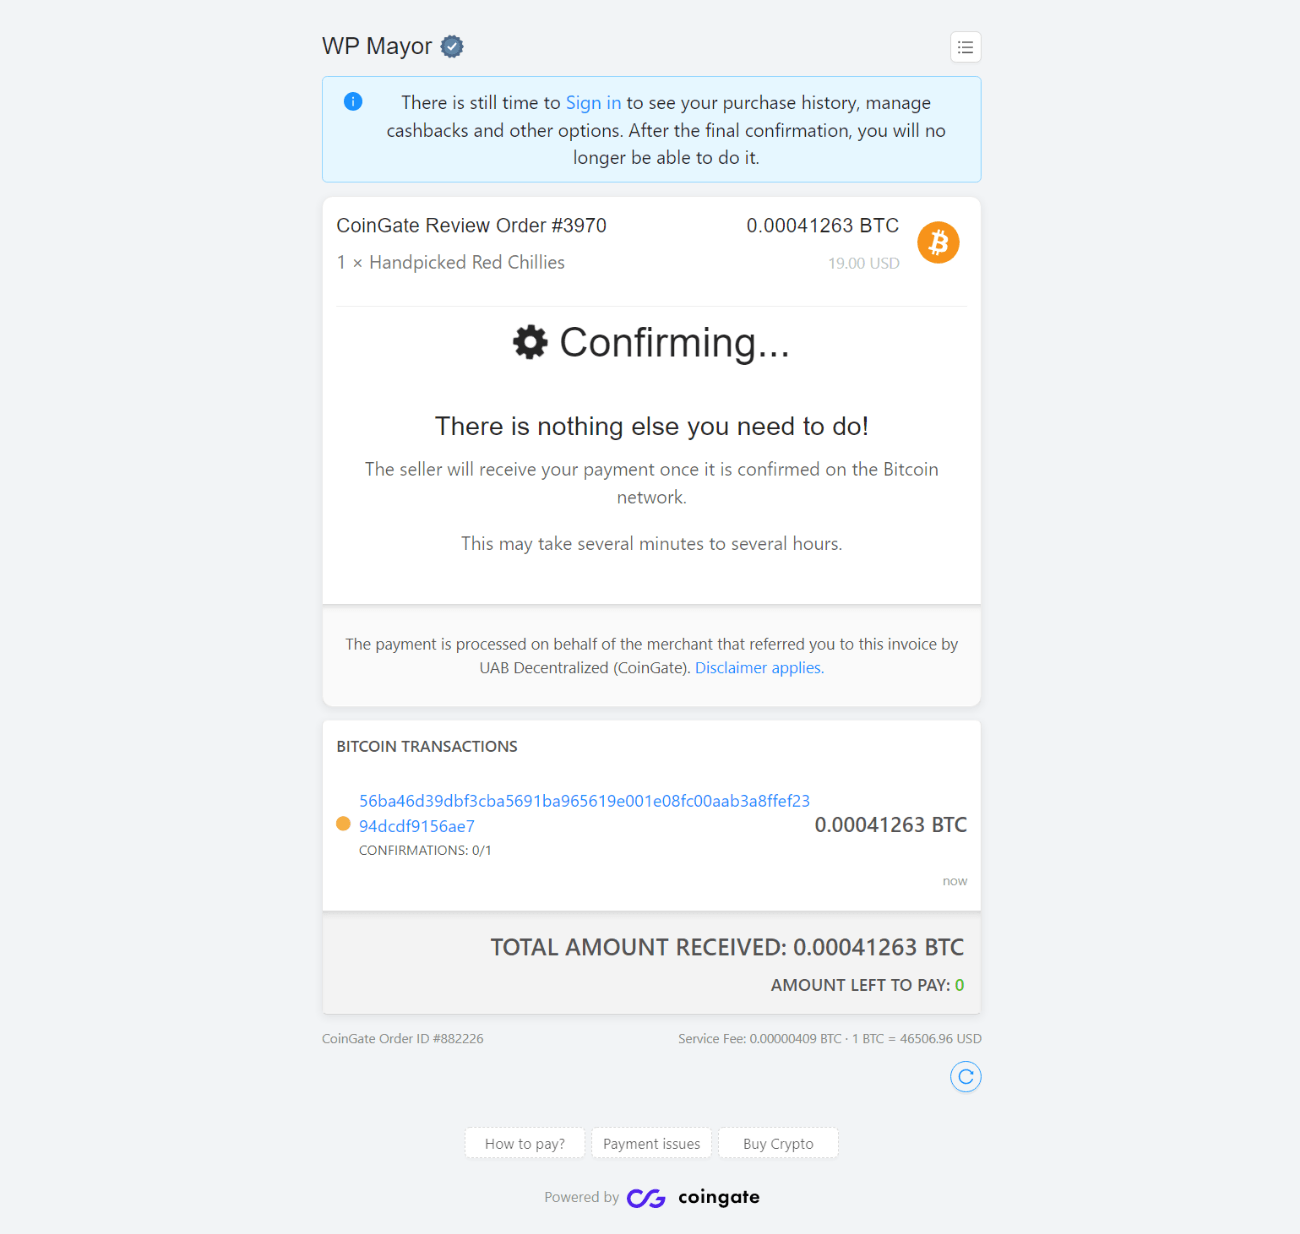
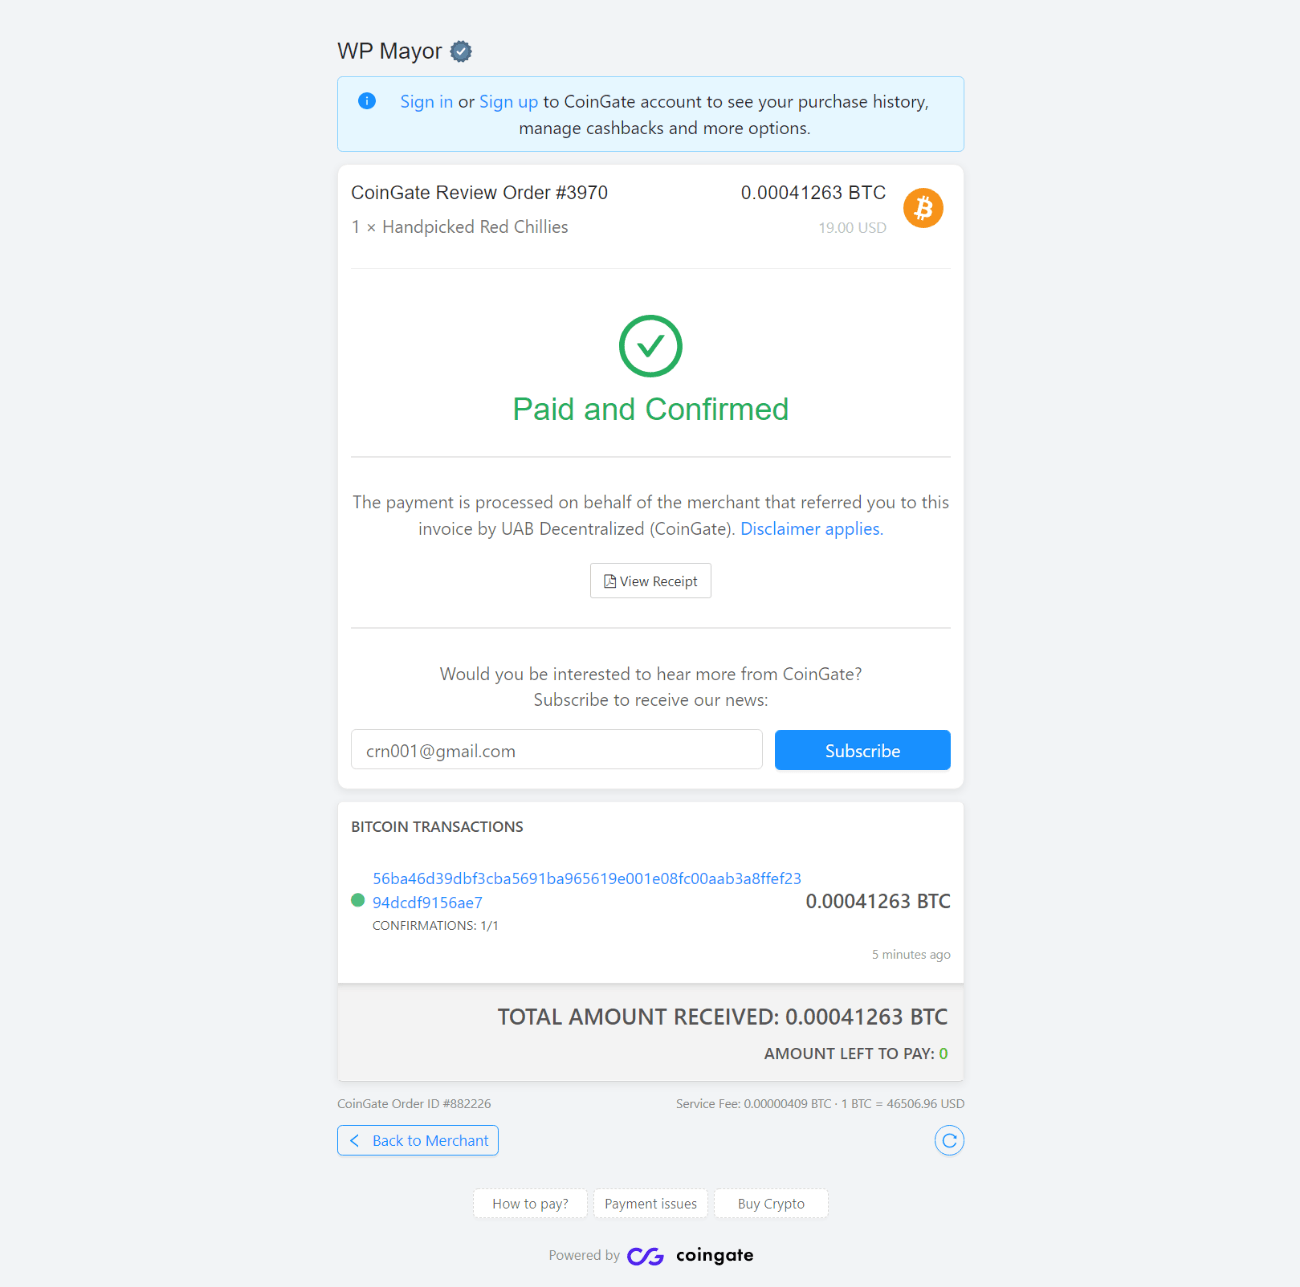
The person would now need to wait for the network to confirm the payment. Once the transaction is confirmed by the network, the payment page will automatically update again to show that the payment was successful:
How It Works for Store Owners
While you’re waiting for payment/payment confirmation, the order will show up as Pending payment in the WooCommerce dashboard:
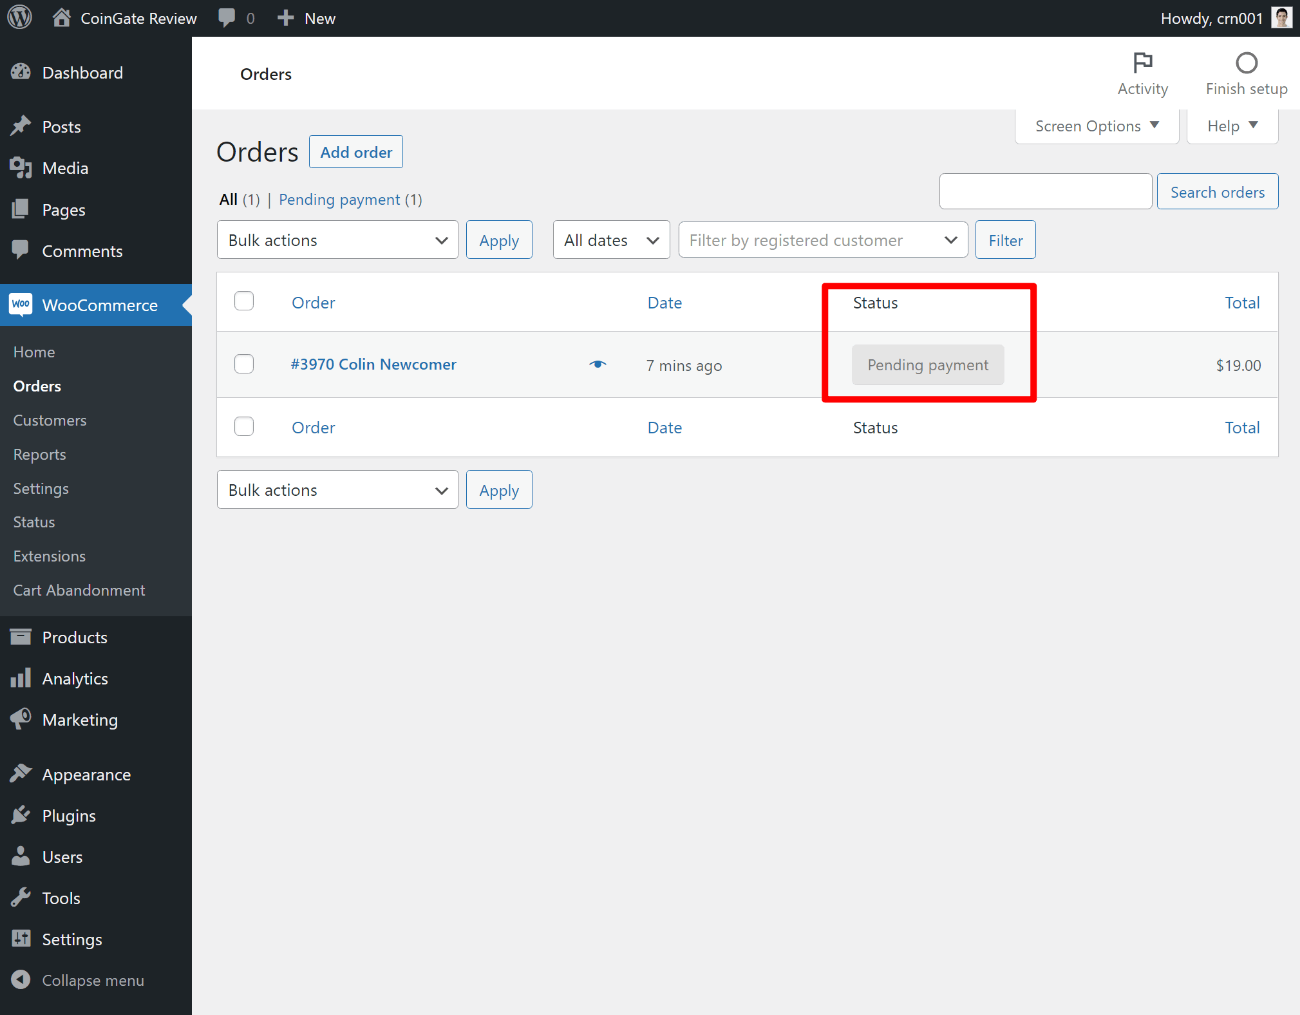
Once the transaction is confirmed by the network, the order status will automatically change to Processing. You can adjust this behavior in the plugin’s settings if needed.
From there, it behaves pretty much exactly like any other WooCommerce order where the payment has been confirmed.
You’ll also see the orders appear in your CoinGate merchant dashboard, which gives you another way to view and track money coming in:
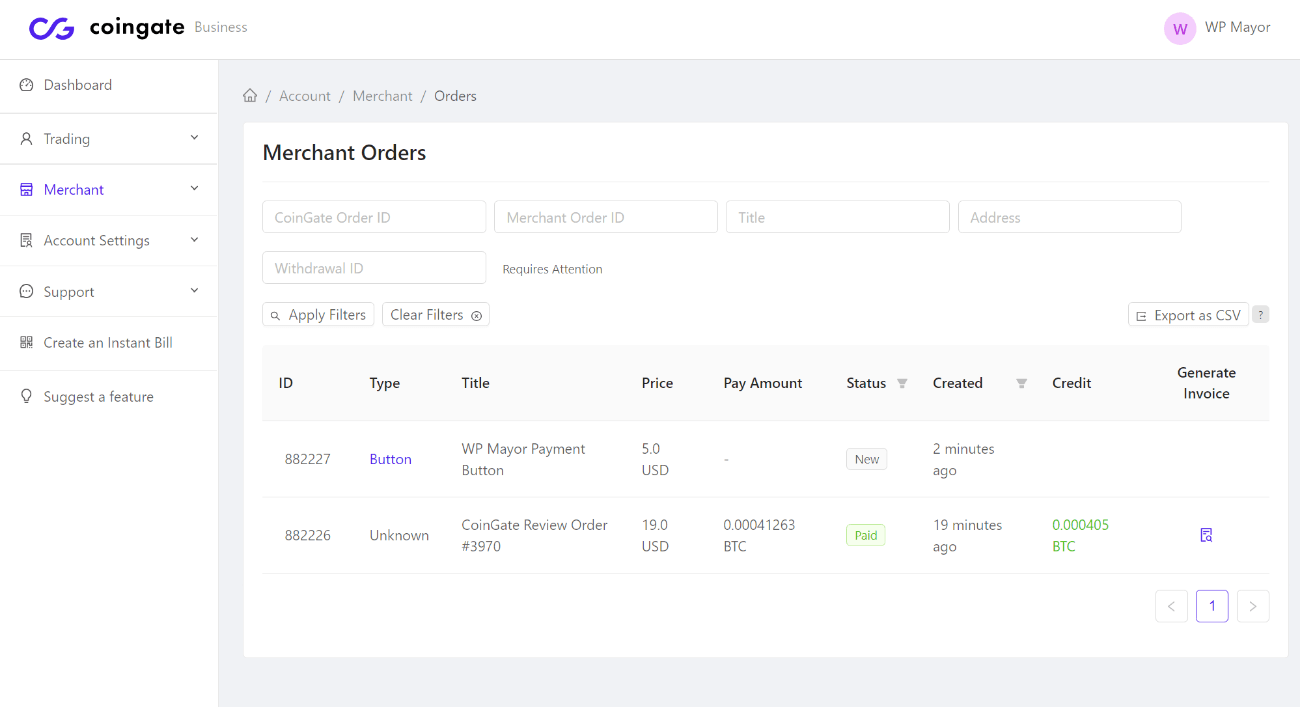
On the main CoinGate Business account dashboard, you’ll see a summary of all your balances. You can also request a payout in your preferred currency at any time – more on minimum payouts when I discuss pricing:

How to Accept Payments via CoinGate Without WooCommerce
If you want to accept cryptocurrency payments on WordPress via CoinGate without using WooCommerce, you don’t need to install a WordPress plugin.
Instead, you can just add a CoinGate payment button.
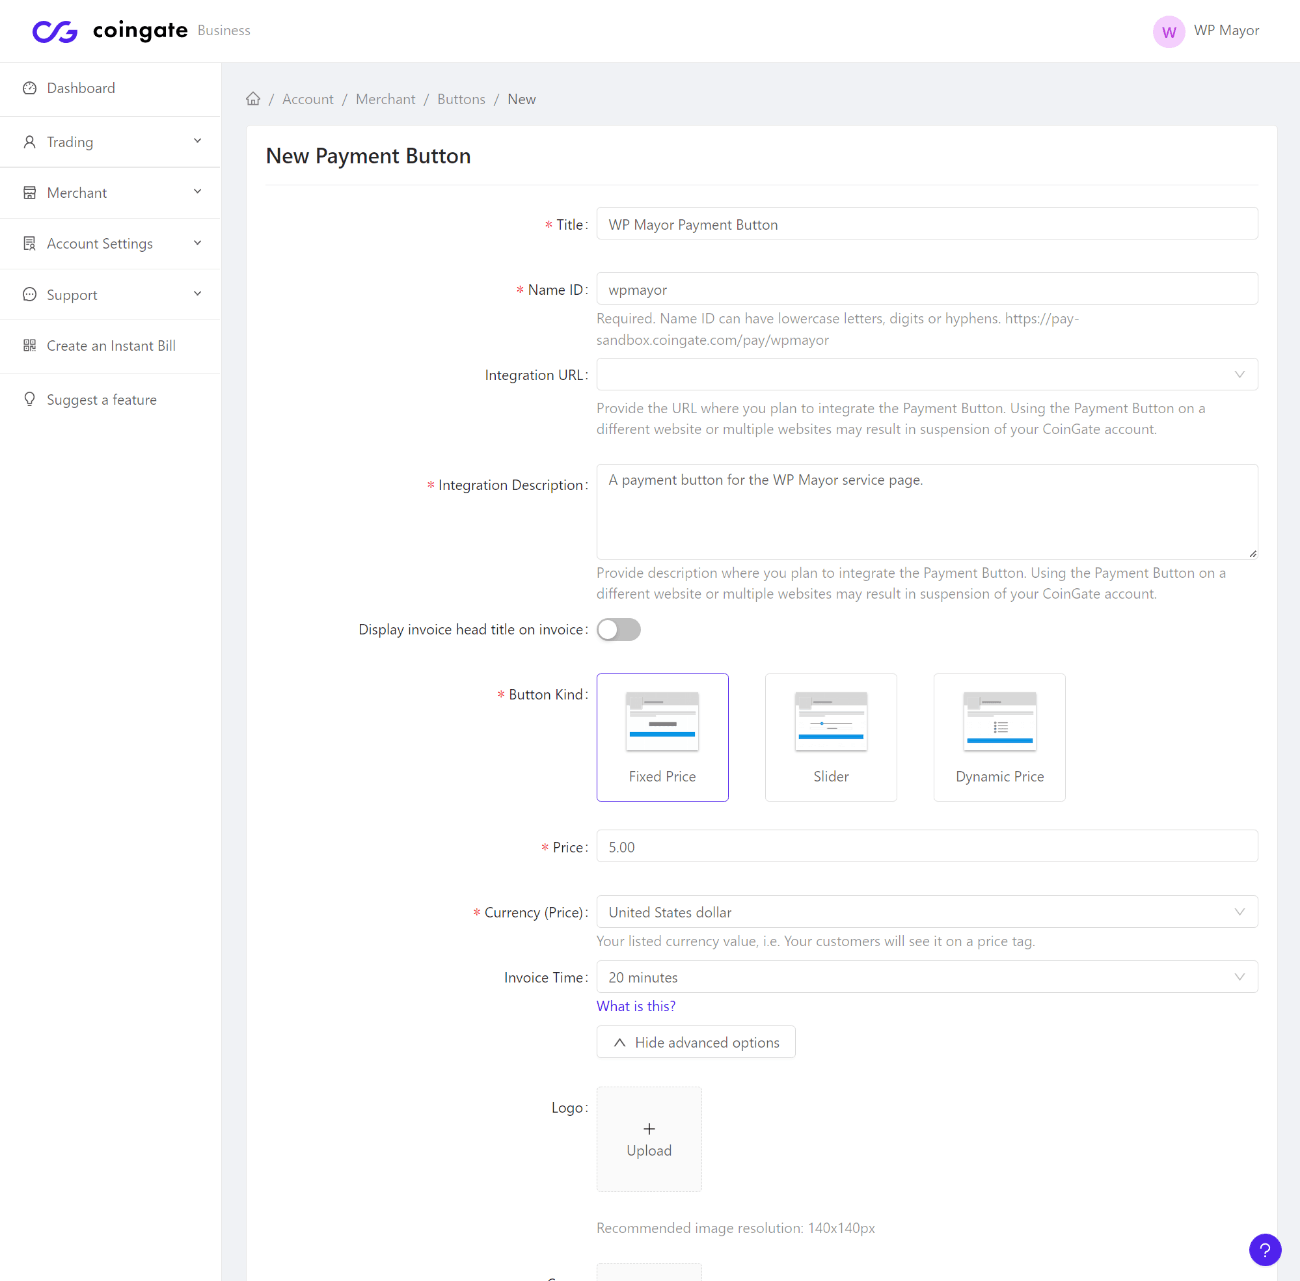
You can create a CoinGate payment button by going to Merchant → Payment Buttons → New Payment Button in your CoinGate Business account dashboard.
There, you’ll get a form to configure the payment details and text. You’re also able to customize the form colors and logo to match your branding:
Once you create the payment button, you’ll get another screen that lets you choose which cryptocurrencies you want to enable/accept for this payment button:

You’ll then get an HTML embed code for your button. To add it to WordPress, you just need to add one of the embed codes to the Custom HTML block in WordPress:

When users click the button, they’ll be taken to the payment page. You could also link directly to this page if you’d prefer – there’s nothing special about the embed code above:

They can then check out using the same interface that you saw at the end of the WooCommerce section.
Once orders come in, they’ll show up in your CoinGate merchant dashboard. You need to be using WooCommerce if you want to see payments in your WordPress dashboard.
CoinGate Pricing
As I mentioned in the introduction, CoinGate charges a flat 1% fee to accept payments and benefit from the real-time conversion rates.
Given that most credit card processors charge something like $0.30 + 2.9%, 1% seems pretty low.
Again, that 1% is basically what you pay for the convenience of receiving all the payments in your preferred currency.
Beyond that, there might be a withdrawal fee depending on how you want to withdraw money from CoinGate. I say might because you can avoid this by choosing a SEPA bank transfer if you’re getting paid in Euro.
However, if you want an international bank transfer, you’ll pay 1% for Euro and 0.2% for USD. Here’s a table that shows the withdrawal methods, along with their minimums and fees (if applicable).

Final Thoughts on CoinGate
Overall, CoinGate makes it very easy to start accepting cryptocurrency payments on your WordPress site.
I would say there are two things that stood out to me versus some of the other WordPress cryptocurrency payments solutions that I’ve used:
- You can accept 70+ cryptocurrencies but automatically receive payouts in a single cryptocurrency or fiat currency. This isn’t always the case, as some of the other solutions require you to have a separate wallet for each currency.
- The user experience is quite good. I like how the payment page automatically detected the transaction in the blockchain immediately after I sent it. Then, I also like how it automatically updated again once the transaction has been confirmed by the network.
The fees also seem competitive, at just a flat 1% of the volume.
If you want to try it out, I would say the best option is to sign up for the Coingate Sandbox. You can set it up on your site in just a few minutes and then start sending some test transactions with testnet Bitcoin to see how everything works.
If you’re happy with everything, you can then sign up for the live version and start accepting live cryptocurrency payments on WordPress.
