


A WordPress landing page is a useful tool you can use to generate leads and convert visitors into customers. However, understanding the value of a landing page and knowing how to build one yourself are two very different things.
Using a page builder plugin such as Beaver Builder can help streamline the process of creating a landing page. In addition to eliminating the need to do any coding yourself, a page builder plugin also lets you choose from pre-made templates and modules that are essential for any landing page.
In this post, we’ll discuss the benefits of using a page builder plugin to create a WordPress landing page and introduce you to Beaver Builder. Then we’ll walk you through how to do it step by step. Let’s get started!
The Benefits of Using a Page Builder to Create WordPress Landing Pages
There are a variety of ways to create a WordPress landing page. One is to code one yourself from scratch. Unfortunately, this can be a time-consuming process that requires a bit of technical know-how.
Another option is to use a WordPress theme. WordPress landing page themes come ready to use and are significantly faster than coding it yourself.

Easily create a WordPress landing page with Beaver Builder today! Take control and join over 1,000,000 websites built with Beaver Builder.
Get Beaver Builder nowHowever, they can also be limiting in terms of design and functionality. Also, since your theme dictates the design of your entire site, it isn’t ideal if you’re creating the landing page on an existing site.
The quickest and easiest method — and the one we’ll focus on in this post — is to install a WordPress page builder plugin. Some of the benefits of using a page builder to create your landing page include:
- You don’t need to write or add any code unless you want to
- It’s a quick, cost-effective solution
- You can use it with any WordPress theme
- Many come with tools to test and track the performance of the page
- You can easily create and customize the content and design via drag-and-drop functionality
Put simply, a page builder plugin comes with everything you need to build an effective WordPress landing page with ease. It’s a great option especially if you’re new to landing pages and want to get more comfortable and confident working with page builders.
An Introduction to Beaver Builder
Once you make the decision to use a landing page plugin, you’re tasked with deciding which one. There are many options, but we recommend using Beaver Builder:
Beaver Builder is one of the most popular and powerful WordPress landing page builders. This freemium tool lets you choose from a variety of ready-made templates and quickly create landing pages using drag-and-drop blocks.
You can use Beaver Builder to create many different types of content pages, including about, contact, and portfolio pages. Depending on the complexity of the landing page and what you plan to use it for, you may want to pay for a premium plan.
The lite version is free and comes with the basic necessities for building a landing page. However, to get the most from the tool, we recommend upgrading. The premium plugin includes 20 additional modules, as well as pre-made templates, icons, and more.
How to Create a WordPress Landing Page With Beaver Builder (In 5 Steps)
So far, we’ve covered the benefits of using a page builder to create a landing page and why Beaver Builder is a solid choice. Now it’s time to get to work. Let’s take a look at how to create your WordPress landing page in five simple steps.
Step 1: Create Your Beaver Builder Account and Install the Plugin
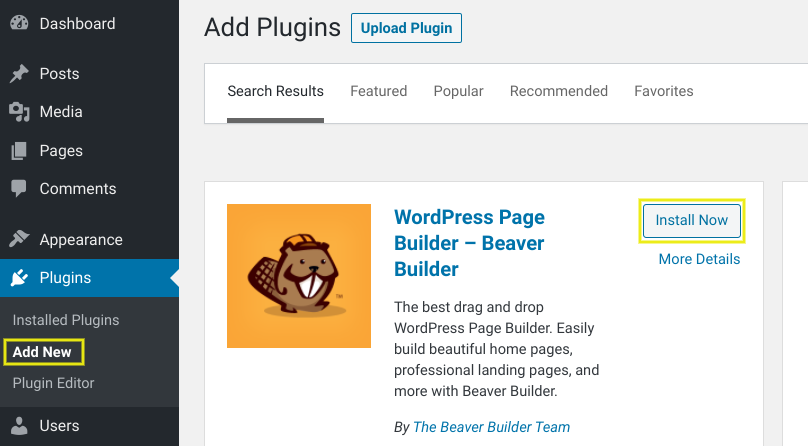
As we mentioned, there is a free version of the Beaver Builder page builder plugin. You can add it to your site by going to Plugins > Add New from your admin dashboard, then searching for ‘Beaver Builder’:
However, the free version doesn’t give you the advanced features and tools that make premium page builder plugins so helpful. So if you want to use the premium plugin, the first step is to choose a plan and create an account.
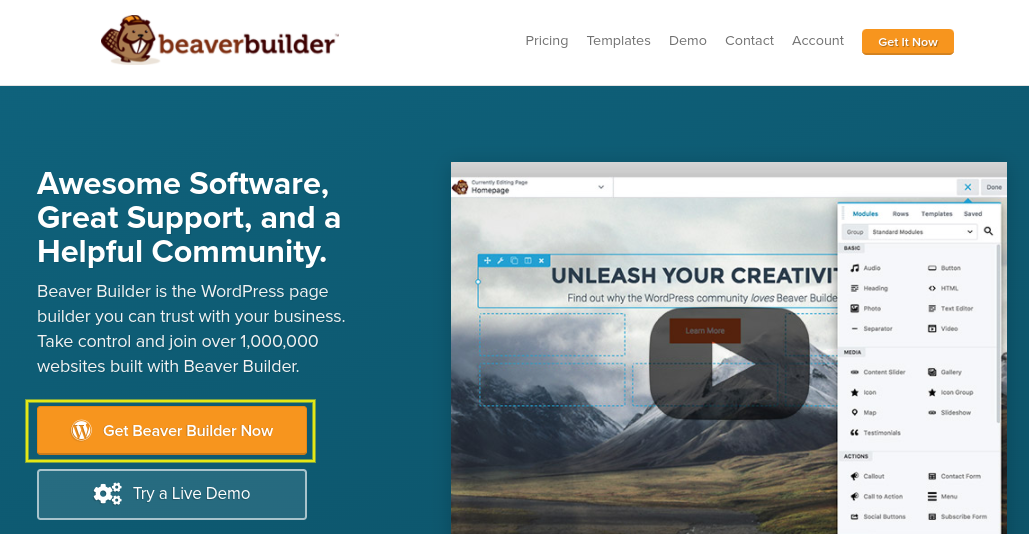
On the Beaver Builder website, click on the Get Beaver Builder Now button:
Once you choose your plan, select Get Started. It will redirect you to the checkout page. Enter your information, then click on Sign Up now.
On your ‘My Account’ page, download the plugin .zip file. Note: This is also the page where you’ll find your activation key, which we’ll use in a moment.
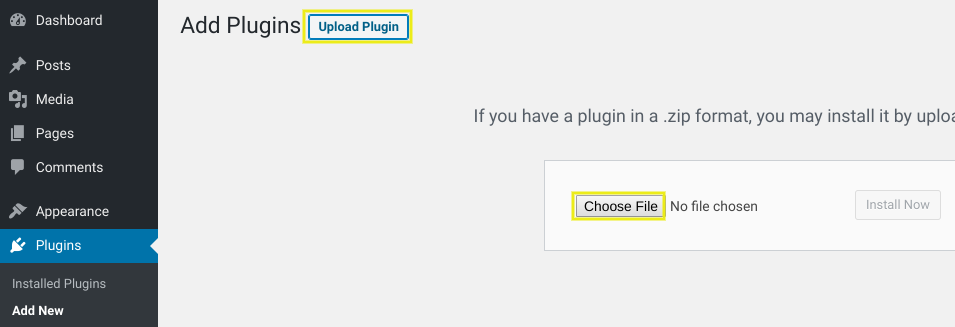
From your WordPress dashboard, navigate to Plugins > Add New > Upload > Choose File:
After you upload and activate the plugin, you need to activate your license. You can do this by going to Settings > Beaver Builder > License:
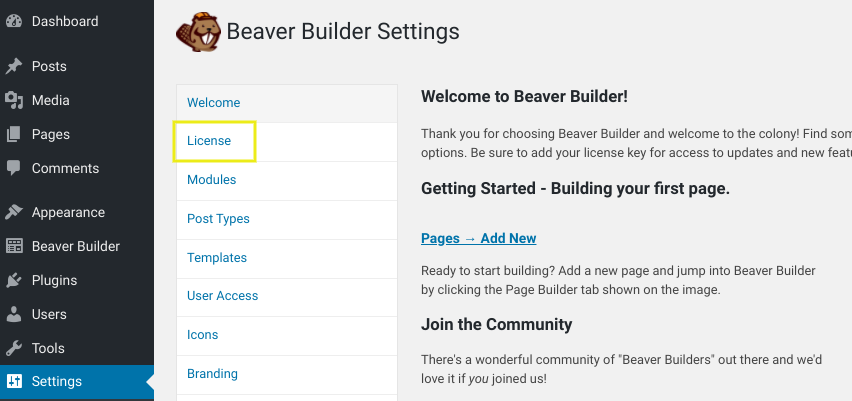
Click on the Enter License Key button. Again, you can find this key on your Beaver Builder ‘My Account’ page.
Step 2: Add a New Page and Launch Beaver Builder
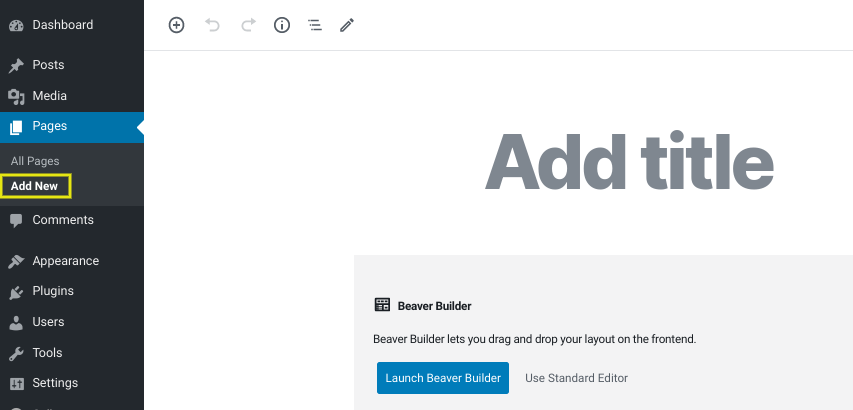
Once you have the plugin activated, the next step is to create a new WordPress page. From the dashboard, head over to Pages > Add New:
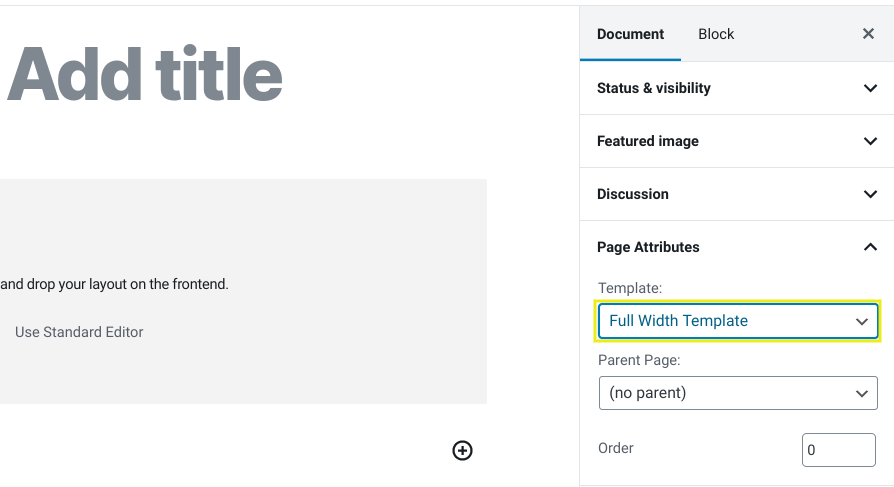
Most WordPress themes include a full-width template, which is ideal for landing pages. On the right-hand panel under the ‘Page Attributes’ section, select Full Width Template from the dropdown:
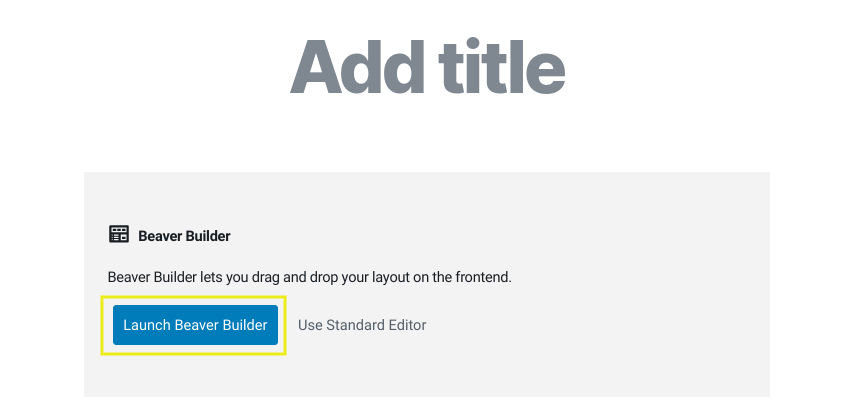
Next, click on the Launch Beaver Builder button in the editor:
This will automatically open the editor to show you the front-end preview of your landing page. It will use your existing page template, but keep in mind we’re going to change the template and page layout.
Step 3: Select a Template and Customize the Layout
You have a couple of options when it comes to your landing page template. You can build your own layout using the drag-and-drop tools or choose a premade landing page template to build off of.
If you’re using a landing page builder plugin, chances are you’re aiming for efficiency. So, for this tutorial, we’ll choose one of the Beaver Builder templates to adapt.
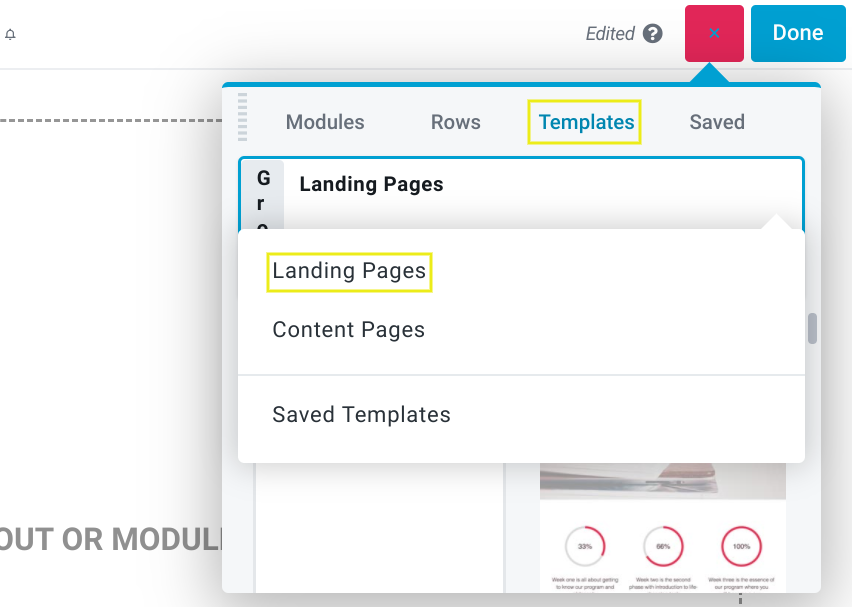
In the top right-hand corner, click on the (+) icon, followed by Templates > Landing Pages:
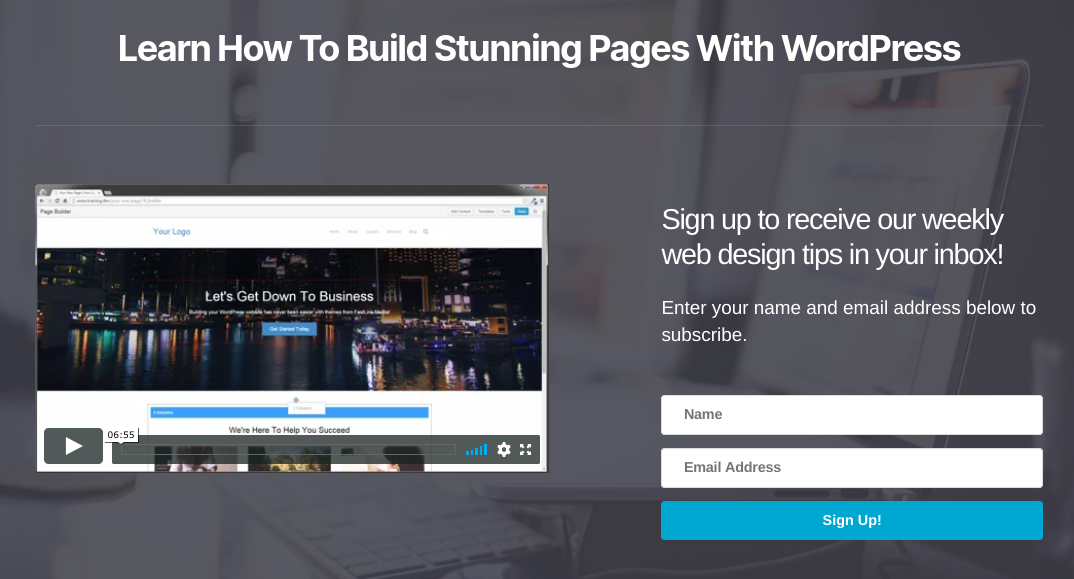
You can browse the templates to find one that looks similar to what you’re looking to achieve with your landing page. We’ll use the Subscribe template.
Once you select your template, it will load a preview. You can click on any element to edit its contents:

You can edit the text, customize the styling, and replace or delete the modules by clicking in the box. You can also simply hover your mouse over the area and a blue toolbar will appear:
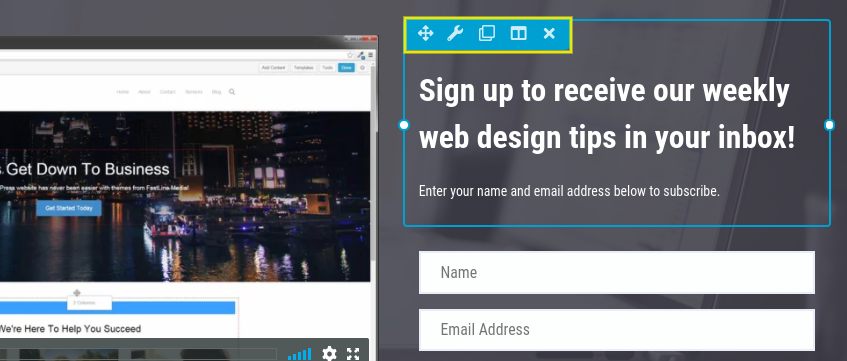
You can edit the content inline or in the module settings panel that opens when you click on the wrench icon. The other icons let you duplicate the element, drag it to another place on the page, or delete it.
To further customize the layout of your WordPress landing page, you can add rows and columns. To do this, click on the (+) icon again, then select the Rows tab:
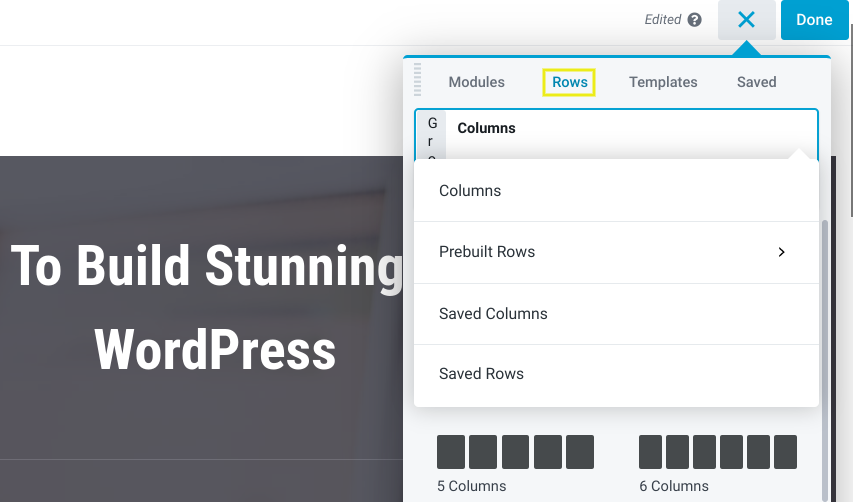
Here, you’ll find a selection of prebuilt rows and columns. Note: If you’re using the free version, this is how you would build the layout.
Step 4: Add Modules to the Landing Page
Using one of the prebuilt templates gives you a solid launching point. You have a basic framework that is easier to customize than if you were building it on a blank canvas. Whether you created your layout from scratch or used a template, the next step to enhance your landing page is to add modules.
To view the available modules, click on the (+) icon, followed by the Modules tab:
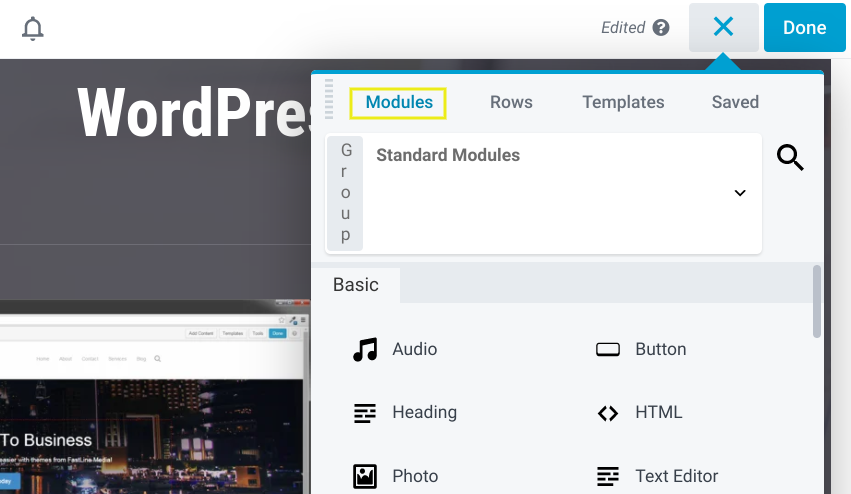
If you’re using the Lite version, you will have access to five basic modules:
- Audio
- HTML
- Text editor
- Photo
- Video
With the premium plugin, you have a plethora to choose from, including modules for Call to Actions, social buttons, contact and subscribe forms, testimonials, and more. Even if you used a prebuilt template for your layout, there’s a chance it doesn’t include the modules you want, so these are worth exploring.
To add a module, simply drag and drop it to wherever you want it to appear on the page:
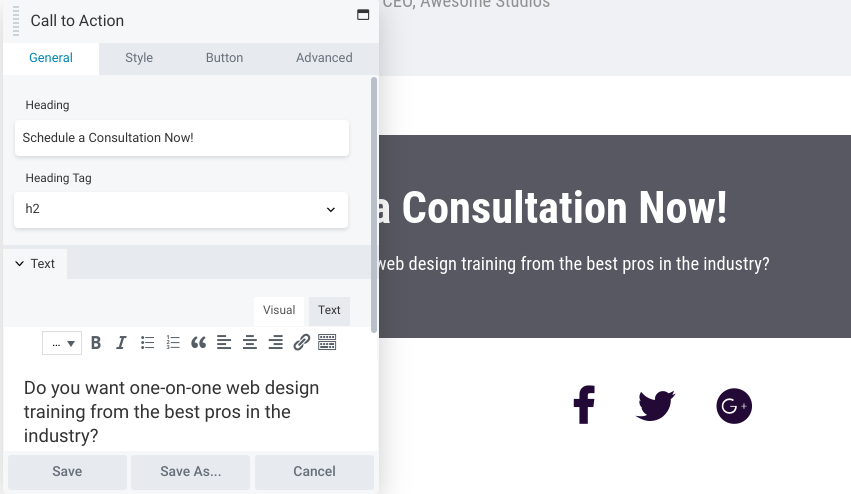
The module settings panel will open where you can customize the content and design of the module. If you want to save the module to use again for future landing pages, you can click on the Save As button at the bottom of the settings panel.
Step 5: Save and Publish Your WordPress Landing Page
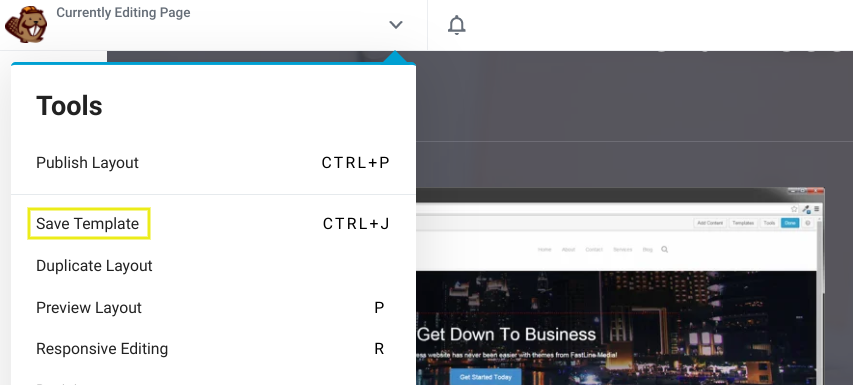
Similar to the individual modules, you can also save your entire template to use as a framework for future landing pages. To do this, click on the down-facing arrow in the top-left corner of the screen. Under ‘Tools’, select Save Template:
The landing page won’t be live on your site until you publish it. Once you’re satisfied with it, click on the Done button in the top right-hand corner of the page. You’ll have the option to Discard, Save Draft, or Publish:

Then you can then view the final result of your live landing page:
That’s it! You’ve officially created your WordPress landing page.
Easily create a WordPress landing page with Beaver Builder today! Take control and join over 1,000,000 websites built with Beaver Builder.
Get Beaver Builder nowConclusion
There are a handful of ways to create a landing page in WordPress, from coding your own to using a WordPress theme. However, the quickest and most efficient method is to use a landing page builder plugin such as Beaver Builder.
As we discussed in this post, you can use Beaver Builder to create a WordPress landing page in the following five simple steps:
- Create your Beaver Builder account and install the plugin on your WordPress site.
- Add a new page and launch Beaver Builder.
- Select a template and customize your layout.
- Add modules to the landing page.
- Save and publish your WordPress landing page.

Do you have any questions about creating a WordPress landing page using Beaver Builder? Let us know in the comments section below!

3 Responses
Thanks for complete step to step guide for building landing page with beaver builder. The most wonderful thing about the builder is its user-friendly interface.
The paid version of this builder is great and it also offers further addons but I have no idea about free version, what they offer.
WILL
Thanks for the article!
I have a question and a suggestion:
Question: I have several blogs, each is opinion/informational with nothing to sell. Would I benefit from having a landing page with an introduction and a link to each blog?
Suggestion: Lumping instructions for the free and premium versions of Beaver Builder together is confusing. Please consider two separate sets of instructions:
• “How to Create a WordPress Landing Page With the Free Version of Beaver Builder”
• “How to Create a WordPress Landing Page With the Premium Version of Beaver Builder”
Keep on keepin’ on!
NEAL
Hi Neal,
The main purpose of a landing page is to convert the visitor in some way – while this doesn’t necessarily have to involve a sale, the landing page should guide the visitor towards some kind of action (subscribing to your blog’s newsletter, for example, or downloading an e-book). Creating landing pages for posts requires visitors to take an extra step to get to what they want (your content), so you should definitely use them sparingly, if at all, in order to provide a smooth user experience.
I think that creating a landing page for each blog post would probably be overkill. However, you might consider landing pages for any monetized posts you have (such as those containing affiliate links), or for any exceptional content on your blogs (for example, if you have any e-books, multi-part series, exclusive content that’s only for registered subscribers, etc.).
I appreciate your suggestions regarding the structure of the article – thanks for sharing!