


For a long time, creating an eLearning website or course meant finding a pre-established platform to host it. Sites like Udemy, LinkedIn Learning, and Coursera are still among the most popular. However, as easy as it may be to host your courses on those sites, your work falls under someone else’s branding and rules, and you pay for the privilege.
What if you could host your eLearning courses on your own website?
It’s not a pipe dream. You can host a robust, full-featured eLearning website with the Tutor LMS plugin from Themeum.
Why Choose Tutor LMS for Your eLearning Website?
Hosting your own eLearning website might sound like a huge undertaking. It may seem like the more well-known sites have a lot of power and money to keep them running. You might think it’s not worth trying to compete. I’m here to prove you wrong.
If you can create a WordPress site, you can create a fully functioning eLearning website that’s wholly your own.
Tutor LMS helps you create an eLearning course site using WordPress. The Tutor LMS plugin features a frontend course builder, advanced quiz builder, and multi-instructor capability. Using other Tutor LMS tools installed separately, you can create and customize certificates and utilize a ready-made theme explicitly tailored to hosting eCourses. The UI/UX is also top-notch, with a modern and elegant interface.
As I show you how to build an eLearning website with Tutor LMS, I’ll describe more features in detail. Let’s get started!
How to Get Started
If you can install a WordPress plugin or theme, you can build your eLearning website. There are a few things to install to experience the full potential of what Tutor LMS offers. I’ll guide you through the steps below.
Install TutorStarter, a Free Tutor LMS Theme
The first thing you need to do is install the Tutor LMS theme. While you can use your own theme, their free TutorStarter theme is worth exploring — especially if you want to do the least amount of layout possible.
In your dashboard under Appearance>Themes, choose Add New and search for TutorStarter. Install it, then select Activate.
Once you have the theme installed and activated, search for a plugin called TutorMate under Plugins>Add New. Install and activate. TutorMate is a Tutor Starter theme companion plugin to import predesigned demo pages, and will come in handy in the next section.
Starter site
In the dashboard menu under TutorStarter, select Starter Sites.
There are four available four options to choose from. For our example, I chose Marketplace.
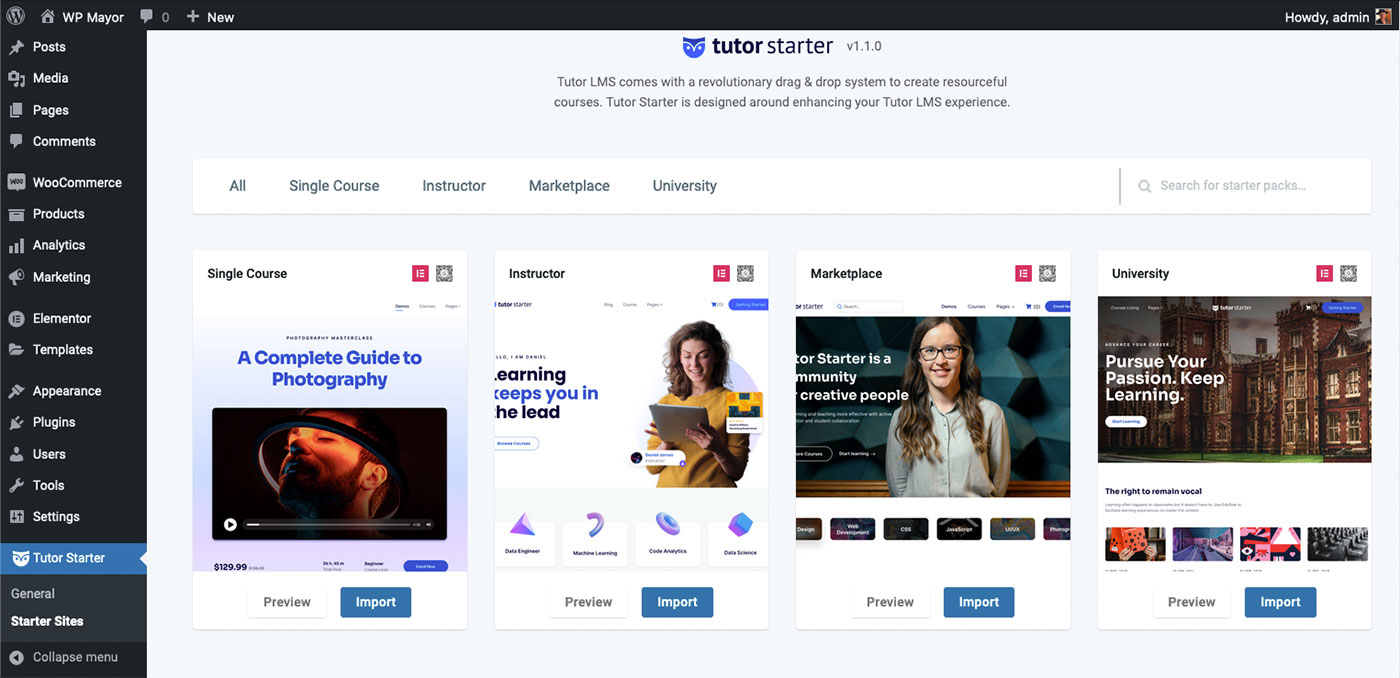
- Choose the starter site you want and click import.
- Choose between Elementor or Gutenberg for the building environment you prefer and click import.
- Once you have imported all the elements, click View Site to see how your site will look.
You can also click View Site from your dashboard, as you usually would. You’ll see that Tutor Starter has created a beautifully-designed layout for your site.
You can tweak the layout any time, but let’s move on to the Tutor LMS plugin for now.
Install Tutor LMS Pro
By now, you know the drill. In your WordPress dashboard, head over to Plugins>Add New. Search for Tutor LMS, install, and activate. It’s free to do, but if you want to take advantage of all the features that tutor LMS offers, I suggest creating an account on the Themuem site and downloading the Pro version.
In either case, once you activate the plugin, you’ll be taken to an onboarding wizard that will walk you through the steps to set up your preferences. If you prefer to skip the wizard at this point, you can always change your settings in the Tutor LMS menu. We’ll cover these settings in detail later on.
Additionally, under Tools, you can choose to start the wizard from the beginning. That will take you through the most basic settings, and I encourage you to do that. There are quite a bit more settings you can configure, and it’s too much to cover in this tutorial. However, the choices are very intuitive, and most people won’t have trouble making choices specific to their eLearning website.
Let’s go through some of the additional features that make Tutor LMS a powerful platform.
Select Addons
You can enable even more features for your eCourse site by toggling one of the choices in the Addons menu. Some will activate right away, and others require installing a plugin, such as BuddyPress or Paid Memberships Pro.

A few Addons that you might find handy right off the bat are:
- Gradebook
- Calendar
- Assignments
- Course Attachments
- Certificate
After you’ve browsed the Addons, it’s time to get into the nitty-gritty of building a course.
Create a 1-1 Booking Calendar
Tutor LMS provides many great features to handle group sessions via classes, including Zoom and their Event Calendar. But, if you need to offer 1-1 tutoring support for your students, you’ll need a dedicated booking plugin on your site. Simply Schedule Appointments is a plugin hosted by WordPress, which means your students would be able to book appointments with you without having to leave your site. Simply embed the booking calendar onto any page on your website, including your instructor profile page or course page.
Create a Course
Creating a course is easy. In the Tutor LMS menu, click Courses, then Add New. Once you’re in the course editor, fill in the title and click Save Draft. Click Preview and preview the course in a new tab when you have that saved. Now, let’s finish building the course using the Frontend Course Builder.
Create and edit a course using the Frontend Course Builder
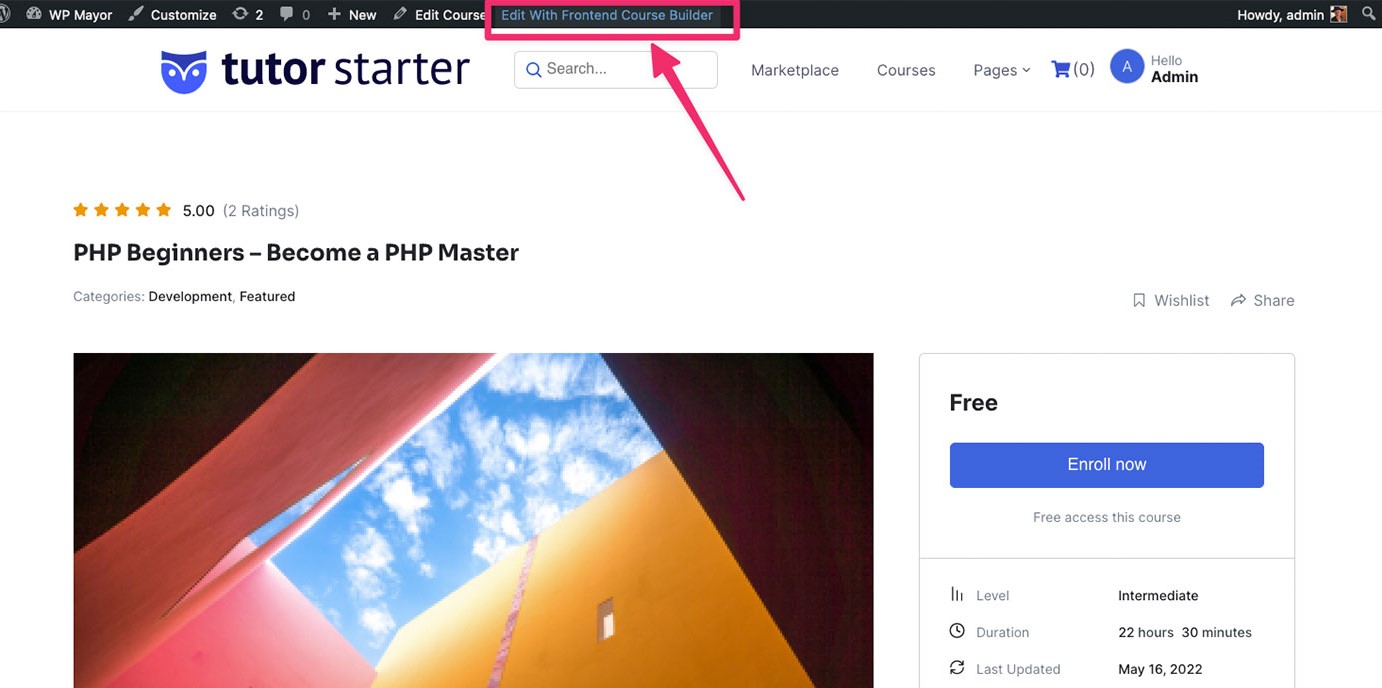
There are two methods for creating and editing a course: the backend editor and the frontend editor. The backend editor is where you started when you first created your course. It utilizes a basic UI, similar to the WordPress blog post or page editor. Tutor LMS Pro offers a much nicer frontend editor that you can access once you’ve saved a draft of your course.
Now that you’re previewing the draft of your course, you will see Edit with Frontend Course Builder in the top bar of your WordPress dashboard. Click that to get into the editor.
Now that you’re in the Frontend Editor, the UI is much cleaner and easier to navigate.
You can also create a course using the frontend course builder. From the frontend dashboard, click on “Create a new Course” and this will take you to the frontend editor.

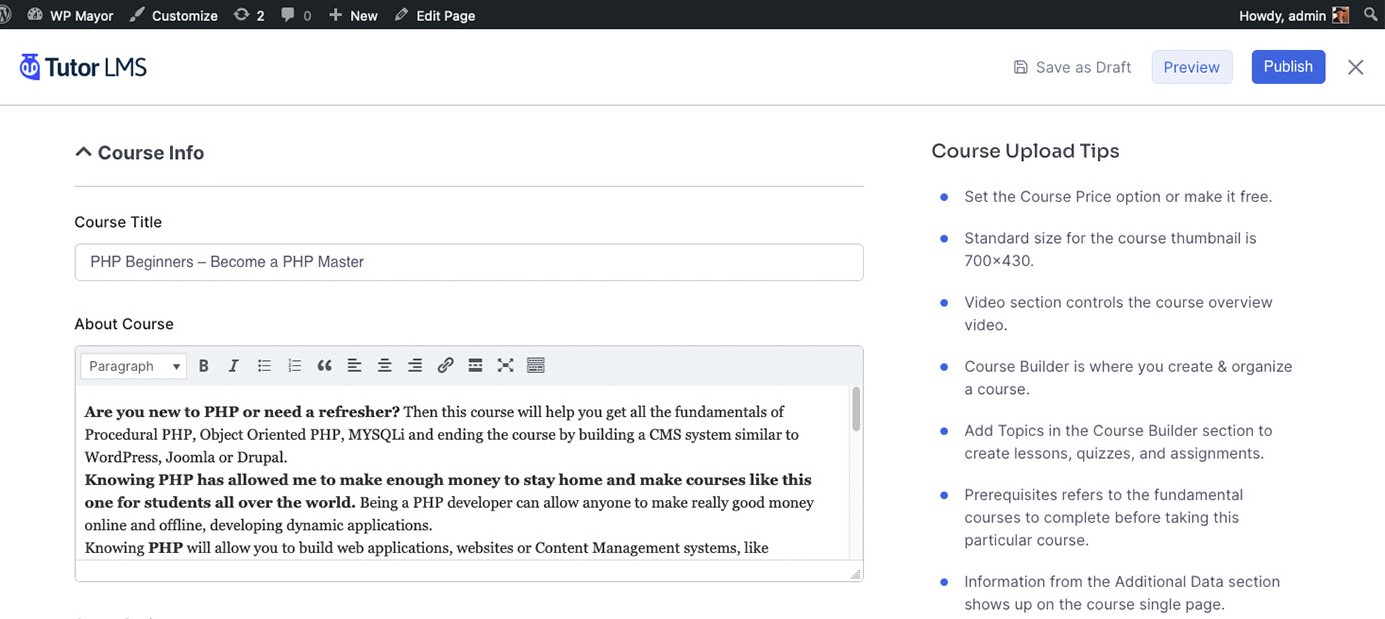
Once you’re inside the editor, you’ll fill out the particulars of your course. Course Upload Tips on the right side explain the different areas where you need to provide information.
Again, if you look through the examples provided by Tutor LMS, you’ll get a sense of how a course looks to the student. You can use those as inspiration for building your courses.
The Frontend course builder is a unique feature of Tutor LMS that allows instructors to create their courses without being in the backend WordPress panel. This is incredibly useful if you want your platform to have the lowest possible barrier of entry, as teachers don’t have to learn anything about WordPress.
Create Quizzes
To create quizzes, you must first have some topics created in your course. Once you have one, click the drop-down arrow to open it. You’ll see a +Quiz button that will open up the Quiz menu. Just fill in the blanks to create your description and questions.
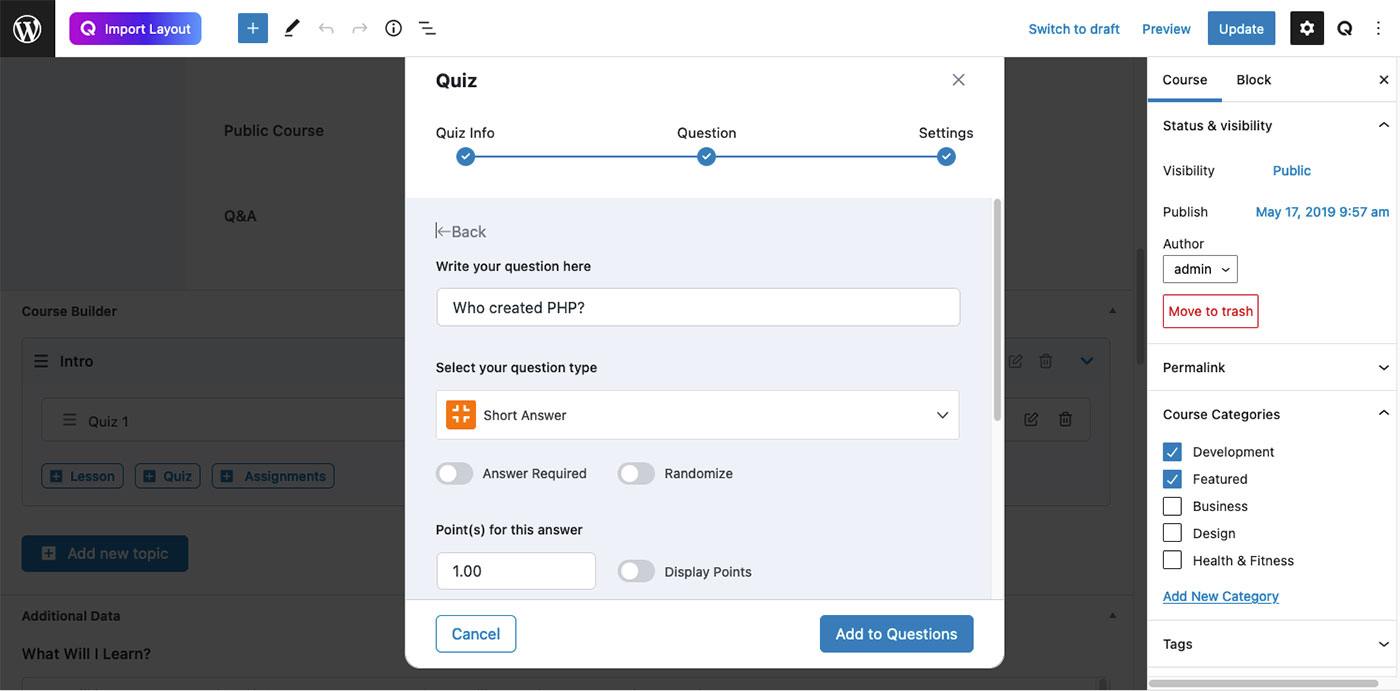
In the last section, you can apply settings such as time limit, retry attempts, and passing grade.
Create an Assignment
You can create an Assignment in the same way you created a Quiz. Under the topic, click the +Assignment button. You’ll get a menu where you can fill in all the pertinent info about the assignment, with attachments if you like.
Create a Live Class using Zoom
If you want to host live classes, Tutor LMS allows you to connect with Zoom, fully integrating with the plugin. Each instructor can connect using their Zoom account. The process is simple, and you can find the fully detailed tutorial in the Tutor LMS Support docs.
In addition to Zoom, there is also a Google Classroom addon if you prefer that platform.
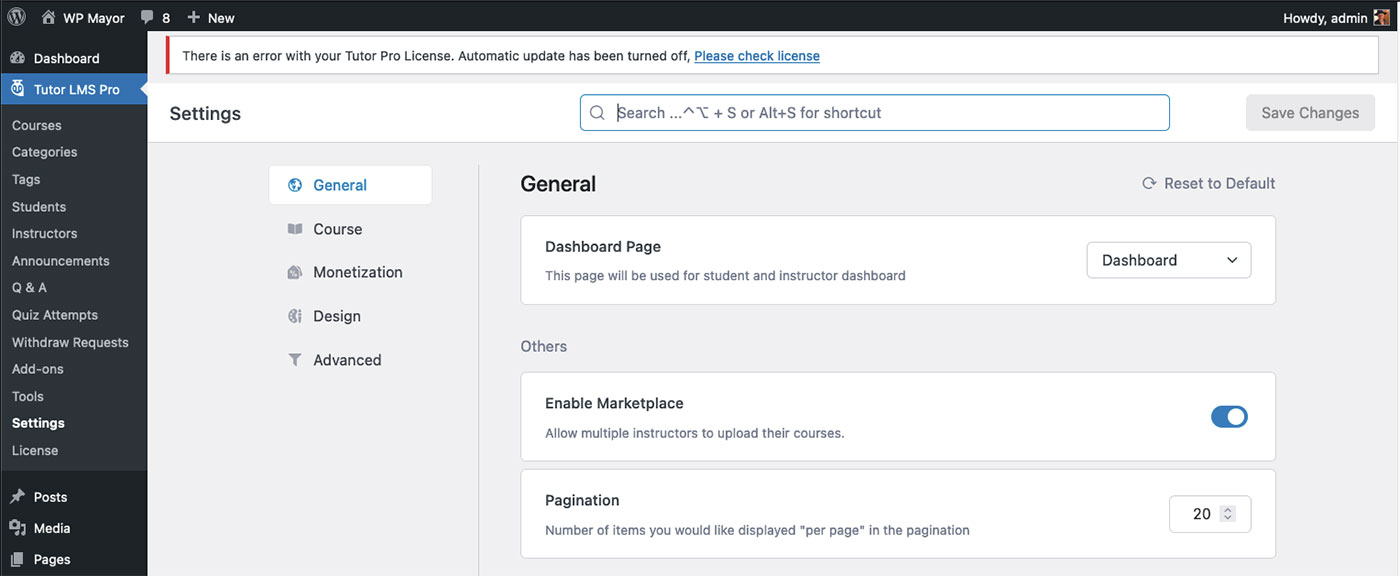
Tutor LMS settings
The Tutor LMS settings menu is intuitive and easy to navigate.
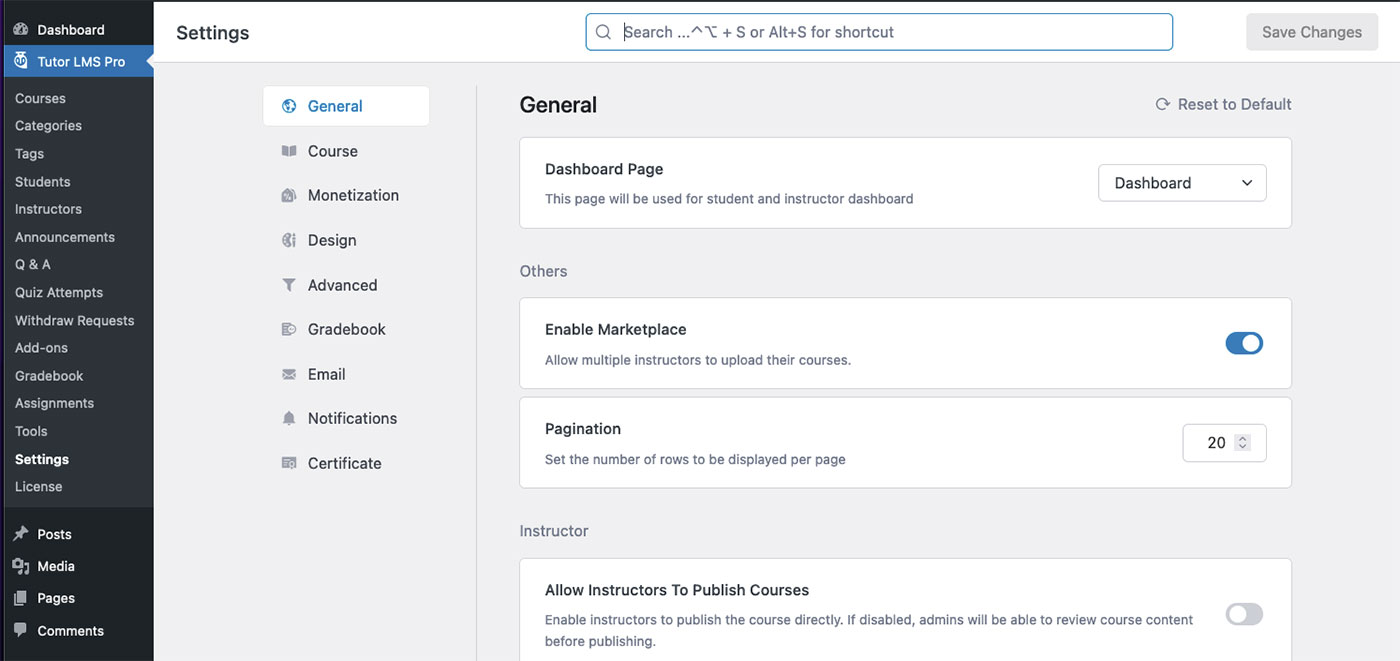
There are many options to configure, so take your time and go through them all. You may not need to apply some of them. Still, it will give you an understanding of the functionality available.
Set up automated emails
One important setting to configure is Email. Tutor LMS will send automated email notifications for multiple situations such as course enrollment, completion, quiz completed, etc. Within the Email menu, you can scroll down to find the various email templates provided for you. Each one is editable, and you can preview the message in the same window:

Create custom certificates
While the plugin comes with several completion certificate styles to choose from, you can also create your own custom certificates that match your branding. You’ll need the additional (free) Certificate Customizer plugin and an active Pro license. Once you have those, you can follow the detailed tutorial on their site.
How to access the Frontend Dashboard
So far, we’ve been working behind the scenes in WordPress to create courses and configure settings. However, you likely don’t want your students and instructors to be working in the WordPress dashboard. This is where Tutor LMS’s UI shines.

In the Tutor LMS menu, navigate to Tools>Tutor Pages. In that menu, you’ll see the main pages the plugin has created for you: Dashboard, Instructor Registration, and Student Registration. These are the pages where you’ll want to send others and where you want them to interact with your content.
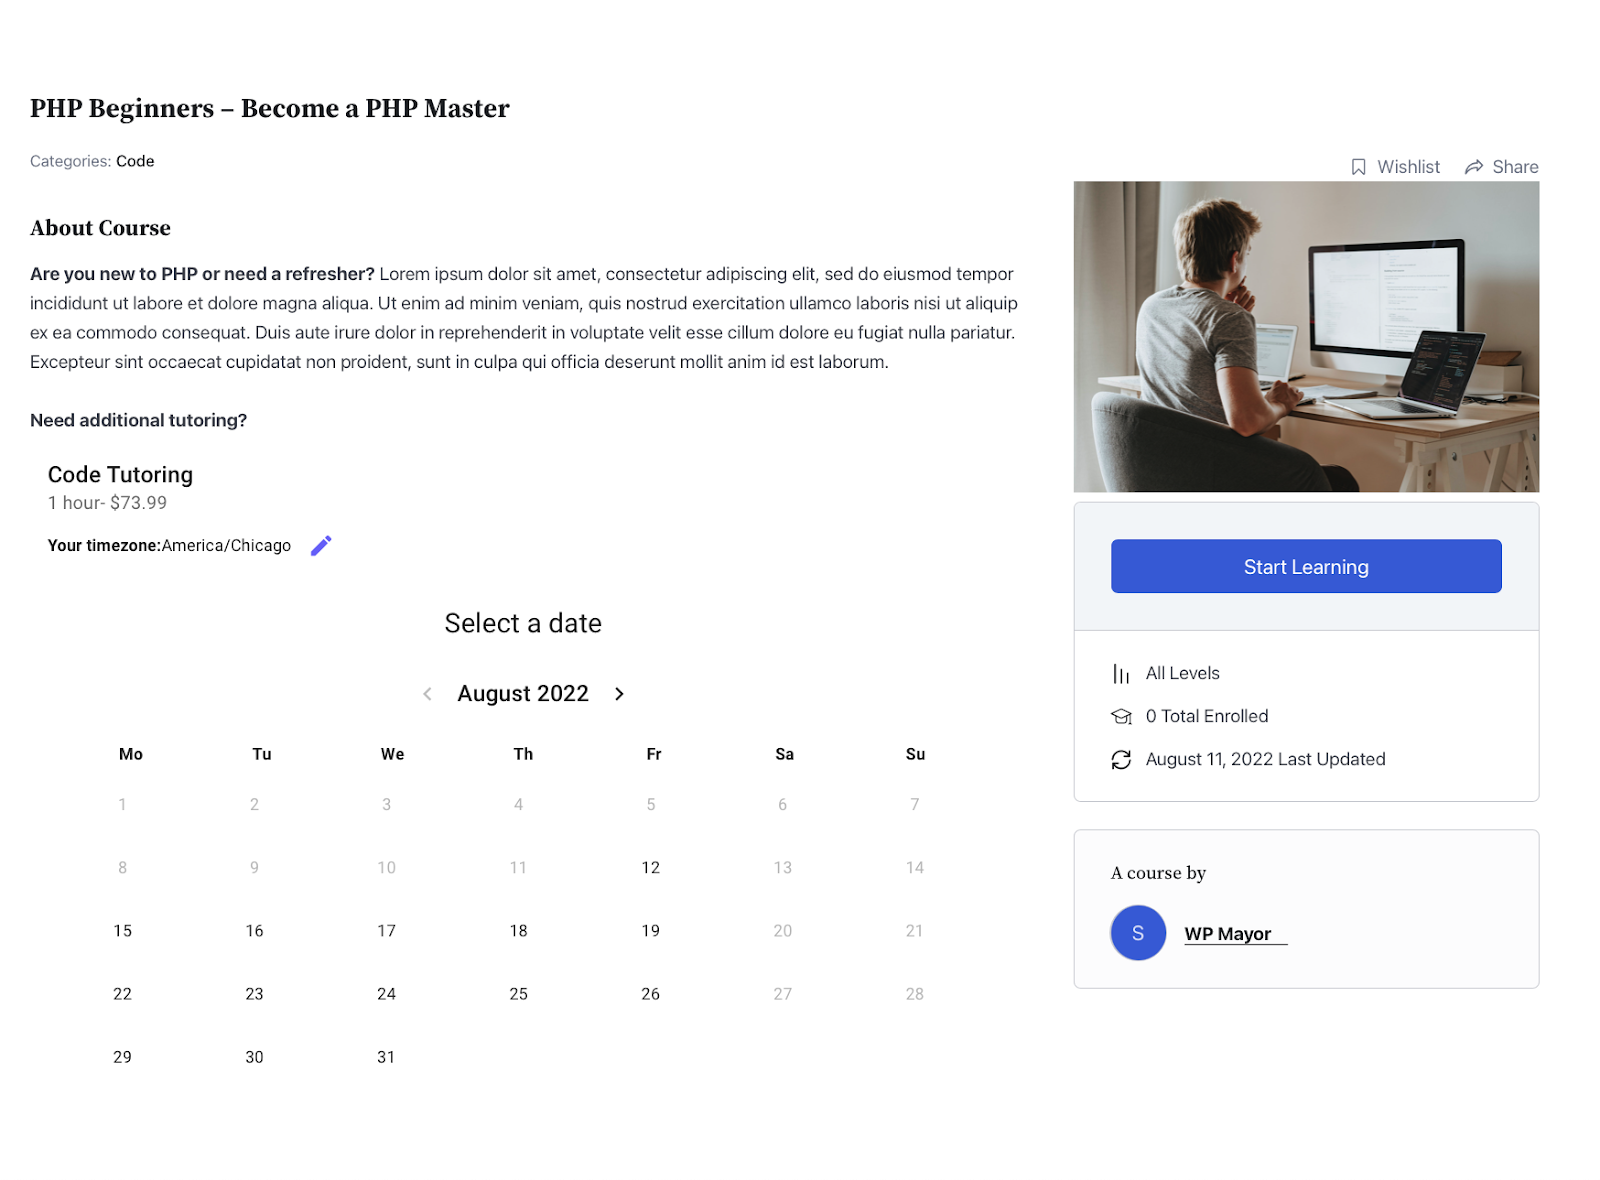
Also, you can see what a finished course page looks like on that frontend:

Earning money from your courses
Sure, you can offer your courses for free if you like. However, if you want to earn income from your hard work, the Tutor LMS plugin has options.
There are options for using WooCommerce, Paid Membership Pro, Easy Digital Download, WooCommerce Subscription, and Restrict Content Pro. Just navigate to Tutor LMS>Settings>Monetization. You’ll need to have the appropriate plugin installed before seeing the settings for that option.

Host Your Own Course Content with An LMS Plugin
We’ve covered a lot here, and that’s because Tutor LMS is such a feature-rich plugin. It’s worth exploring all of the available options, even if you don’t use them right away.
You can now host your own using an LMS plugin rather than sign up with someone else’s proprietary eLearning course site. You can own your content and offer a robust, beautifully-designed eLearning website on your WordPress site.
We hope you’ll take advantage of this plugin to offer your own courses. Comment below with your thoughts and questions on using Tutor LMS!
