


Elementor just released its new Pro 3.5 update. The update’s aim is to bring new customization features to its WooCommerce builder.
When Elementor began working alongside WooCommerce in 2018, its primary focus was product presentation and archiving page templates. However, since then, eCommerce has skyrocketed in popularity, a trend that’s predicted to continue. In response, Elementor got to work on this latest update to allow for a more customizable user experience.
As you’ll soon see, Elementor’s most notable changes concern its WooCommerce ‘Cart’, ‘Checkout,’ and ‘My Account’ widgets. With that in mind, let’s dig deeper into exactly what this new update has to offer…
The Cart Widget

The cart widget is a feature which is very common in most eCommerce sites. It provides visitors with an overview of all the products or services they’ve added to their basket.
Elementor Pro has now added the Cart widget which replaces the default WooCommerce cart page.
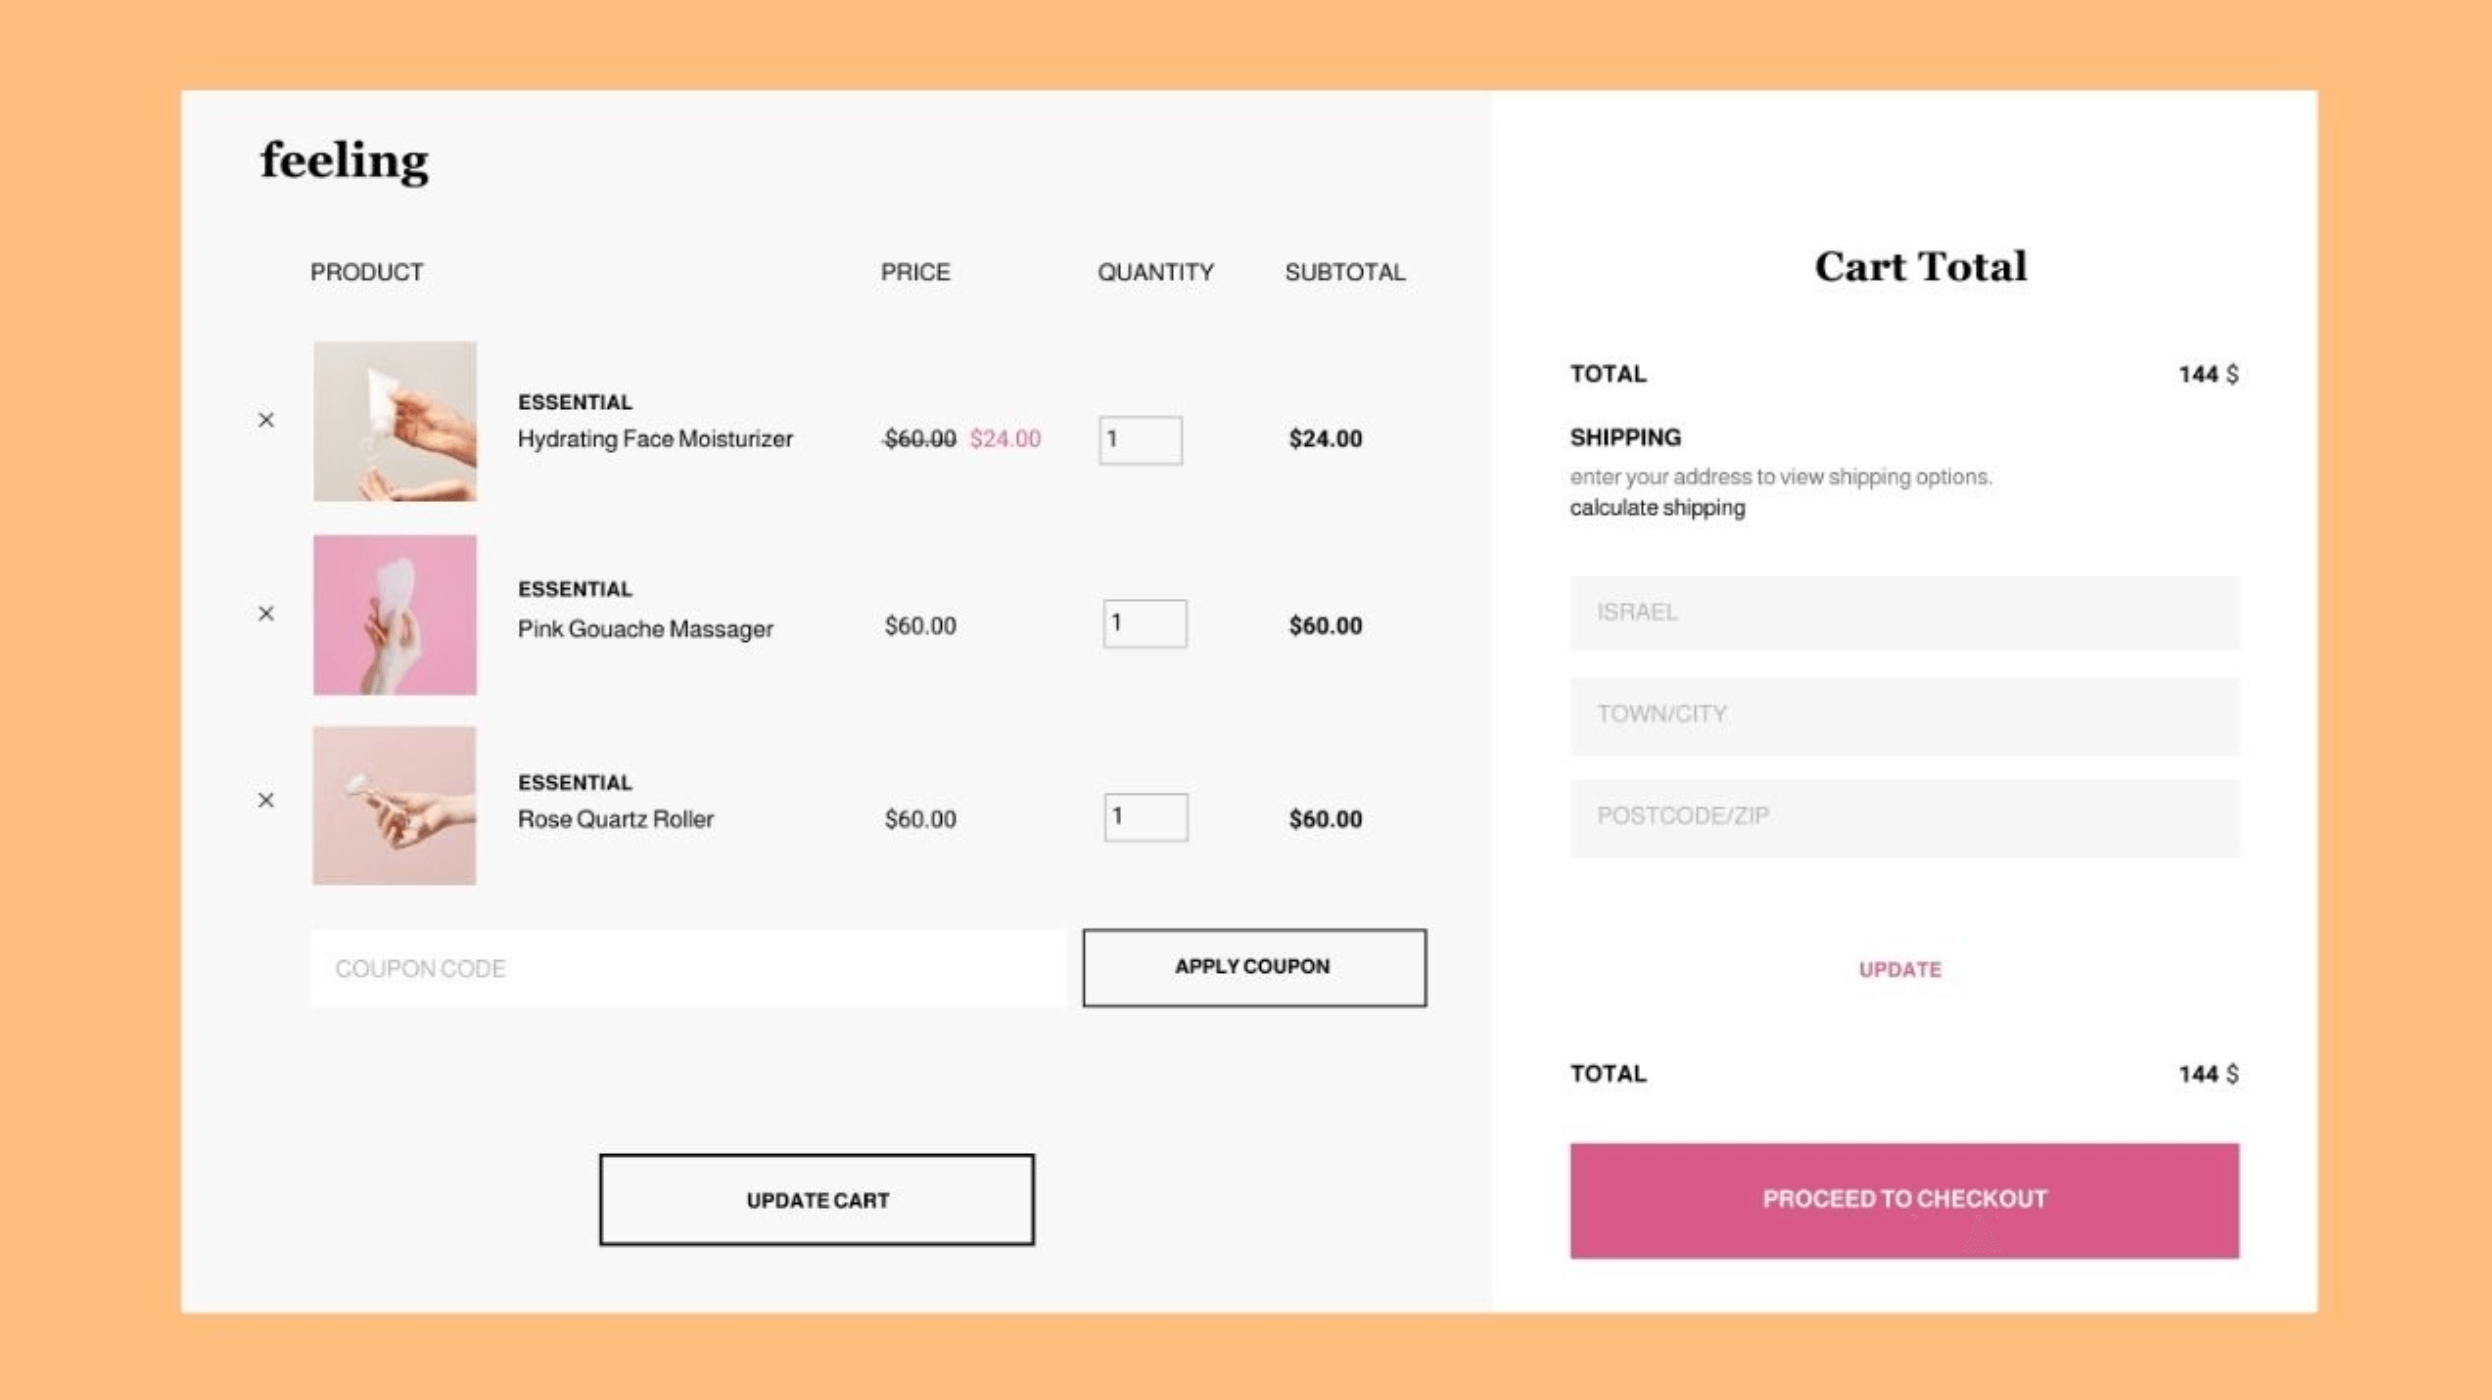
You can choose between one of two layouts and change the style of all your form fields, including their typography and colors. Through use of this widget, you can add or remove cart buttons, adjust totals, and add coupons, depending on your preference.
You can also decide on whether your cart offers automatic or manual cart updates. This means that when customers add new items to their cart, it will either calculate their new total instantly, or they’ll have to press an update button to get a new total.
Once you’re happy with your cart design, you can save it as your default WooCommerce cart from Elementor’s editor.
The Checkout Widget
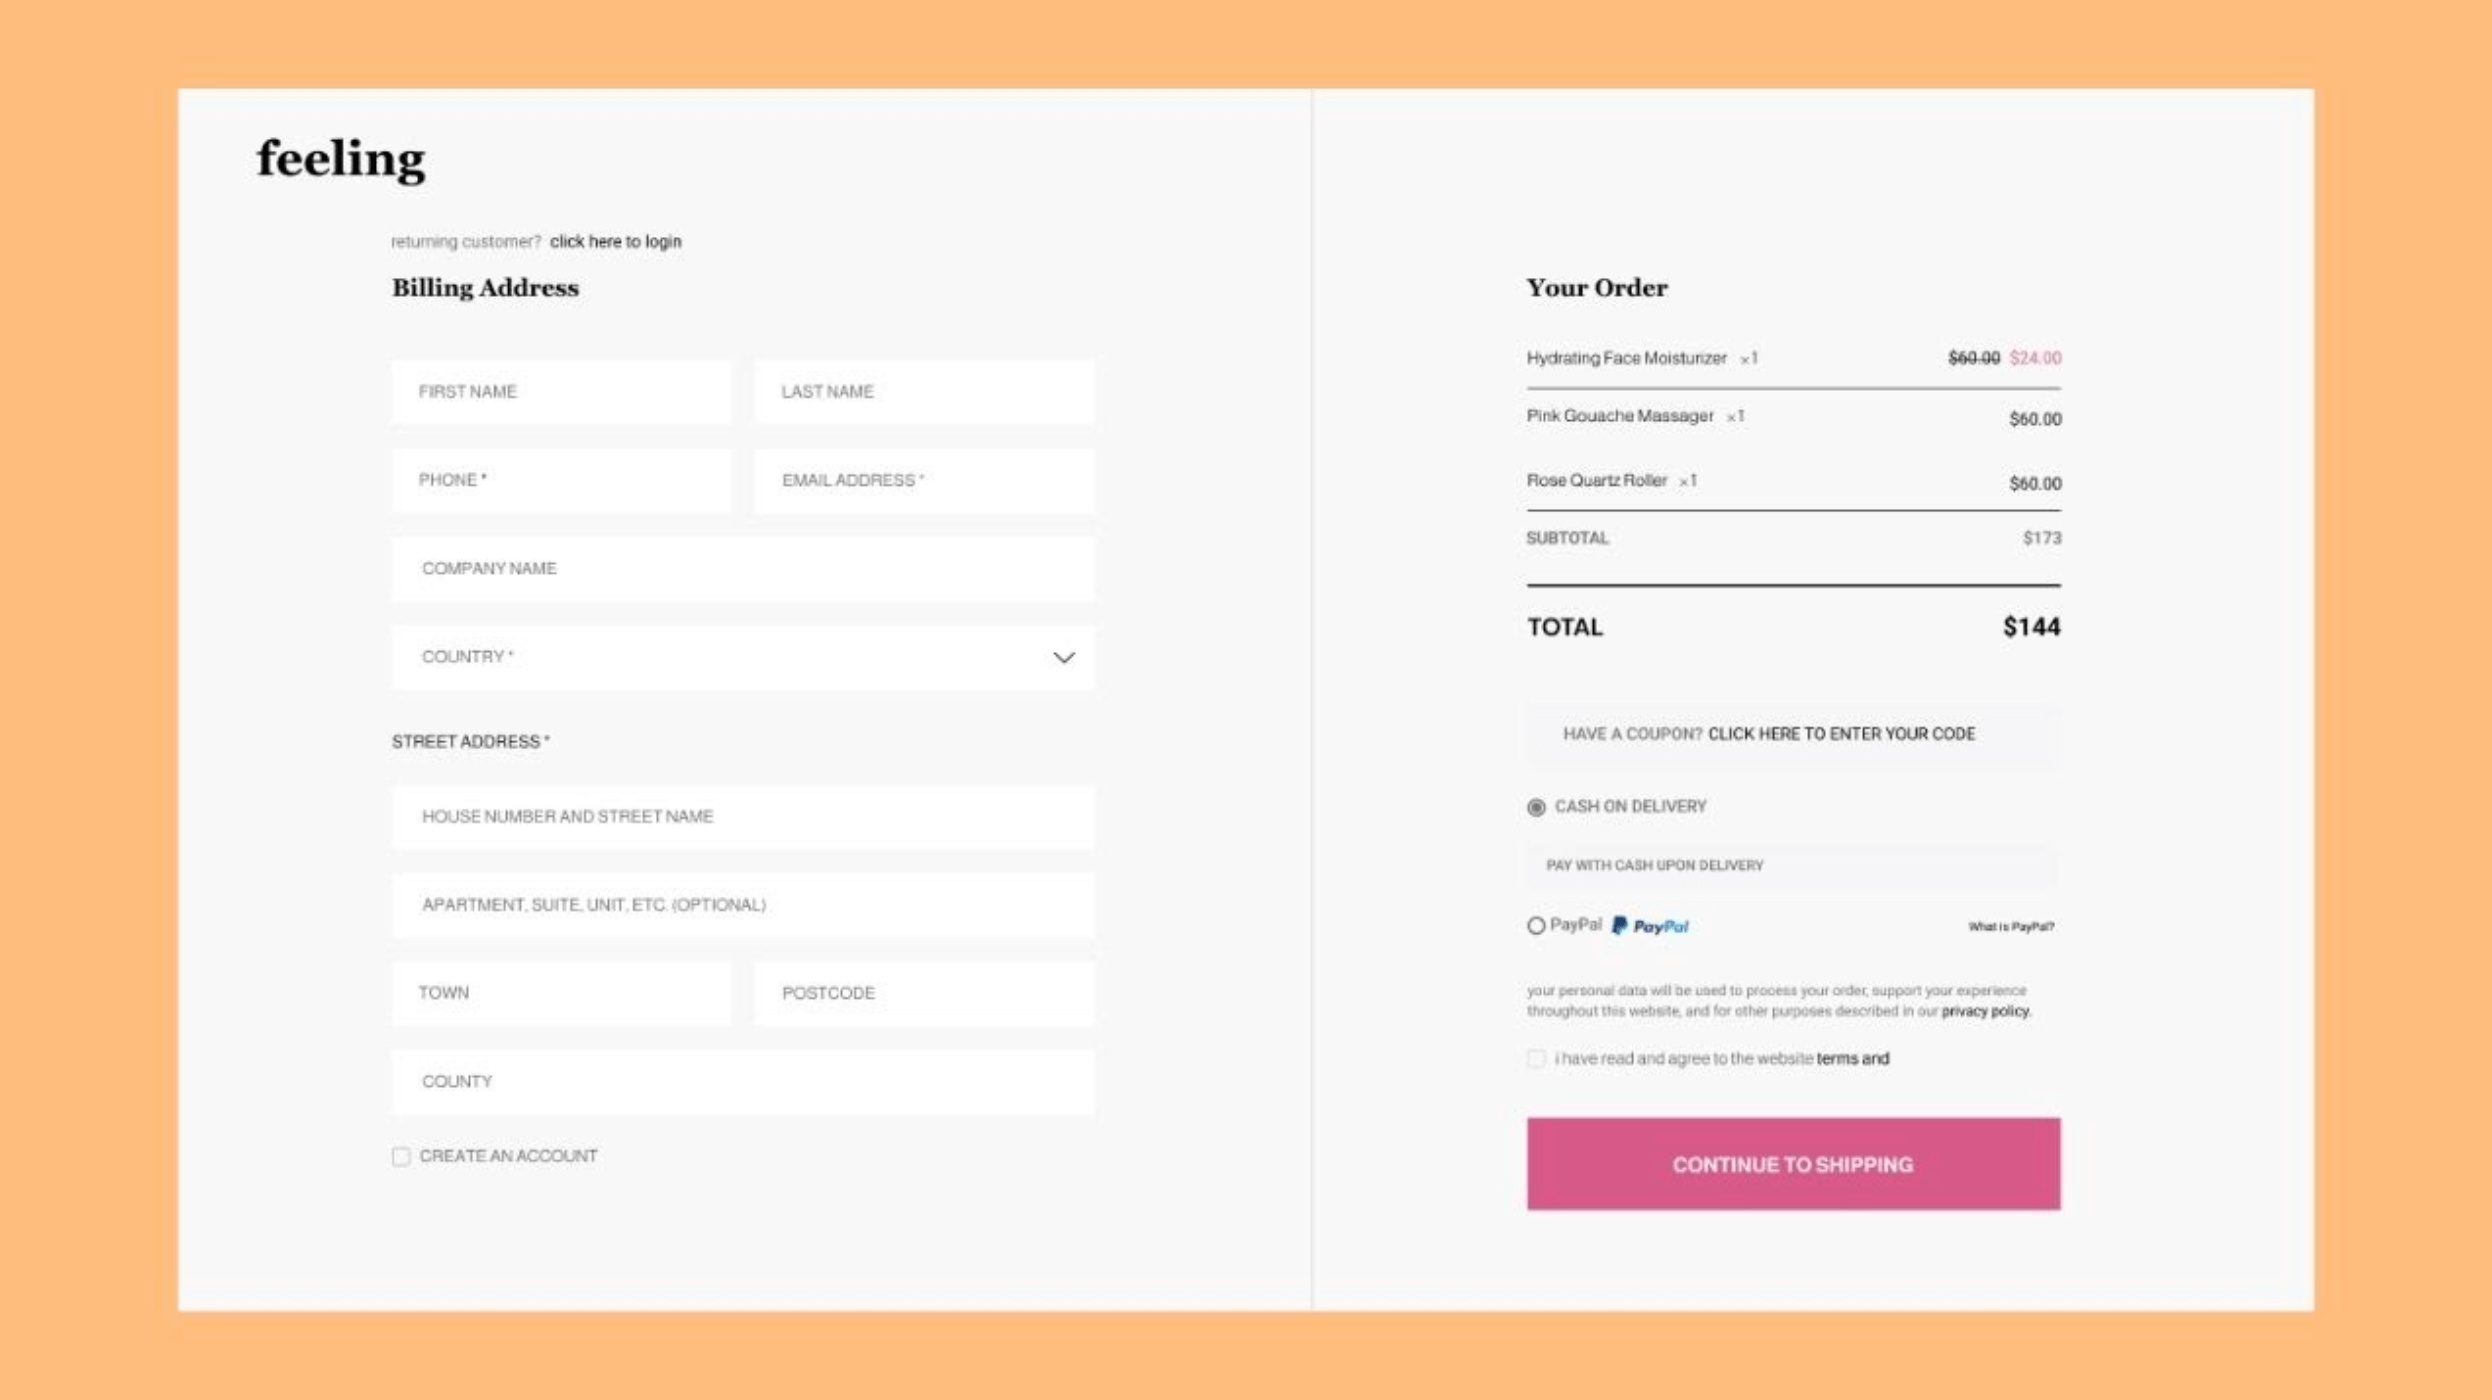
Elementor’s latest update also allows you to modify your checkout page’s design using the WooCommerce checkout widget (which is accessible from Elementor’s editor).
The checkout page is one of the most important pages of your eCommerce store. Enhancing its design can help your conversion rate skyrocket.
Through Elementor’s checkout widget, you can adjust the color, typography, and layout without having to write a single line of code. The benefit of this is that it’s much easier to ensure the design of your checkout page is consistent with the rest of your store.
This is great for creating a more coherent and memorable brand which, in turn, goes a long way to building credibility and customer trust.
You can change the column layout from one column to two. You can also make the columns sticky, so they stay with website visitors as they scroll down the page.
On top of that, you can also change form field labels and customize their look. For instance, you can modify the font, the background color of user entry fields and sections, field titles, alignment, and field size.
You’ll also benefit from a single-click page configuration that enables you to set your newly designed checkout page as your default WooCommerce checkout page. You can handle all of this from the convenience of Elementor’s editor.
The Account Widget

You can now customize the ‘My Account’ page too. This is the first page your customers will go to when they want to make changes to their orders, update their personal details, and check up on past orders. Now you can personalize this page so that its design is harmonious with the rest of your shop.
Each section of the page can be individually styled, including typography, color, and layout. But, best of all, while you’re editing, you can see each tab (i.e., customer orders, account details, addresses, etc.) side by side to produce a more coherent design. For example, in the past, each tab in the ‘My Account’ section had a separate page that you had to change to edit, but this is no longer the case.
One limitation is that, at the moment, while you can view all of the tabs (i.e., orders, account details, etc.) together in preview mode, you can’t actually see their section’s content simultaneously, which makes the editing process slightly more laborious.
Site Settings
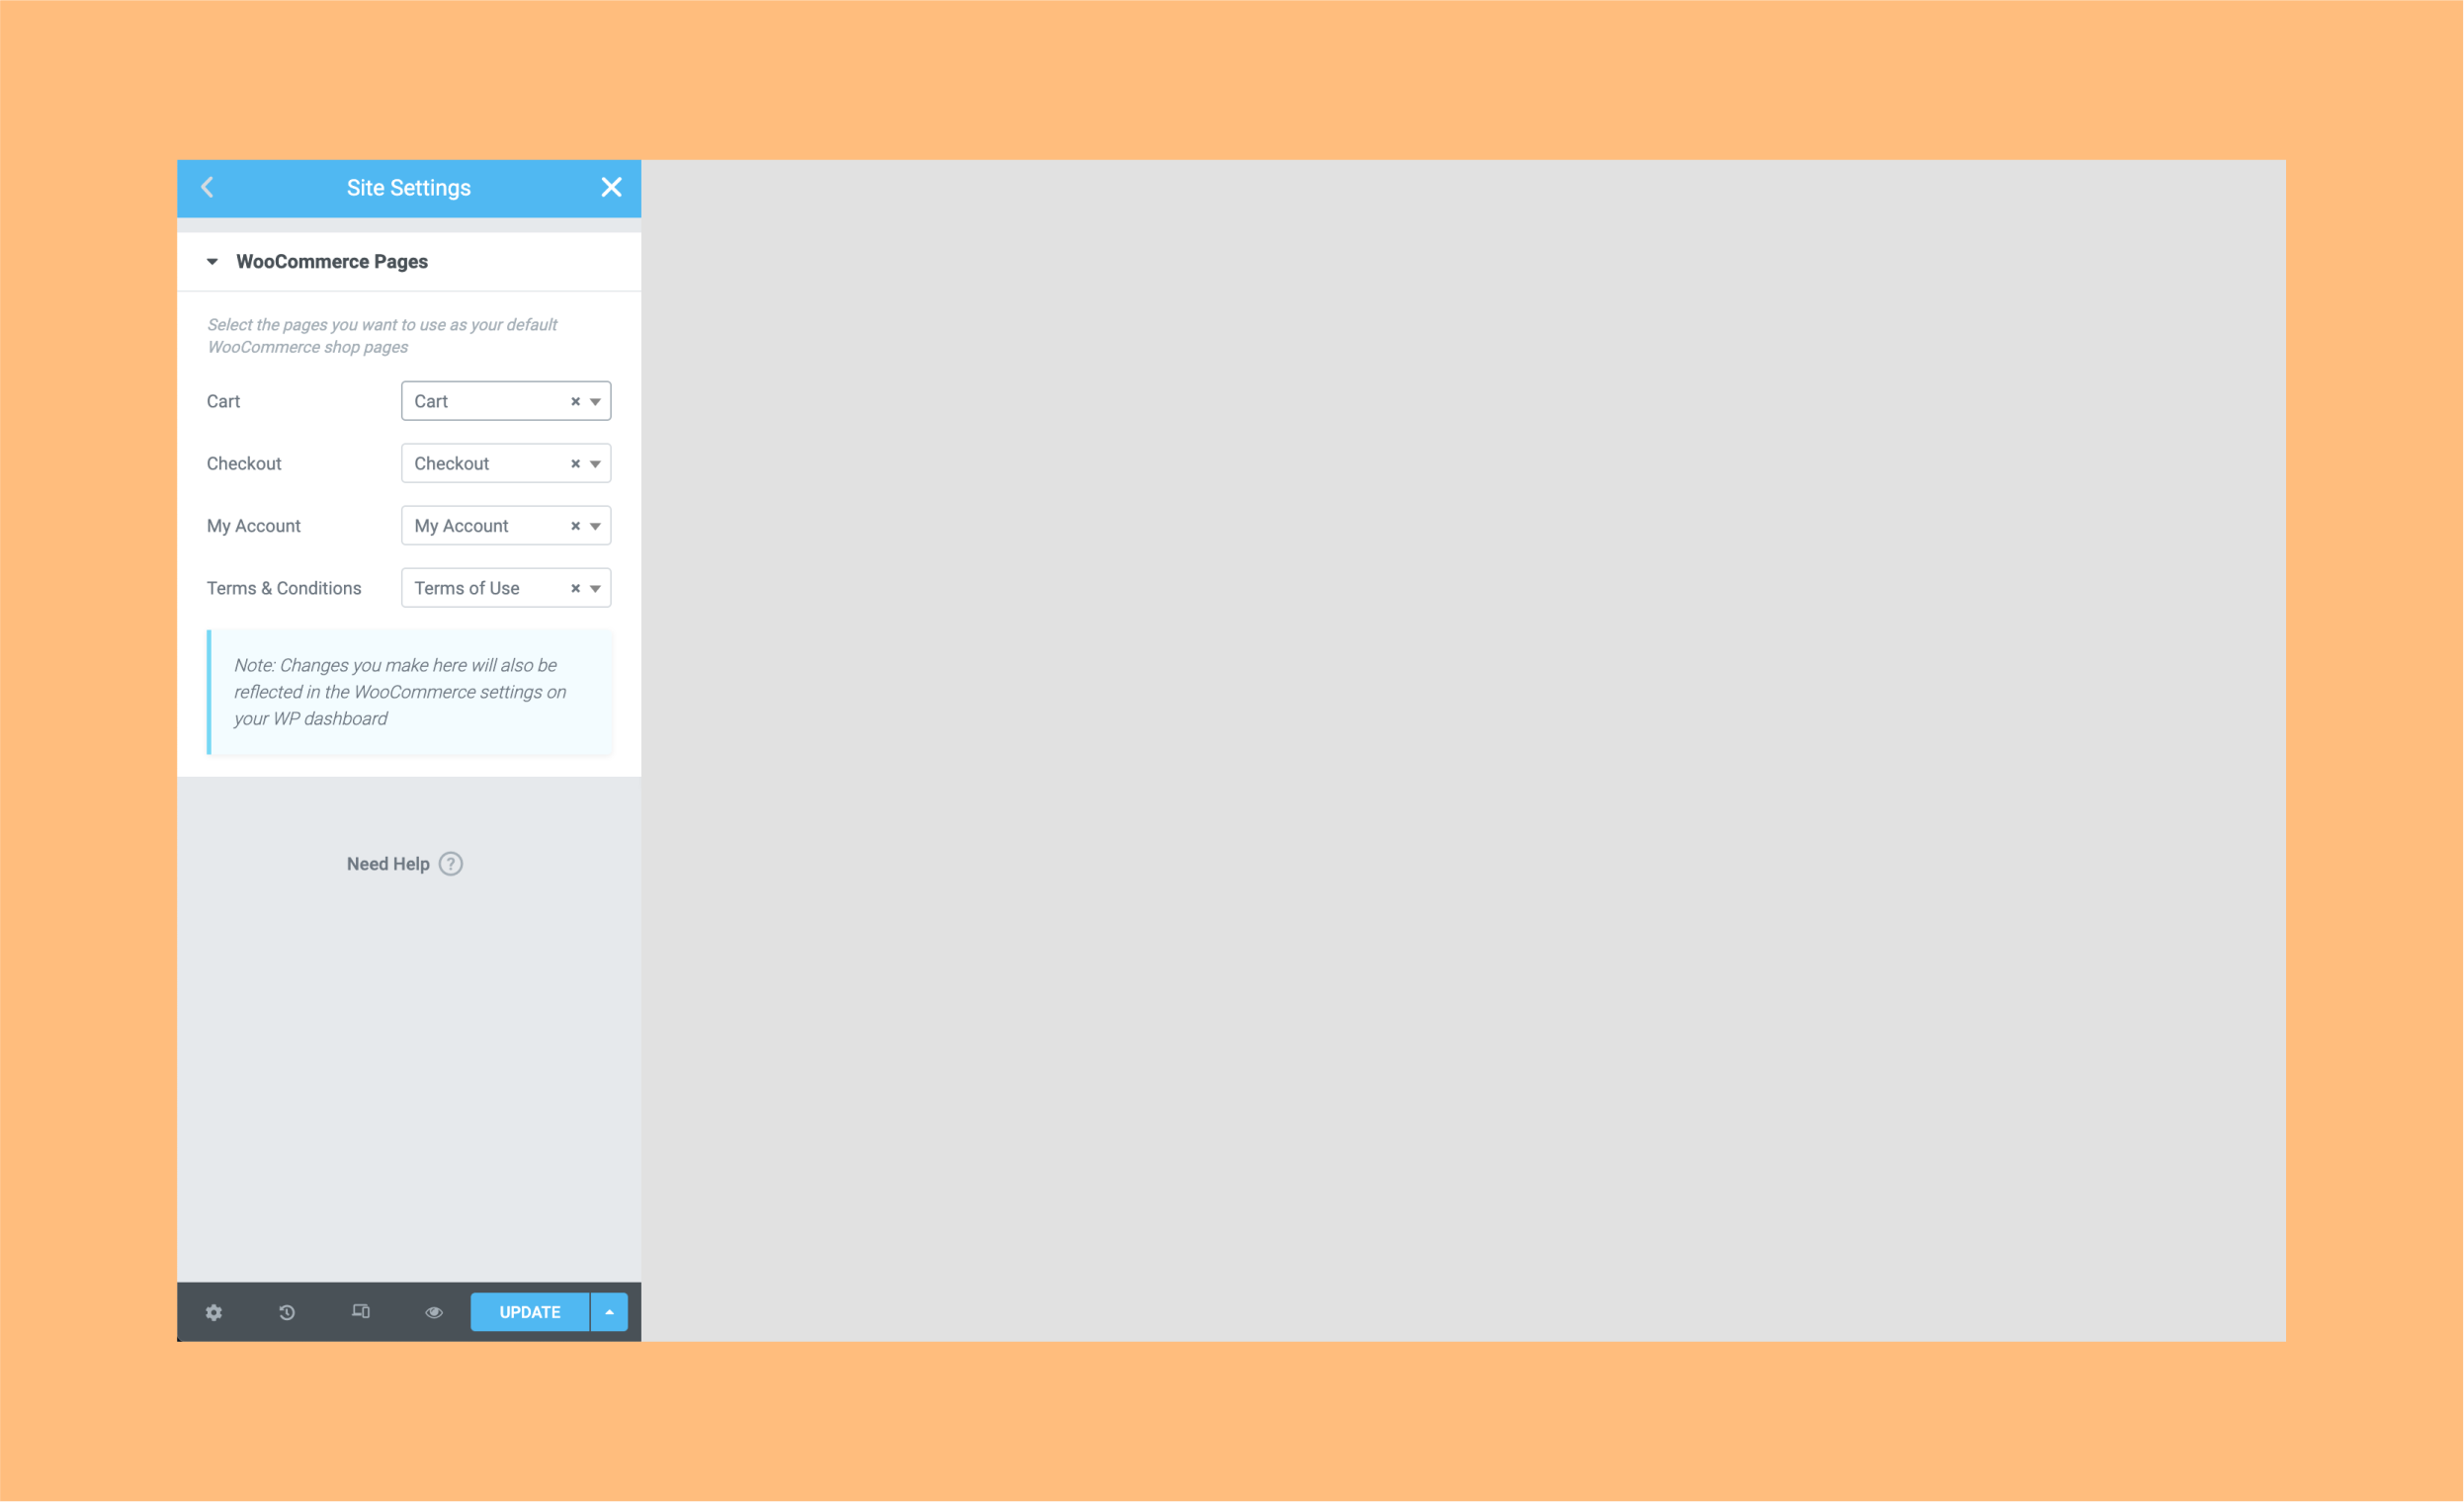
Lastly, you can now select WooCommerce pages inside Elementor to configure your default ‘Checkout,’ ‘Cart,’ and ‘My Account’ pages.
In addition, you can also create new WooCommerce pages from inside Elementor and sync updates with WooCommerce. Needless to say, this massively streamlines your workflow because you don’t have to leave Elementor to create new pages.
Elementor Pro 3.5: Our Final Thoughts
It’s important to note that the widgets mentioned in this article work best with the Hello theme. Although you can use other themes, you may experience some layout and style issues.
All in all, the new customizable widgets for your WooCommerce Cart, Checkout, and My Accounts pages make it much easier to create a unified brand experience without having to leave Elementor. And most importantly … no coding is required!
