


Searching for a way to convert Gravity Forms to PDF? That is, a way to take some or all of the information in a form submission and plug it into a PDF template?
This functionality can be helpful for everything from applications to contracts, other legal documents, and more.
Instead of wasting time with paper forms or unstructured data, you can just create a form that collects all the information you need and plug it right into a PDF document. You’ll even be able to collect real signatures if needed.
In this tutorial, we’ll show you step-by-step how to convert Gravity Forms to PDF with zero technical knowledge required.
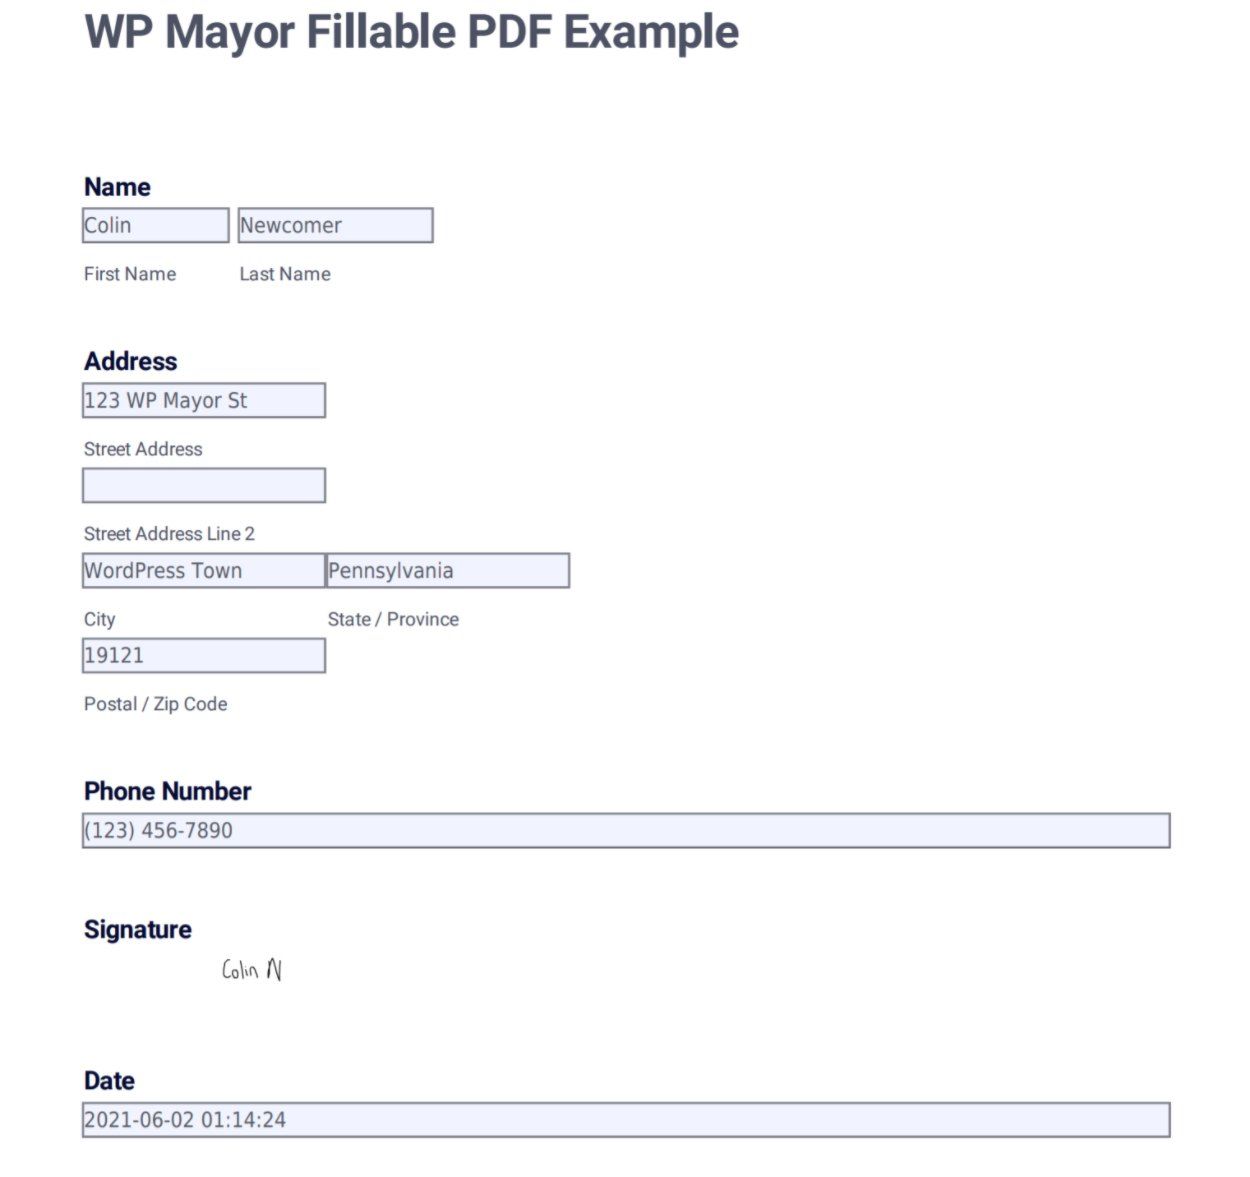
Here’s an example of a filled-in PDF that you’ll be able to generate from a Gravity Forms submission by the end of this post:

How to Export Gravity Forms to PDF With Fillable PDF Templates
Now, let’s get into the step-by-step guide for how to start generating custom PDFs using Gravity Forms.
To set this up, you’ll need the help of a third-party Gravity Forms plugin. There are a few different options that you can choose, but we’ll be using the Fillable PDFs plugin from ForGravity for this tutorial because it’s easy to use, supports key features like signatures and conditional logic, and lets you include PDFs in confirmations and notifications.
In addition to the plugin, you’ll also need the actual fillable PDF document to which you want to add content. Then, the plugin will let you map the fields in your form to the fillable fields in your PDF document. We’ll show you how to create the document.
To get started, make sure that you’ve installed the core Gravity Forms plugin (our review) as well as the Fillable PDFs plugin from ForGravity.
Let’s go through it…
1. Create Your Fillable PDF Document
If you don’t already have the fillable PDF document that you want to use, your first step is to get that document.
If you’re trying to fill an existing form (like a W-9 document for US taxes), you can just download a fillable version of the existing document. But if you’re looking to use your own custom PDF template, you’ll need to create it.
You can use any tool that lets you create fillable PDFs for this – here are some good options:
- Adobe Acrobat – paid – a very flexible option, but it’s not free. Tutorial here.
- PDFescape – free/paid – a simple browser-based tool with no watermarks.
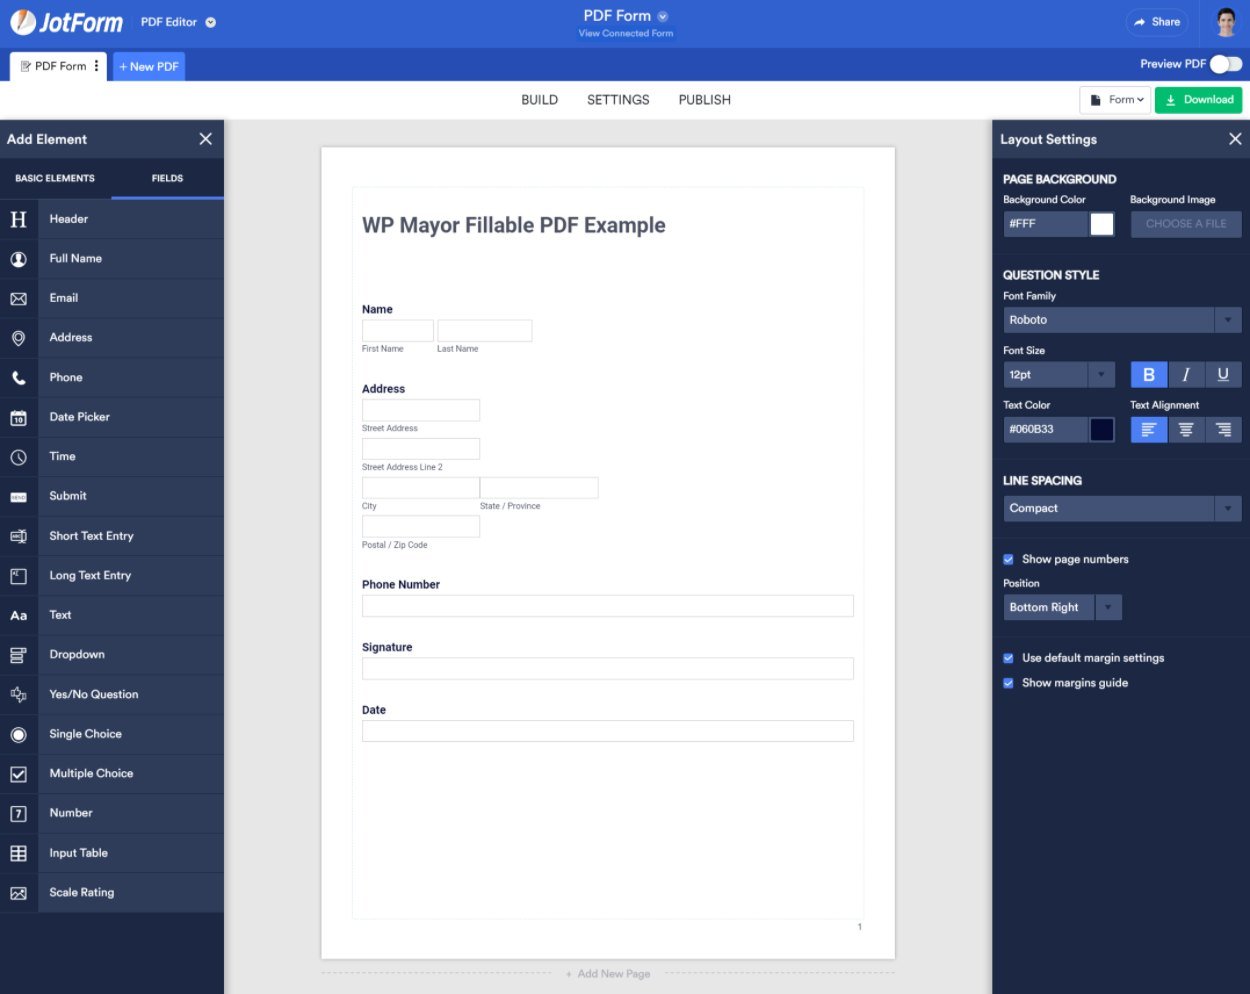
- JotForm – free/paid – a user-friendly browser-based tool, but the free version adds a JotForm watermark to the bottom of your document.
Here’s an example of how things look with the free JotForm editor:
2. Add Your Fillable PDF As a Template in WordPress
Once you have your document, you’ll do everything else from your WordPress dashboard.
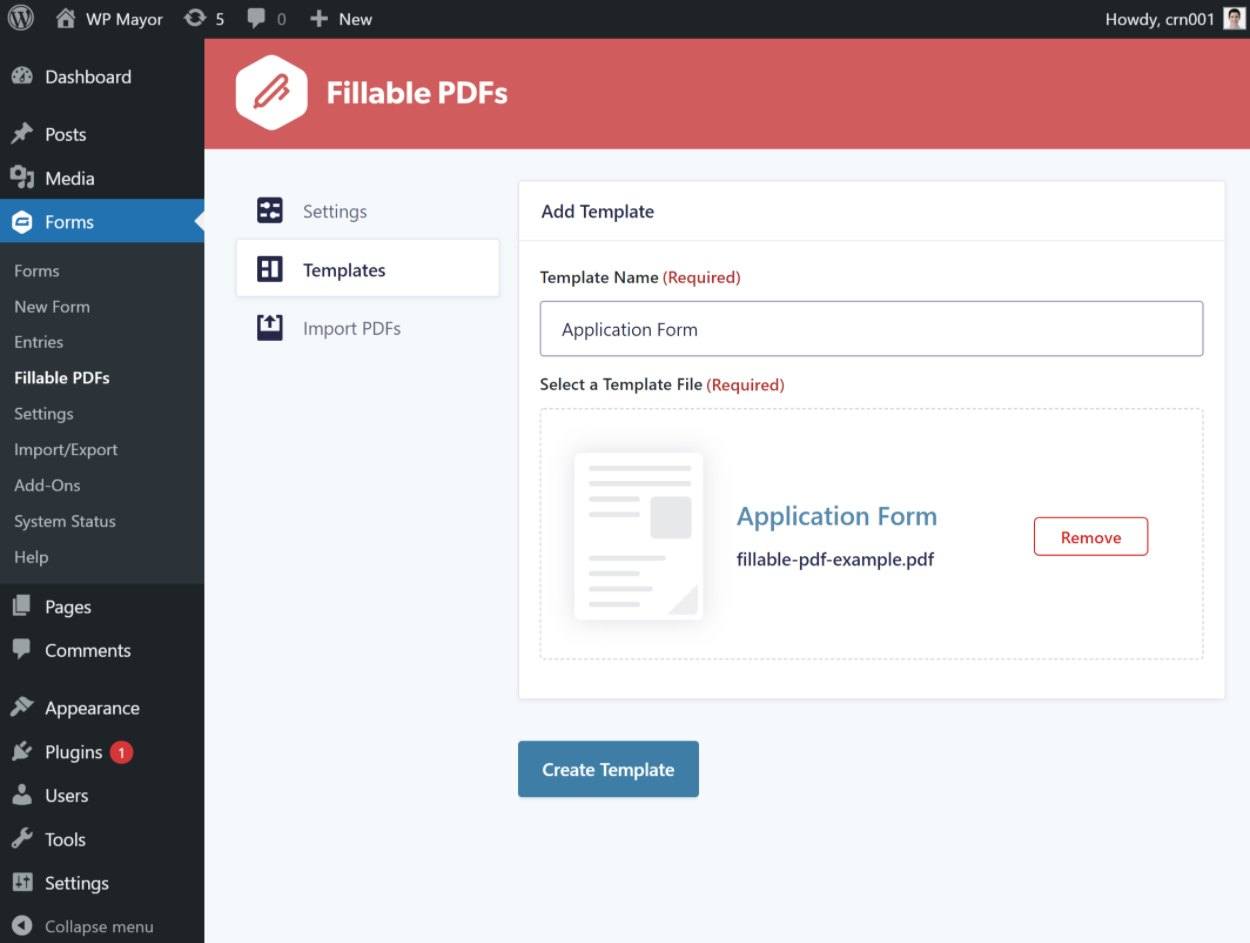
To begin, go to Forms → Fillable PDFs → Templates. You’ll need to make sure you enter your license key before you can see the settings.
Then, add a new template:

Give your template a name to help you remember it and then upload the fillable PDF file that you prepared in the previous step. Then, click Create Template:
3. Set Up Your Form in Gravity Forms
Now, you’ll do the rest of your work from the Gravity Forms interface.
To get started, create a new form or edit an existing form that you want to connect to your fillable PDF.
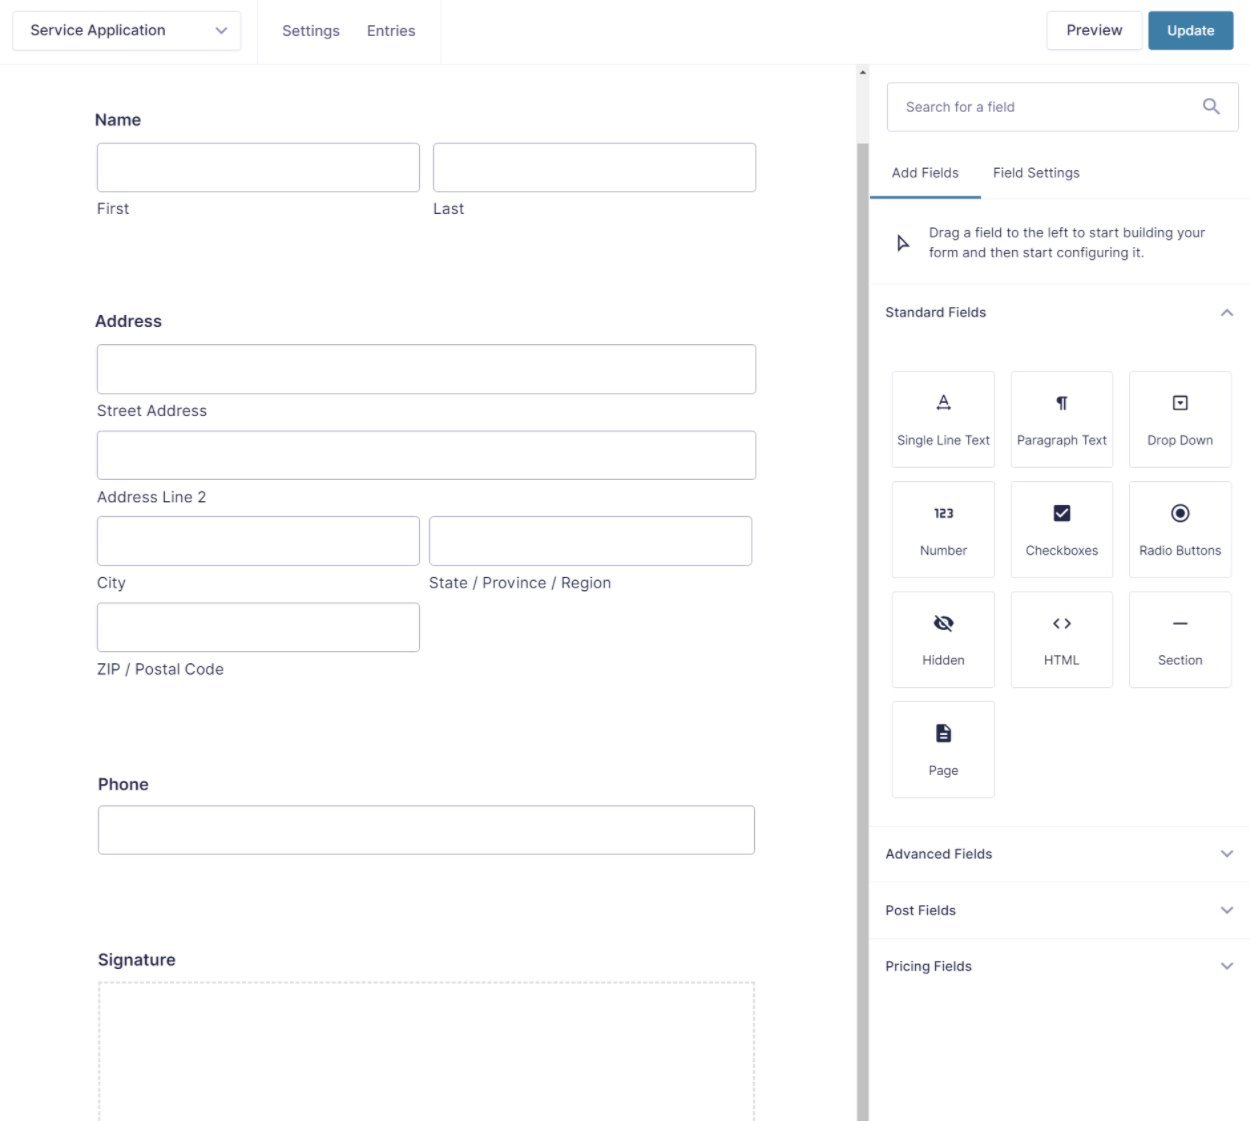
Make sure that your form has fields for all of the information that you want to map to your fillable PDF.
You can create the form manually or, to help you do this quickly, the Agency license of Fillable PDFs includes a built-in PDF import feature that lets you automatically create a new form based on the fields in your PDF (learn more here).
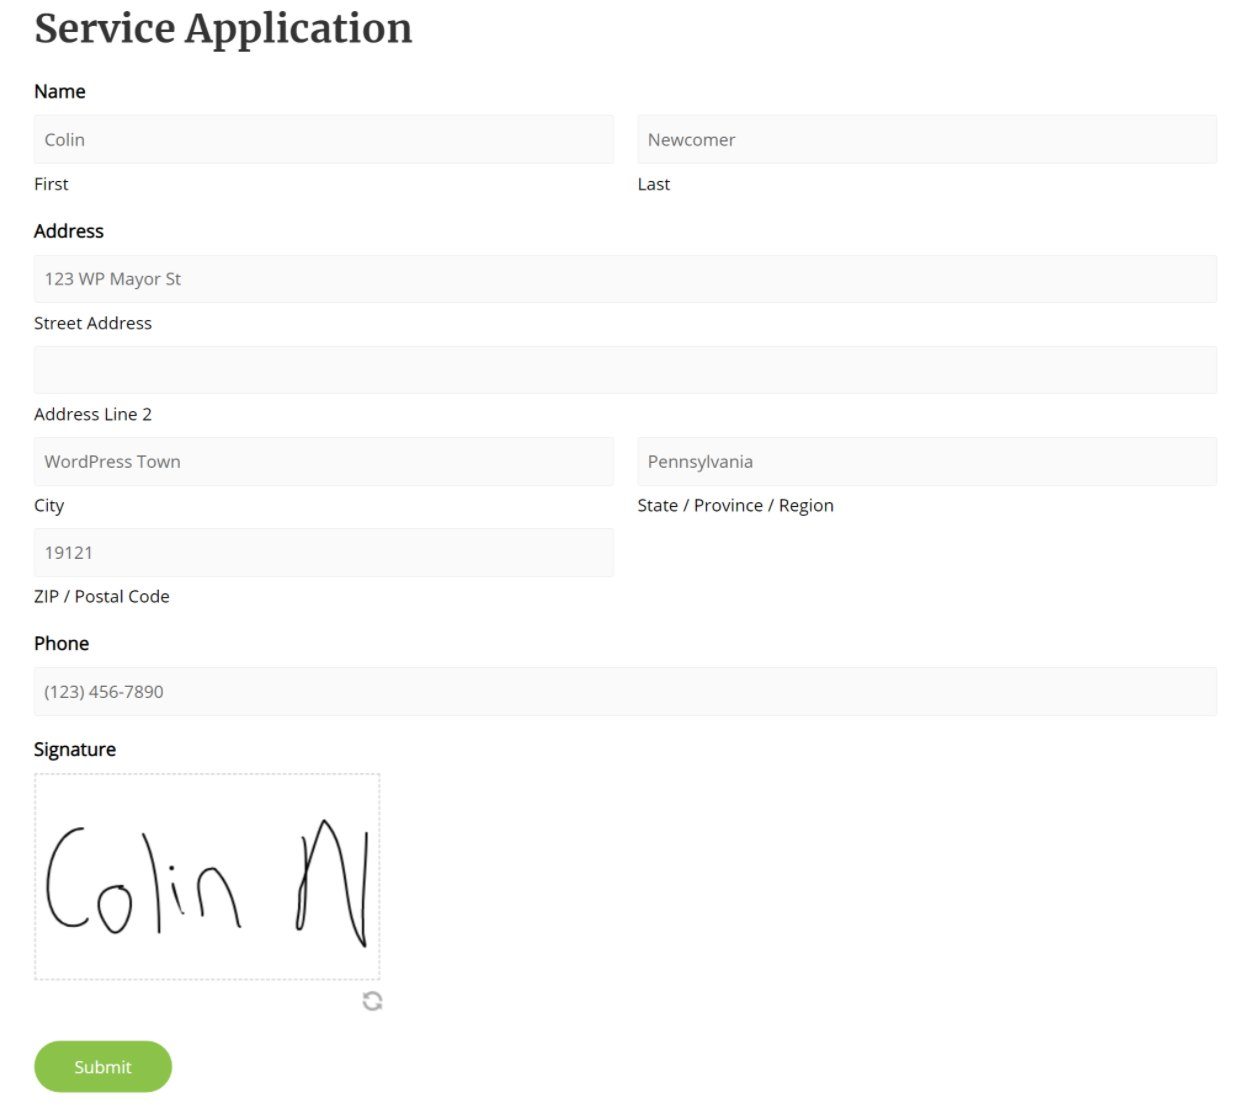
Here’s an example of what the form might look like for the example fillable PDF from above – you can see that I’m using the Gravity Forms Signature field to collect a real signature that will be added to the PDF:
4. Set Up Your Fillable PDFs Feed
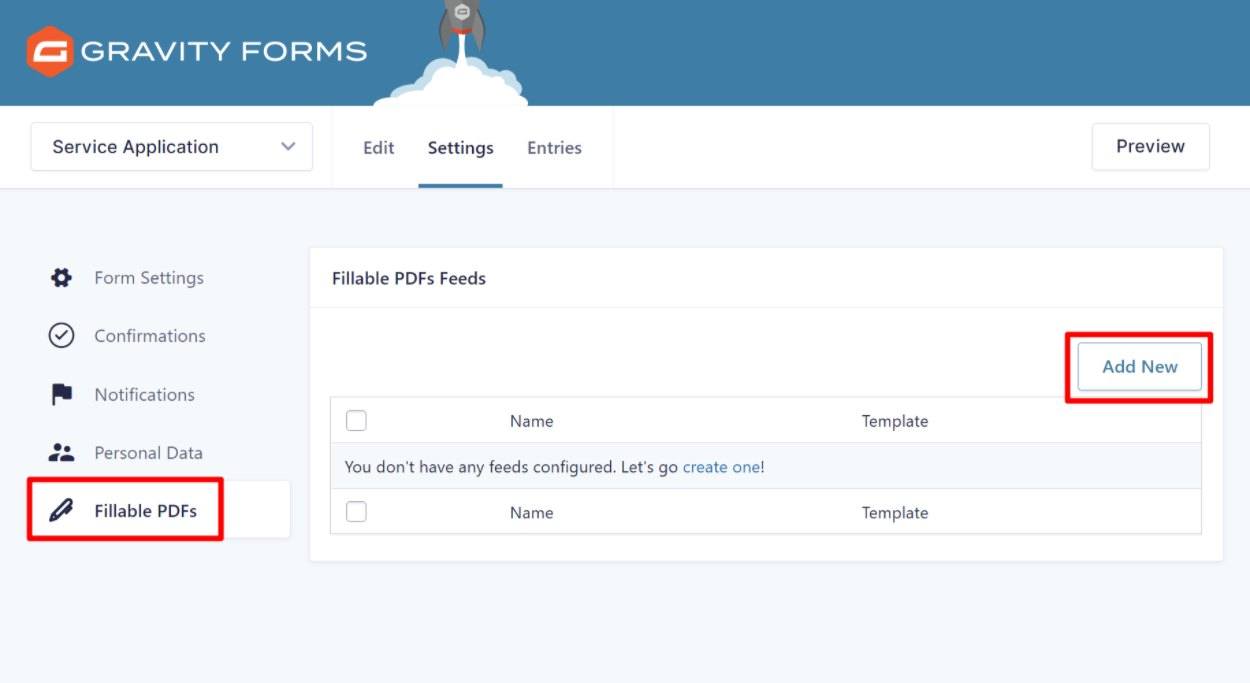
Once your form is ready, go to Settings → Fillable PDFs to connect your form to the PDF template. Then, click Add New to create a new Fillable PDFs feed:
Give it a name to help you remember it and then select the template that you added in step #2. This will open some new options.
Map Your Form Fields
First, you need to map the fields in your form to the fillable fields in your PDF template. To do that, click the Map Fields button:

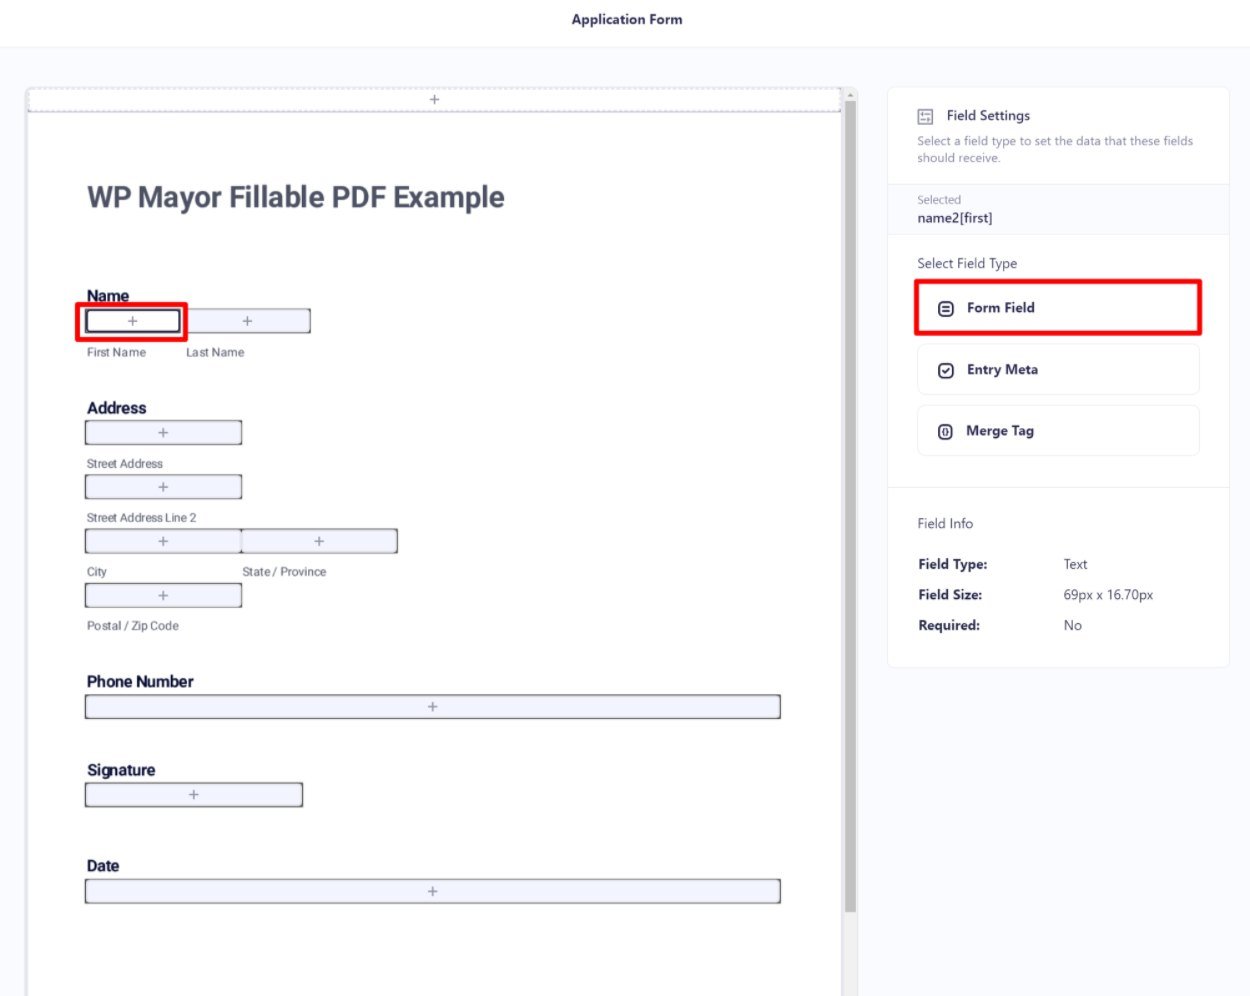
This will open a popup where you’ll see a live preview of your PDF form. To map fields, all you need to do is click on the PDF field to which you want to map a form field. That will open its settings in the sidebar.
Then, choose Form Field as the field type:
Then, you can select the actual form field using the drop-down. For this case, you would select the Name (First) field:
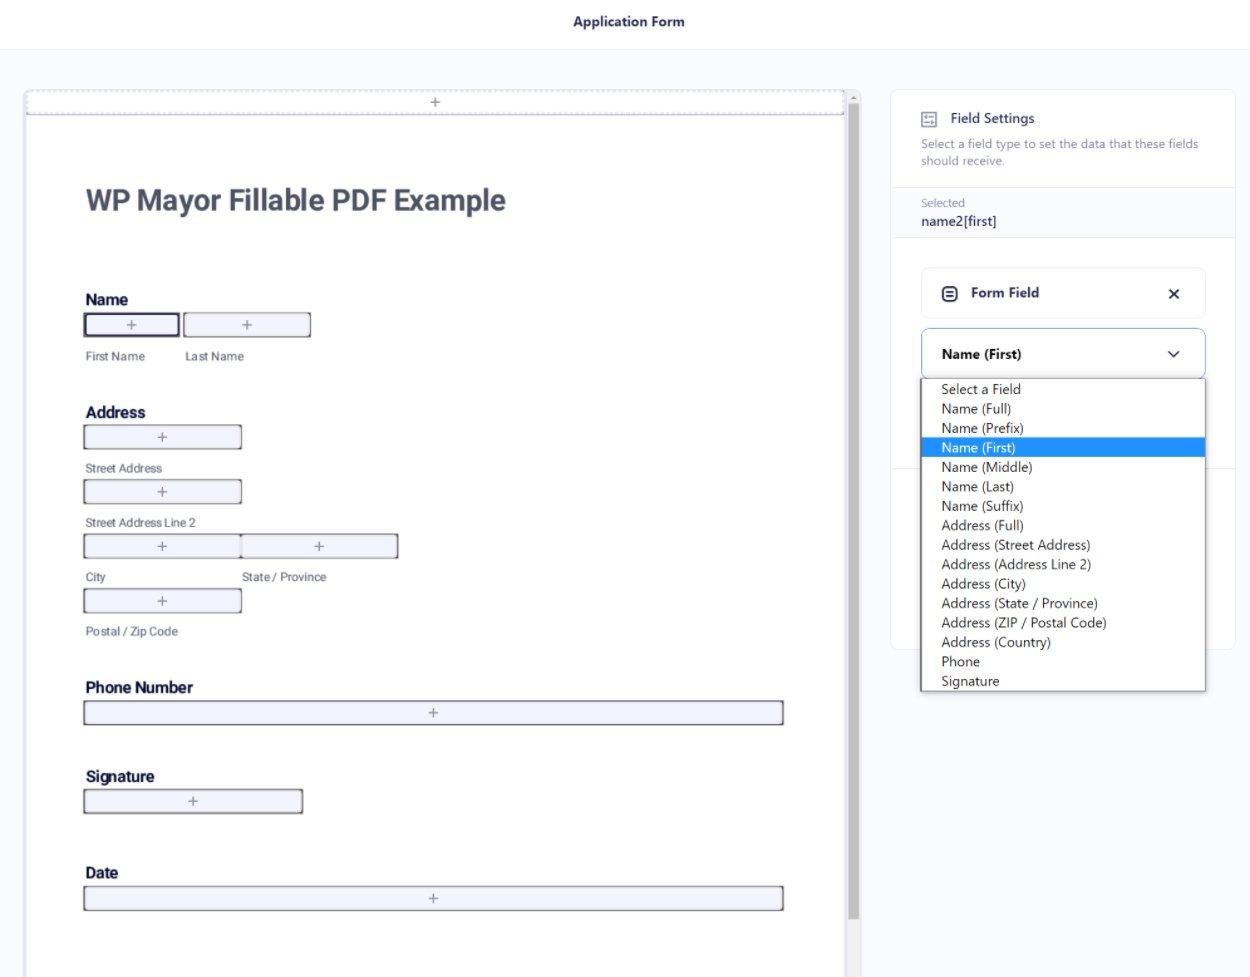
Repeat the same process to map all of the fields in your form.
If you’re using a signature field, the Fillable PDFs plugin will insert the actual signature in the field.
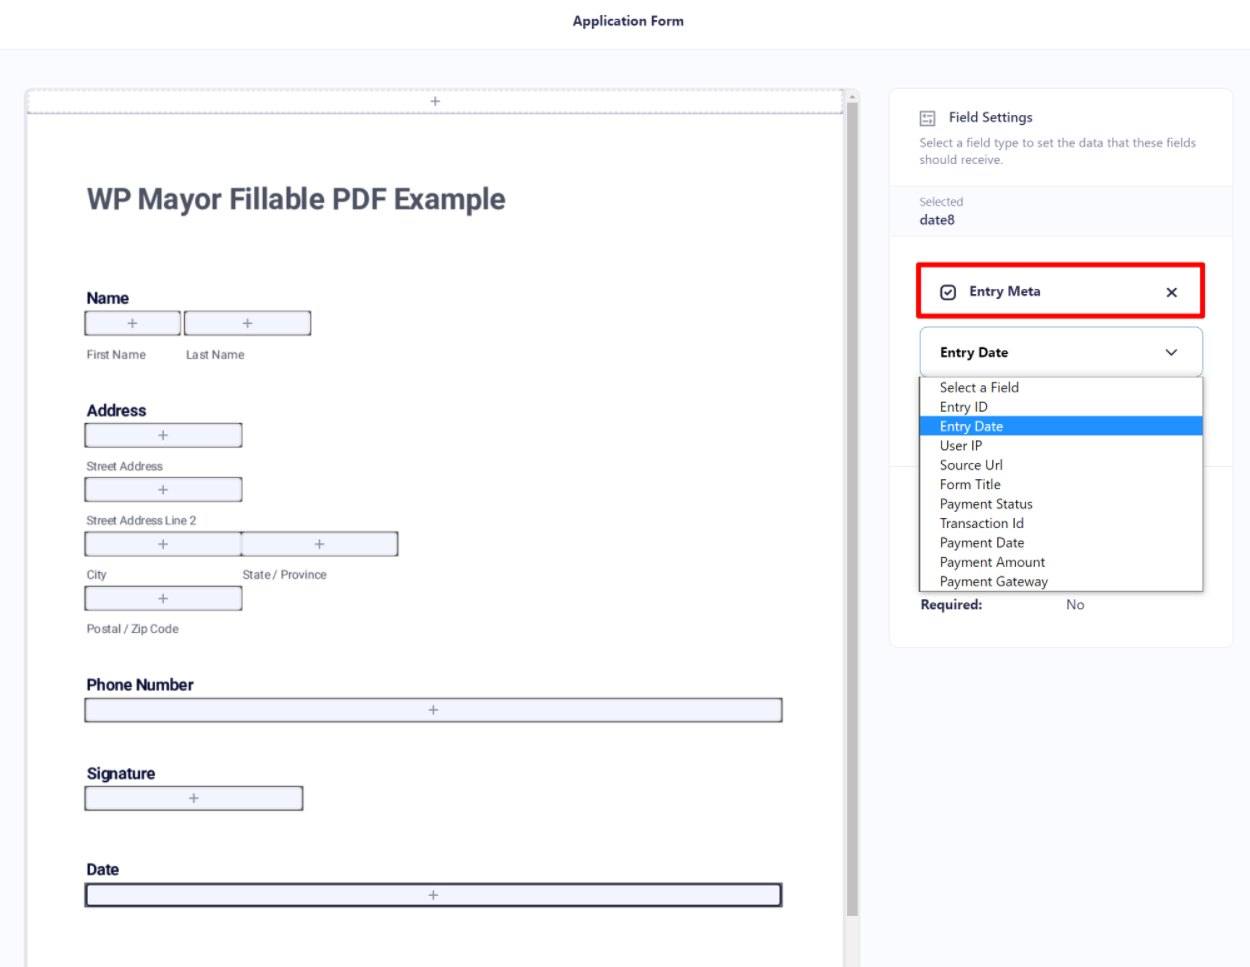
In addition to mapping form fields, you can also map entry meta or merge tags.
For example, to fill the date field, you could either let a user choose the date in the form or you could automatically fill the field with the date on which a user submitted the form (entry meta):
Once you’ve mapped all of the fields, click the Apply & Close button.
Configure Other General Settings
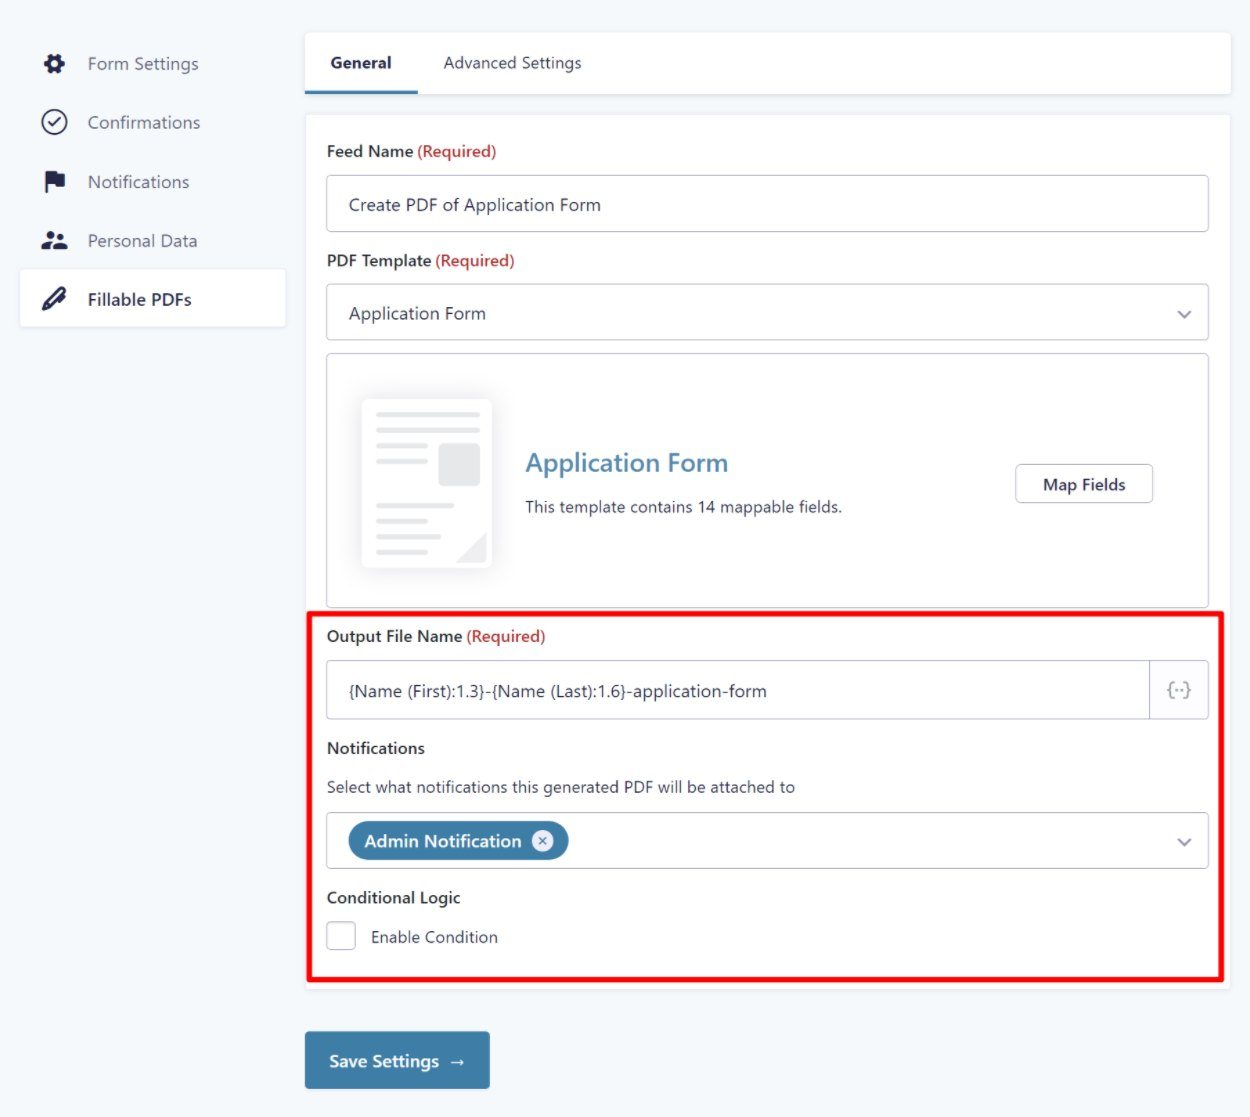
To finish things out, you’ll want to configure the output file name (which lets you use merge tags). You can also choose to attach the generated PDF file to one or more notifications.
Another useful option is conditional logic, which lets you decide whether or not to generate a PDF based on the Gravity Forms conditional logic system. This opens up two useful possibilities. You can…
- Only generate a PDF if the user answers the form a certain way.
- Use different PDF documents depending on how a user answers the form. You could do this by creating multiple Fillable PDFs feeds and applying them in different scenarios using conditional logic.
Configure Advanced Settings
To configure additional options, you can go to the Advanced Settings tab of the Fillable PDFs feed.
These are optional settings – here’s what you can do:
- Set a password to view or change the PDF. You can use merge tags here, like setting the password equal to a user’s name or even letting them add a password when they submit the form.
- Control file permissions for what people can do with the document.
- Enable/disable public access (if public, anyone can download the generated PDF).
- Remove interactive form fields.
- Regenerate the PDF file if the entry is edited.

Once you’ve made your choices, make sure to click the Save Settings option at the bottom.
5. (Optional) Display a Link to Download the PDF in Confirmations
Above, we showed you how you can attach the finished PDF to some/all of your Gravity Forms notifications.
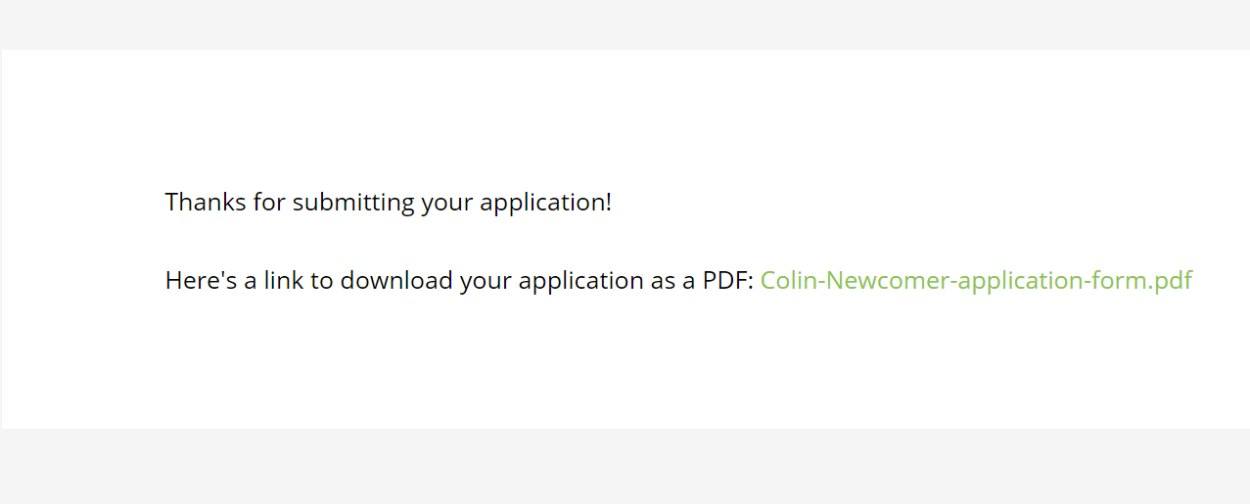
Another option is to include a download link in the form confirmation, which lets users download the form right away.
If you want to add this feature, you can set up a normal Gravity Forms confirmation and then use Fillable PDF’s merge tags to include a download link:

6. Test!
At this point, you’re pretty much done – give your form a test to make sure it’s working.
You can submit a test form submission:
If you added the merge tag to the confirmation, you should see a link to download the document:
And then you should see the information in the PDF’s form fields:
And that’s it! You just learned how to fill Gravity Forms PDF templates.
Convert Gravity Forms to PDF Today
Converting form submissions into PDF documents can be useful in a ton of different situations, including applications, contracts, and other documents.
You can reduce paperwork and streamline admin processes while still being able to include important features like document signatures.
For an easy way to convert Gravity Forms to PDF, you can use the Fillable PDFs plugin from ForGravity.
Do you still have any questions about setting up this functionality? Let us know in the comments!
