


Did you know that you can host an interactive Google map on your WordPress website?
You may already know that you can embed a Google map in any page or post simply by copying the iframe code into an HTML block. That will show the map of any area you’ve designated. However, that’s the limit of the HTML embed method.
If you’d like to take Google map locations to another level on your WordPress site, stick around because I’ll show you exactly how to do it in this article.
But first, what potential uses could you have for hosting a Google map on your site?
For one, you could show the location of your business with a pin. Or, if you’re planning an event, you can display the exact location right on the event page so visitors can easily plan ahead. Let’s say you have a travel website that tells tourists about the best museums to visit in a particular city. Or you could show hiking trails and allow users to enter their own notes about the hike?
You can do all of this with the Map Locations WordPress plugin from Creative Minds. Let’s get started!
Create Unique Maps with the Map Locations Plugin
With the Map Locations plugin, you can place multiple locations on a Google map along with specific info about the location — plus images, video, zip code routes, and searchable markers.
Using Google map integration you can create a store location system using multiple maps, creating an interactive directory of locations. The plugin also allows you to display a unique icon for each location.
In addition, the plugin supports:
- Importing and exporting locations
- Location search by zip code
- Embedding locations using shortcodes
Getting Started with Map Locations WordPress Plugin
The Map Locations plugin features a full menu of settings and hosts an easily-accessible User Guide right on your WordPress admin dashboard. There are several important steps to configure and set up your maps. The first is getting the plugin installed on your site.
Install the Map Locations Plugin
You can find and download the Map Locations plugin on its WordPress.org page. Alternatively, you can search for “cm map locations” in your dashboard under Plugins→Add New.
You can also purchase one of the premium versions of the plugin on the Creative Minds website.
Once installed and activated, you’ll find a new menu item in your left-side dashboard menu called “CM Map Locations.”
The first step in configuring the plugin is to enter your Google Maps API key. If you don’t already have one, let’s go over that now.
Get a Google Maps API Key
First, you’ll need a Google account. Since July 2018, using Google Maps, Routes, and Places data also requires you to have billing information in Google Cloud. However, you’ll have the opportunity to add that info as you create your API key.
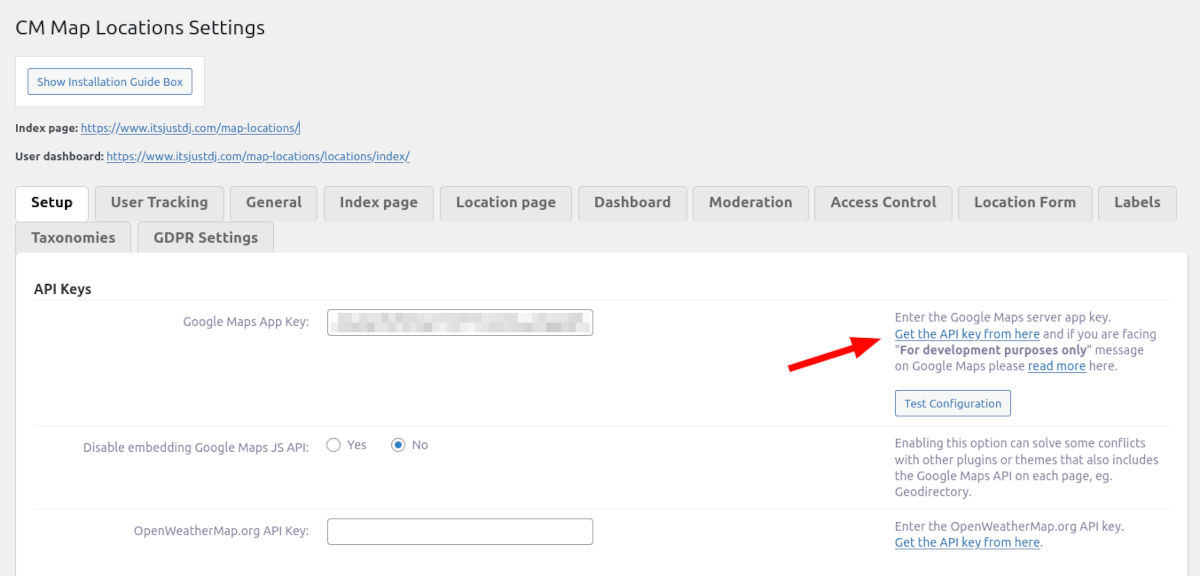
Under CM Map Locations→Settings, you’ll find a field for the API key and a link to obtain it, if you don’t already have one.
You’re going to need several API keys to use the Map Locations plugin:
- JavaScript API
- Geolocation API (For some features; requires HTTPS)
- Geocoding API
- Places API
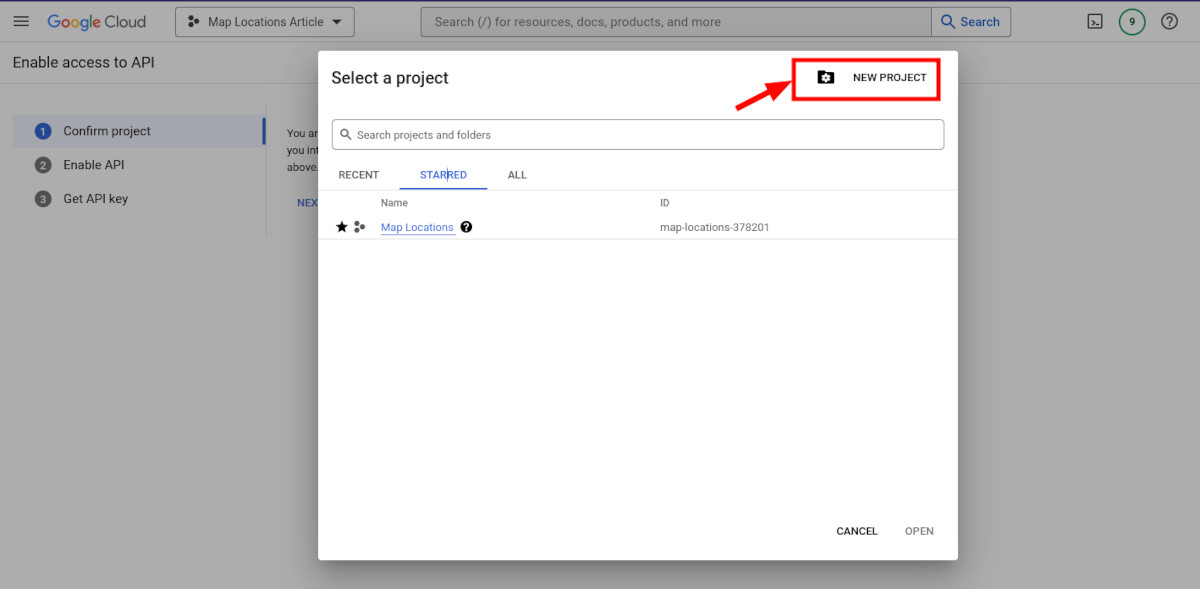
To get these keys, head to the Google Developers page.
Navigate to your project, or create a new one.
Next, navigate to APIs & Services→Library.
Select one API from the list, or use the search bar to find one of the APIs that I mentioned earlier. In the menu popup for the API, click the blue Enable button. Repeat the steps for each API.
Once you have all the APIs enabled, you need to get the key (you only need one). In the sidebar, select Credentials where you’ll see your API key listed. Copy the API key to your clipboard — you’ll paste this into your website in a moment.
First, you need to enable billing for Google Cloud as I mentioned earlier. This is an important step for the Maps Location plugin to function correctly. When logged into your Project, click the hamburger menu at the top left and select Billing. You’ll get a message prompting you to Link a billing account. Click that button and follow the prompts.
Now that you’ve completed all the steps to set up and obtain your Google API Keys, head back over to your WordPress site. In the CM Map Locations settings page, paste in your Google Maps API key and click Save at the bottom. If you like, you can test the configuration using the button on the right.
Adding a Location
The Map Locations plugin creates both an index page for visitors and for users. Once you add a location, it will be listed on those pages. Before you add a location, it’s a good idea to create at least one category for your maps.
This is as simple as adding a new post category, but these are specific to Map Locations. Create as many categories as you like under CM Map Locations→Categories. You can also add default marker icons for each category.

Once you‘ve created your categories, you can add a location. You can use the CM Map Locations menu or click + New in your admin toolbar and choose Location. On the new Location page editor, fill in the Location name and Description fields that pertain to your desired location.
Select the appropriate category from the list, and choose a Marker icon. You may also upload your own icon if you like. Next, you can add any images or videos about your location — this can come in handy for travel guide sites.
Next, scroll down to the Google map displayed on the page. Search for the location or move the map as necessary. When you have your location in sight, select one of the drawing tools and draw your location boundaries on the map.
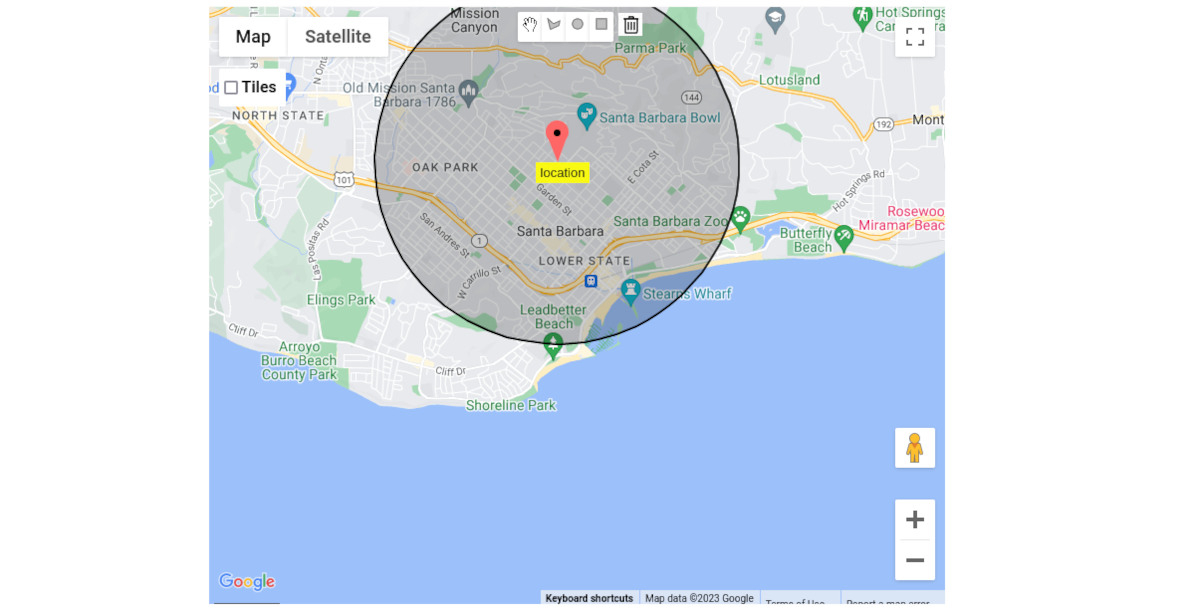
Scrolling down the page further, you’ll see accurate Latitude, Longitude, and address info for your location filled in automatically. If you like, you can add:
- Phone number
- Website
- Email address
- URL
Click the Save button and your location will be added to the list of locations available on your site. When viewing the location, your visitors will see the neatly formatted info and map.
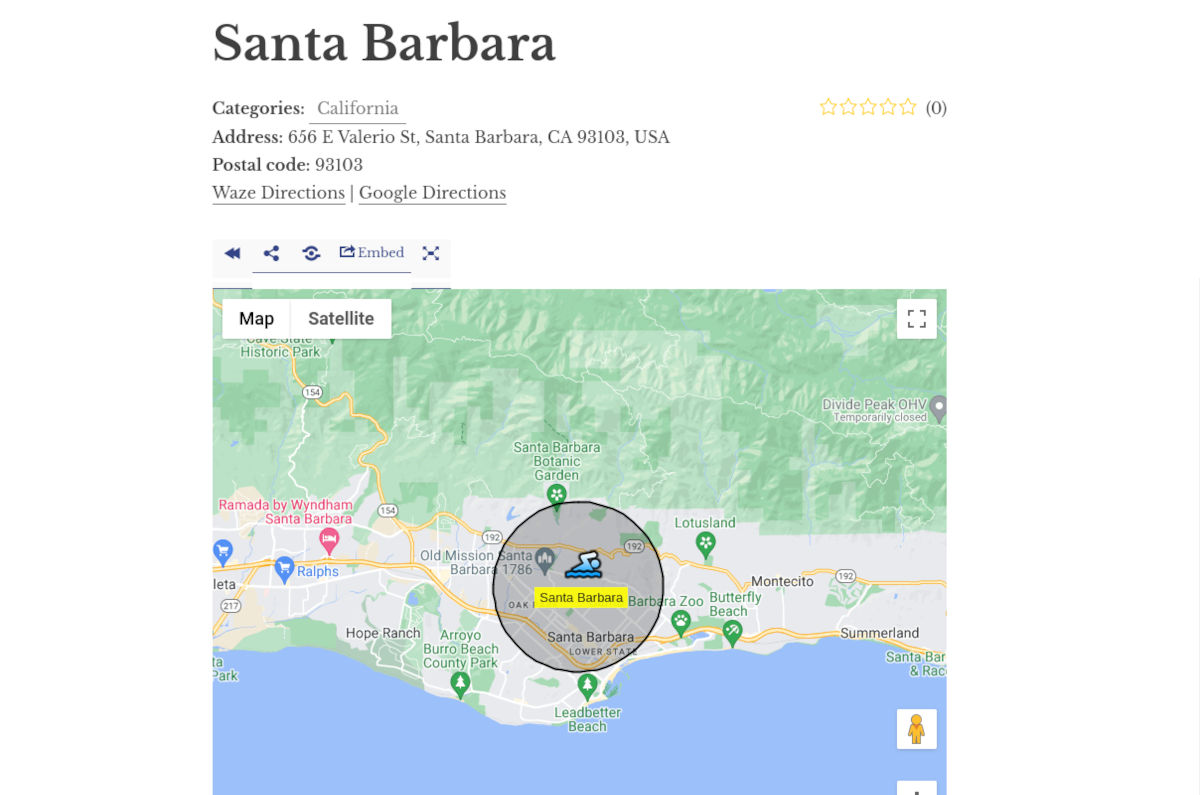
Creating Index Page
The purpose of the index page is to display a map with markers representing various locations, along with a customizable list of those locations.
The index page can be configured to show different information about each location, such as:
- Title
- Description
- Address
- Rating.
Users can interact with the map and locations list to search for specific locations or browse through all available options.
The index page can also include features such as a ZIP code radius filter and the ability to add custom URLs or directions to each location.
Display Maps Using Shortcodes
Shortcodes are WordPress-specific shortcuts that allow users to add dynamic features, such as maps with locations, to posts and pages.
Different shortcodes exist for various purposes, including displaying a location’s snippet, showing a specific location on a map, displaying maps with locations from a category, and showing current location maps.
Users can add parameters to make these shortcodes more specific, such as choosing the theme, width, and height of a map or limiting the number of locations displayed.
Below is a list of all the shortcodes and their parameters, along with samples to make it easier to understand:
Location Shortcodes:
- Snippet
- Shortcode: [cmloc-snippet]
- Use: Displays a location’s snippet.
- Filtering parameters: id
- View parameters: featured
- Sample: [cmloc-snippet id=”487″ featured=”map”]
- A Specific Location Map
- Shortcode: [cmloc-location-map]
- Use: Shows a specific location on a map.
- Filtering parameters: id
- View parameters: theme, mapheight, mapwidth, width, showtitle, showdate
- Sample: [cmloc-location-map id=1767 mapwidth=640 mapheight=480 width=700 showtitle=1 showdate=1]
- Multiple Locations Map
- Shortcode: [cmloc-locations-map]
- Use: Displays maps with locations from a chosen category.
- Filtering parameters: showonlybyparams, limit, page, category, taxonomy_key
- View parameters: theme, list, mapwidth, width, menu, tooltip, map, usertracking, from_date, to_date
- Get parameters: bgcolor, bgcolor_filter, time, time_filter, identifier, identifier_filter, from_date, to_date, hours, path
- Sample 1: [cmloc-locations-map category=”mountains”]
- Sample 2: [cmloc-locations-map list=left limit=4 page=1 category=”111″]
- Current Locations Map
- Shortcode: [cmloc-current-locations-map]
- Use: Shows the current locations maps.
- Filtering parameters: limit, page
- View parameters: theme, mapwidth, width, tooltip
- Sample: [cmloc-current-locations-map]
Shortcodes can be found under the Shortcodes option for reference.

You can find detailed instructions on setting up shortcodes and displaying locations using the shortcodes in the help documents of the CM Map Locations knowledge base.
Access Control
If you’d like to make your maps interactive, you need to configure Access Control in the CM Map Locations menu. There are multiple options available for access.
Access settings allow the admin to control who can see, view, create, and update locations, as well as which roles can use the Media Library when uploading images.
The admin can choose from pre-set options such as everyone, logged-in users, or specific user roles such as administrator, editor, author, contributor, or subscriber.
Alternatively, they can create a custom role and list the capability names of those who are allowed to access it.
List Locations
This allows you to designate who can access the locations index and search or filter locations.
View Location
This determines who can display the location’s page.
Create Location
Select who can create locations.
Update Own Location
Select who can update locations.
Roles Allowed to Use Media Library
If a subscriber has the upload_files capability they can see the WordPress Media Library tab when uploading the image for a location. If you want to prevent users from searching your website’s Media Library, make sure you revoke access for the specific roles.
For each category, you can choose from any of the default roles included in WordPress core or roles provided by plugins that designate specific roles.
Additional Features
I’ve covered the basics of setting up and using the Map Locations plugin, but there are many more features available.
Themes
There are up to six themes to choose from to make your locations stand out on your site.
Tiles/Layers
A tile or layer is a section of a map that is generated and displayed separately from the rest of the map.
These tiles or layers are typically square images that are pre-rendered and cached on the server, allowing them to be quickly displayed on the map without requiring the user’s browser to load the entire map at once.
Tiles or layers are used to enhance the visual presentation of maps by allowing additional information to be displayed on top of the base map. This can include labels, markers, and other data that can help users navigate the map and understand the context of the area being displayed.
In addition, tiles or layers can also improve the performance of maps by allowing the browser to load only the portions of the map that are currently in view, rather than the entire map all at once.
You can add layers on top of your maps to info such as display traffic cycles using OpenStreetMap or another service.

The settings are in the General tab, under the Map section.
- Default map view – Choose what is the default view. Users can change this at any time.
- Insert tile URL – Add the URL of the tile service of your choice. Check Tiles – OpenStreetMap Wiki for more examples

Allow visitors to turn tiles on or off while browsing the map.

You can even allow users to upload tiles.
Show User Location
Your users can share their geolocation and display it on the map.
REST/API Support
Use REST API to create locations from other sites or even mobile apps.
Display Templates
There are several display templates available, allowing you to easily create a store locator, list, or point of interest.
Search by Radius
You can search a defined radius from a postal code in any country.
Waze and Google Directions
When you create a new location, Wave and Google direction links are automatically added to the listing.
Pricing for the Map Locations Plugin
You can install and use the Map Locations plugin for free on as many WordPress sites as you like. It includes all the essentials you need to create as many locations as you like, add a description and images, and show each location on its unique map. However, by purchasing premium versions, you get access to more features.
Essential (Pro) Map Location = $39/year
In addition to the essentials listed above, you get display templates, import/export, support for categories, weather information, access control, and more — on one website.
Advanced Map Location + Route Manager Bundle = $69/year
This tier adds Creative Minds’ Route Manager plugin and expands the license to three websites.
Ultimate Map Location + Map Routes + 5 Add-ons = $119/year
The Ultimate tier adds several add-ons and the Map Routes plugin, with a license for up to ten websites.
Each tier provides one year of support and offers a 30-day money-back guarantee.
Display Interactive Maps on Your WordPress Site
The Map Locations plugin gives you the capability to create store location lists, guide tourists through any city, or even let users create and adjust maps to suit their needs. This is one plugin in the large selection of offerings by the development team at Creative Minds.
