


If you’ve ever used a loan calculator or price estimator, you may have wondered if there’s a way to add a cost calculator to your WordPress site. There is, and it’s super easy.
Sure, you can learn some JavaScript and knock out a decent calculator in a few months — or you can save a ton of time and headaches by using a plugin. That’s why we love WordPress, right?
Stick around, and I’ll show you how it’s done.
A Versatile Cost Calculator For WordPress
When you use a loan calculator on a mortgage site, it can seem like there’s some complex code behind it. And you may have imagined that it’s out of reach for your site. Hiring a developer to implement a form like that may be out of your budget.
Then, what if you need to change something in the calculator? You’ll need to bring back the dev to fix it for you. That would be a pain and possibly out of your financial reach.
Thankfully, a WordPress plugin will allow you to handle all of this yourself — no code required.

Cost Calculator lets you create any kind of calculator form you need, and it will look great to boot.
Getting Started with Cost Calculator
While the Cost Calculator plugin is easy to use, I’ll walk you through the features and show you an example that may inspire your own forms. First, let’s get the plugin.
Install Cost Calculator
You can find Cost Calculator by searching in your WordPress dashboard under Plugins>Add New or download it on WordPress.org. Additionally, you can purchase the Pro version, which features options like Image Drop-down, File Upload, Range, Multi-range, Formula, Radio buttons, Checkboxes, Quantity, and more.

Creating Calculators
Once the plugin is activated, you’ll see the Cost Calculator icon appear in your WordPress dashboard menu. Click that to access the Cost Calculator menu.
Initially, there are no forms on the list. To get started, just click Create new at the top right. However, since you’re new to using the plugin, I recommend trying the Import calculators option. In the menu that opens up, choose to Run Default Demo Import. That will populate your list with some sample calculators provided by the plugin authors.

Before creating your first calculator, it’s helpful to dig into the provided demo examples. This will give you a feel for the menus and how a calculator is structured. Choose a calculator, and under the Action tab, click the pencil icon to go into edit mode.
Editing Calculators
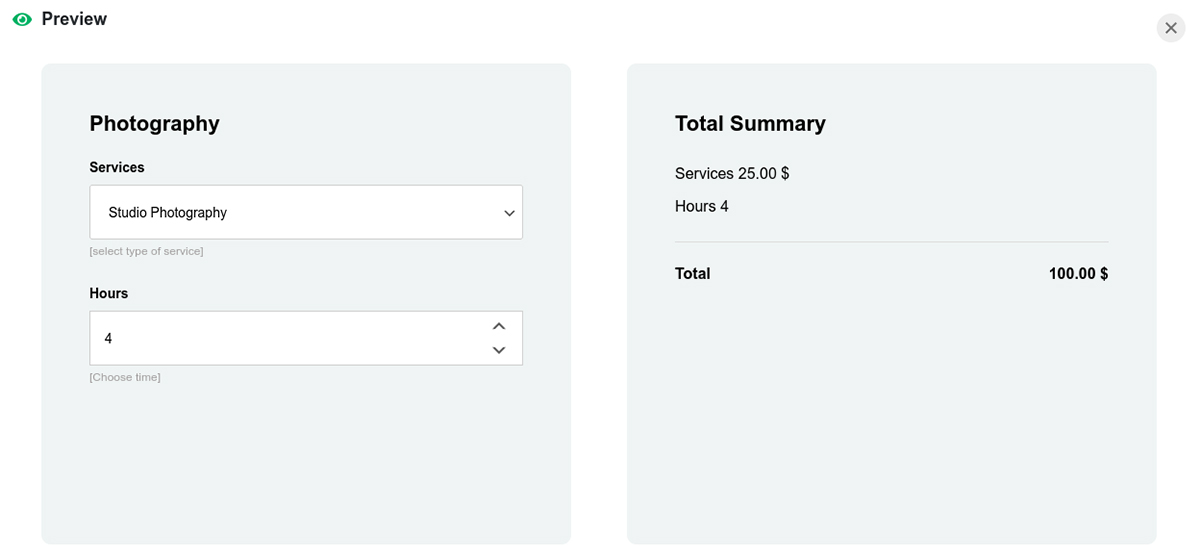
For this example, let’s use the Graphic Designing calculator. Go into edit mode, scroll to the bottom and click Preview. This shows you what you can expect when the calculator is displayed. This one helps potential design clients calculate the cost when choosing between different packages.
Let’s go back to the edit menu and go over the Calculator tab.

On the left are all the elements available to use in our calculator. In this example, on the right, we can see that they’ve used the Drop Down, Range Slider, Radio buttons, HTML element, Checkboxes and Total elements. We can edit any of these by hovering over them, and clicking on the elements.
The first element is a Drop Down named Type of Website. Inside, we can see the Name and Description fields at the top. If we go to the nearby Options tab, we can specify more options for the Drop Down.
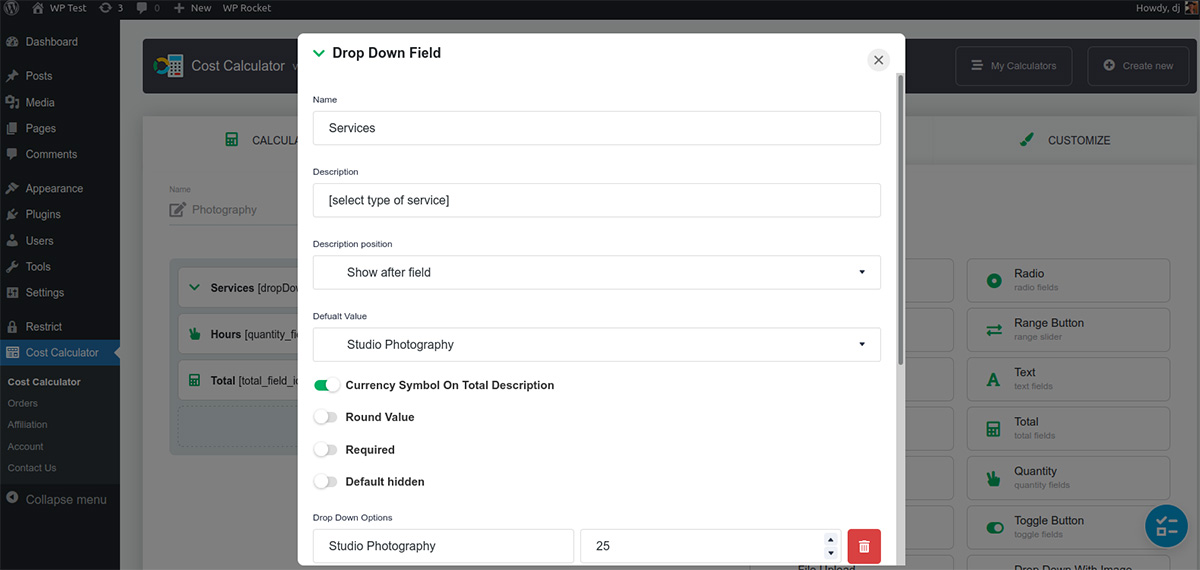
This calculator totals the cost of website designing services. We can set all of that up in this drop-down, including pricing.
The next element, the Number of Pages, is a Range Slider element. For this, we only need to define the Minimum and Maximum Tange values to make the calculation work. While default value isn’t required, it can help steer visitors toward a choice you might prefer.
We also specified the checkbox and radio buttons to prove the extra services for our customers. They need to be configured properly, the flow is quite straightforward.
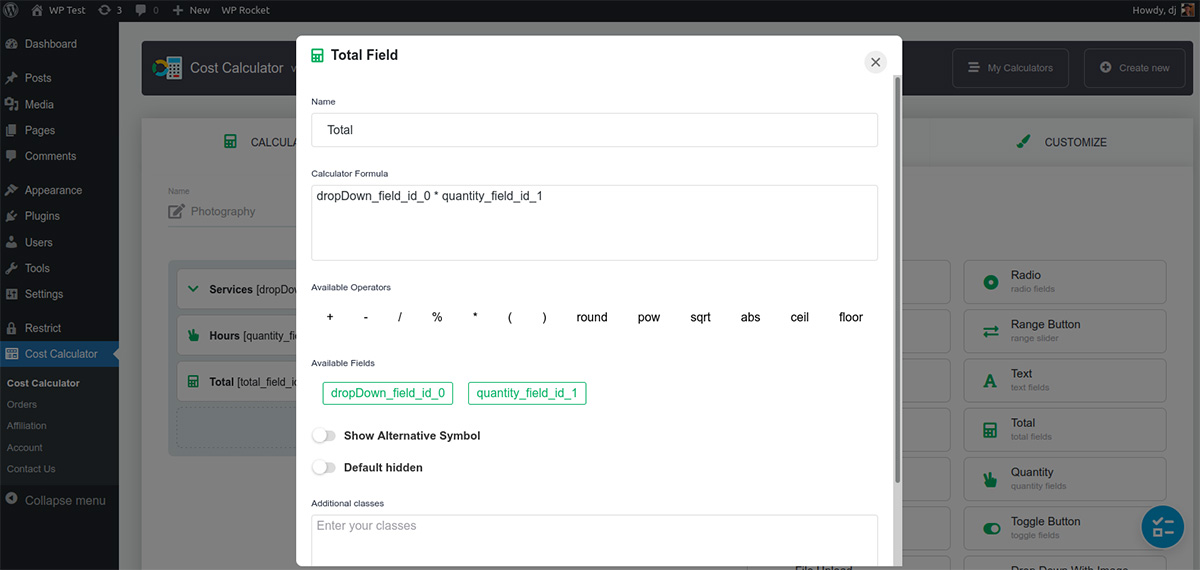
The Total element is where the calculation will be made. In the Calculator Formula field, we can see what looks like complicated code. It’s really not. If you delete everything in that field, you can recreate it easily. Under Available Fields, you’ll see that we only have four fields we can use in the formula.
Click the first, and it appears in the Formula field. Then we need an Operator, so click on the asterisk below to signify that we want to add the four field values. Click the other Available Field option, and your formula is complete.
Now that we see how the calculator is set up, let’s look at conditions, settings, and customization.
Conditions
You may not need the Conditions feature for every form, but when you do, it’s a fantastic feature to have. The Conditional system lets you link different fields and add conditions to them. You can show, hide, or disable specific fields based on whether or not a condition is met. For example, if you have a loan calculator, you can set the interest rate to appear only when the user enters a specific loan amount.
Settings
The Cost Calculator settings menu is where you’ll adjust your currency settings or set up any payment gateway integrations.
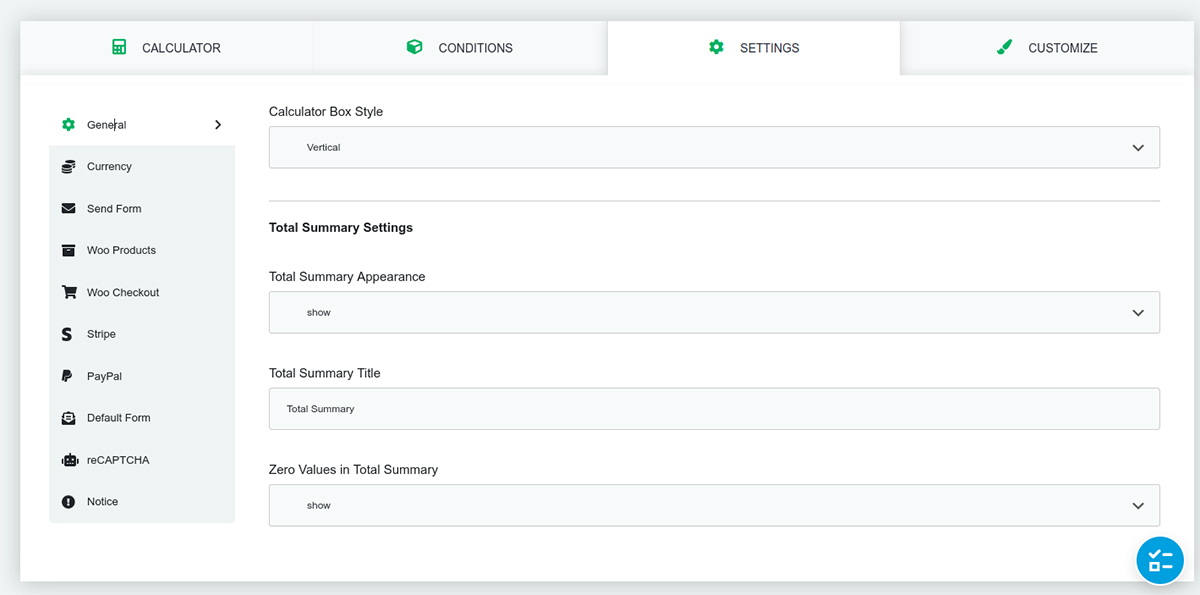
Most settings are intuitive here, but I’ll cover a few significant ones.
If you have a WooCommerce store, the Cost Calculator integrates with it. This is a handy feature that can increase your conversion rate when implemented. For example, you can set up a rate form so that when users click the Submit button, they’re taken directly to your Woo checkout page. You can also add an Add to Cart button to your form.
Send Form allows you to add a send form by integrating with the Contact 7 plugin. Once a user clicks Submit on the calculator form, they’ll have the option to send the form’s results via email.
You are free to select one of the widely spread payments: PayPal and Stripe accordingly on your calculator.
If you don’t want to get a legion of spam robots sending you junk forms, you can include a ReCaptcha button. You’ll need to set that up through Google first, but you’ll be ready to go once you have your site key and secret key.
Customize
The Appearance menu is literally the icing on the calculator cake. You can change just about any design aspect in your forms using simple sliders and color pickers.

Add borders to the boxes, change font color and sizes, or even create your own gradient background color. The customize menu makes it easy to style your forms to fit your site’s branding.
One of the funny and powerful options here, you can use the number of designing presets for your calculator or create a new preset from scratch.
Feature A Great-looking Cost Calculator on Your Website
If you need a way to add a calculator form to your site, the Cost Calculator plugin is not just painless, it’s fun to use. Without hiring a developer or writing any code, you can create great-looking forms for your WordPress site in just a few minutes.
Pricing
Cost Calculator is free to install and use. The Pro version contains features like Payment Gateways (Stipe & PayPal), WooCommerce checkout, Conditions, File Uploads, Multi Range Slider, Image Dropdown, and a Date Picker. Pricing starts at $34.99 for a single annual license.
