


NFTs have been all over the internet in the past year. If you’re one of those who have seen the value in them, then you may also want to display an NFT gallery on your website as a way to share them with the world.
If you’re still not sure what these NFTs are, you may want to follow Jean Galea’s blog on the topic. He has shared his experience and knowledge on everything from his methodology to evaluating NFT projects to his biggest NFT fails.
Non-fungible means that something is unique and one-of-a-kind. NFTs are therefore unique digital tokens representing something.
JeanGalea.com
Now, assuming you’ve gotten familiar with NFTs and purchased a few of your own, especially digital art, you want a way to display them publicly. That’s where the NFT Galleries plugin comes in.
What do I do with this digital art?
You may be invested in NFTs for various reasons. The projects out there are diverse but one that’s stuck around and continues to grow in popularity is digital art.
Once you own this digital art, unlike the physical world where you can hang the art on your walls or in a gallery, you need a digital space to showcase your art. You can always print it to hang on your wall anyway, but to reach a wider audience, you want to stick to the web.
The metaverse has provided new and intriguing ways of doing this, but once again, right now there’s only a limited audience that knows how to get there.
What you want is a way to combine the NFT world with the websites that the majority of the world knows and uses today.
What’s the point of displaying my NFTs?
The whole point of displaying your NFTs on your website is not to show off. There are three main benefits to doing this that many may overlook.
Showcase your digital art collections
As we’ve mentioned above, the digital art market is growing in popularity and value. There are platforms such as OpenSea where you display your art, but the audience on that platform is limited.
Show pride in the collection you’re building and display your showcase on your website.
Grow your audience
By displaying your NFT gallery on your website, you will convert existing website visitors into followers of your NFT-related work. Whatever you’re involved in within this space, you can even get those who follow you on other platforms such as Discord and OpenSea to visit your website.
By doing this, you can get this new audience to be more personally involved with you and your work.
Attract new buyers
Besides being a form of digital art for your enjoyment, NFTs are also investment opportunities. Putting aside what has been said in certain channels, even throughout the recent market dip, the enthusiasm and value of various NFT projects are still very high.
Embedding an NFT feed on your website gives potential buyers a new way to browse your entire collection in one place, organized just the way you want it to be.
With each NFT linking to its OpenSea page, you’re making it super simple for potential buyers to find the ones they like and make you an offer to buy them.
How do I display my NFTs in a gallery?
Your website is a great place to embed and share the NFTs you’ve collected. It helps you reach an audience that may not yet be anywhere near the typical Web3 channels.
Assuming you’ve already set up your WordPress website, all you need to do now is install the free NFT Galleries plugin. You can do that from the Plugins page in your WordPress site’s dashboard.

Step 1: Connect your wallet

Next, you’re ready to connect your wallet. Start by entering your wallet ID and give it a name. Once connected, your NFTs will automatically appear in the live preview.
Step 2: Design your NFT gallery

In the Design tab, you’ll be able to design how your gallery will look. You can adjust the number of NFTs to display, the number of columns, as well as the feed and image dimensions, among others.
You can also choose to open your NFTs in a popup box or link to your NFT on OpenSea, for instance, upon clicking on the image.
One great feature that comes with NFT Galleries is its responsive modes. You can easily switch between desktop, tablet, and mobile, and adjust your feed for each device. This ensures that your NFTs will look great in any format.
Step 3: Moderate your NFT gallery
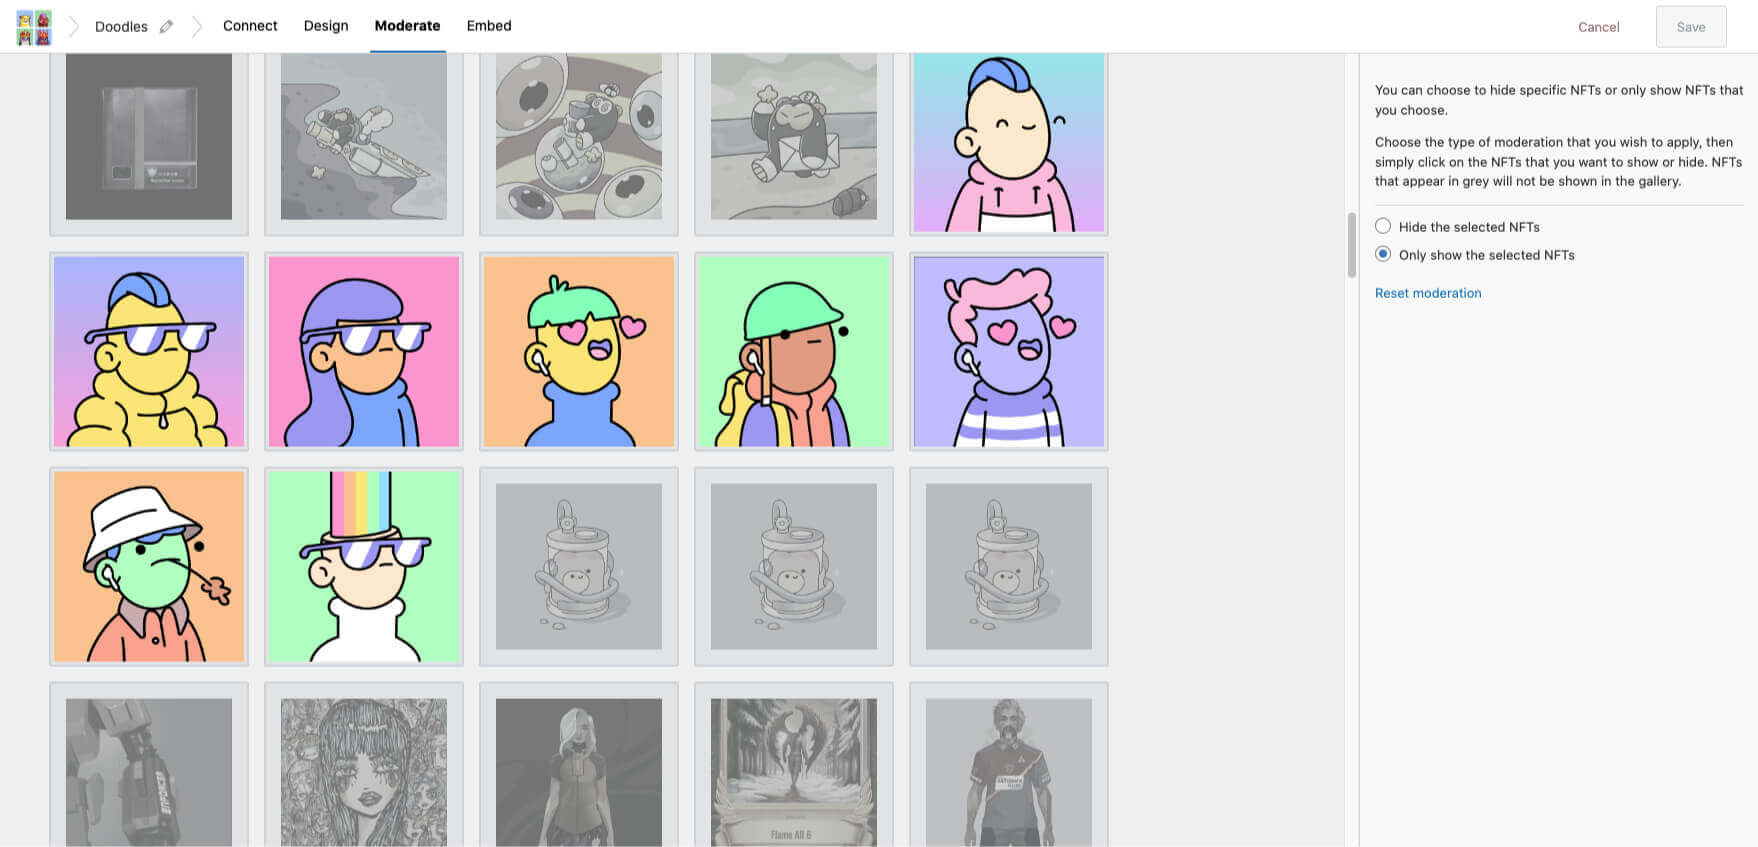
In the Moderate tab, you’ll be able to select which NFTs to appear in your gallery. This gives you full control over your feed in a very intuitive way. It also allows you to create multiple feeds, organizing them as you see fit.
Step 4: Embed your NFT gallery

Finally, it’s time to embed your feed. You can do this in three ways:
- Using a shortcode – this can be used virtually anywhere on your website.
- Using the Elementor widget – great for Elementor-built websites.
- Using the WordPress block – this will allow you to select which gallery you want to display from the block menu in the WordPress editor.
Results
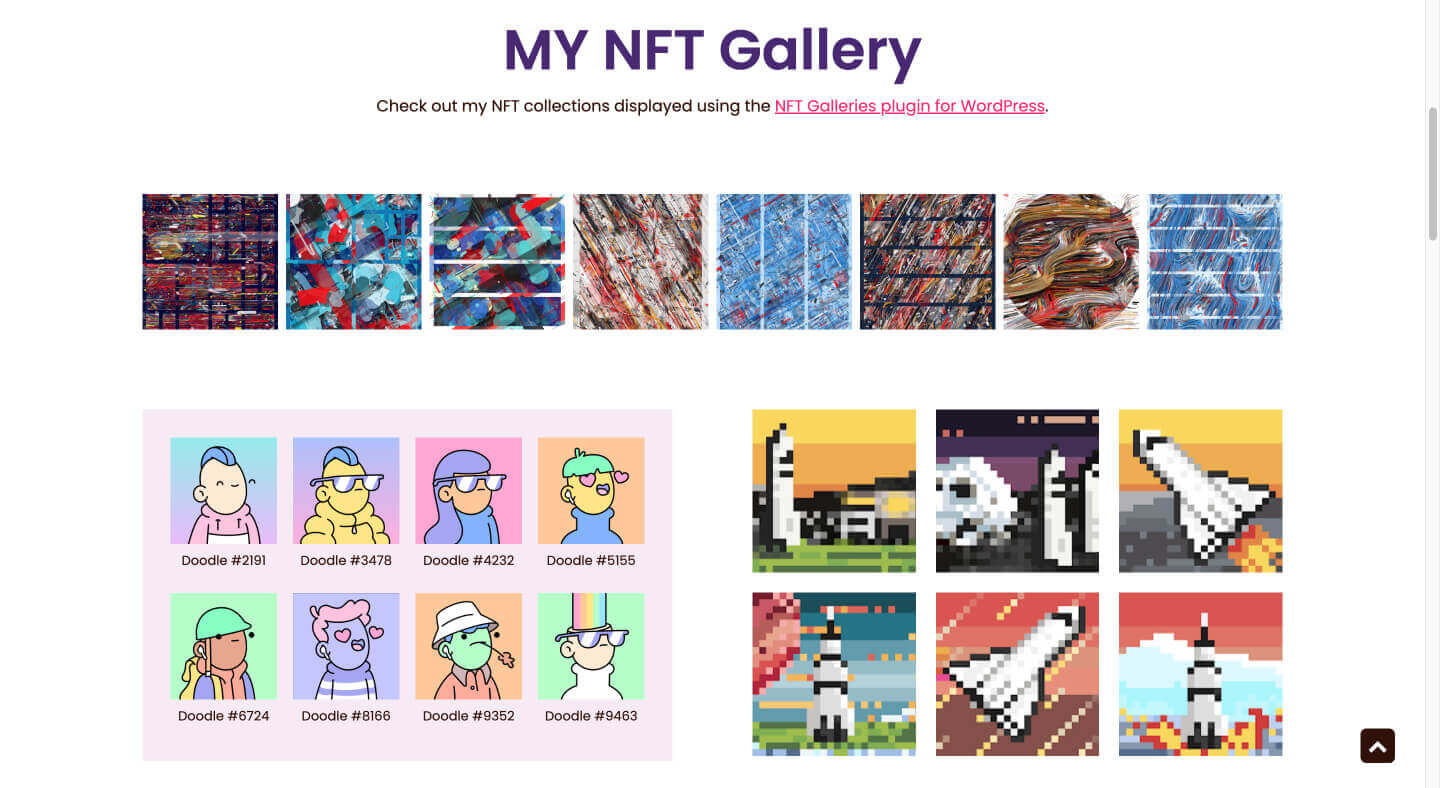
And there you have it! In this example, we’ve used the Elementor block to display our feed. We’ve also created other NFT galleries which have been moderated and grouped by type.
It really is that easy to display your NFT galleries on your website. All you need is your wallet, and the NFT Galleries plugin.
Want to try out a live feed? Check out the demo here.

2 Responses
It would be awesome if doing this was as easy as said. Followed your documentation and haven’t gotten to work for days. Hope you figure this out.
Hey R.T, can you share what hasn’t worked for you? We’ll be happy to help guide you.