


Owning or maintaining an online store comes with a lot of repetitive tasks. Your product list is continuously being updated, and so are your customers and orders. Keeping track of them can become an issue.
In some of our previous posts, we’ve seen how the WP All Import plugin can help you keep your online store organized and up-to-date by enabling you to import all your data – be it products, customers and orders.
This process is made more convenient with the plugin’s ability to import your WooCommerce products on a schedule. In this article, I’ll be explaining how to do so.
Let’s get down to it.
Step 1: Create a new WooCommerce product import
Under “All Import” in the sidebar, go to “New Import”. Although the plugin lets you import your data by uploading a file, or using an existing file on your database, to enable scheduling, we need to download the data from a URL.
The reason behind this is that as you continuously update your file, located on either Dropbox, Google Sheets, or Google Drive, the plugin will be able to retrieve that same file over time and locate any updates or changes. Consequently, the plugin will then update your online shop accordingly.
So, after you’ve copied and pasted your file URL, WP All Import will import your product feed into WooCommerce automatically. The plugin supports XML, CSV, JSON, or XSLX file URLs and will also unzip any zipped feeds and locate the data file.
Next, choose whether you want to update existing items or create new ones. If you are doing both, select the “existing items” button. From the drop-down menu, select the items you would like to import. In this case, I want to create new WooCommerce Products for my online pet shop.

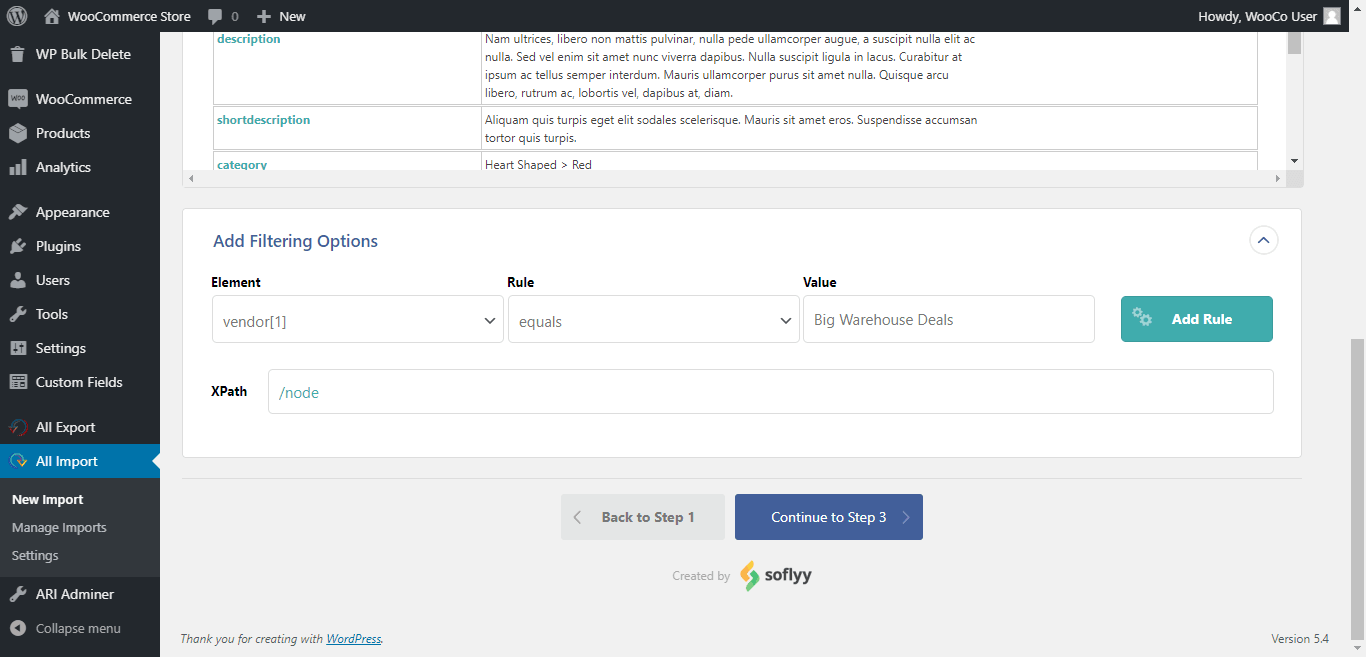
Continue to Step 2 where you can set filtering rules to only import products that meet certain criteria. Alternatively, you can skip this step and continue to step 3.
Step 2: Drag and drop to import WooCommerce data
At this point, you’ll want to start to drag and drop your product data into the WooCommerce fields.
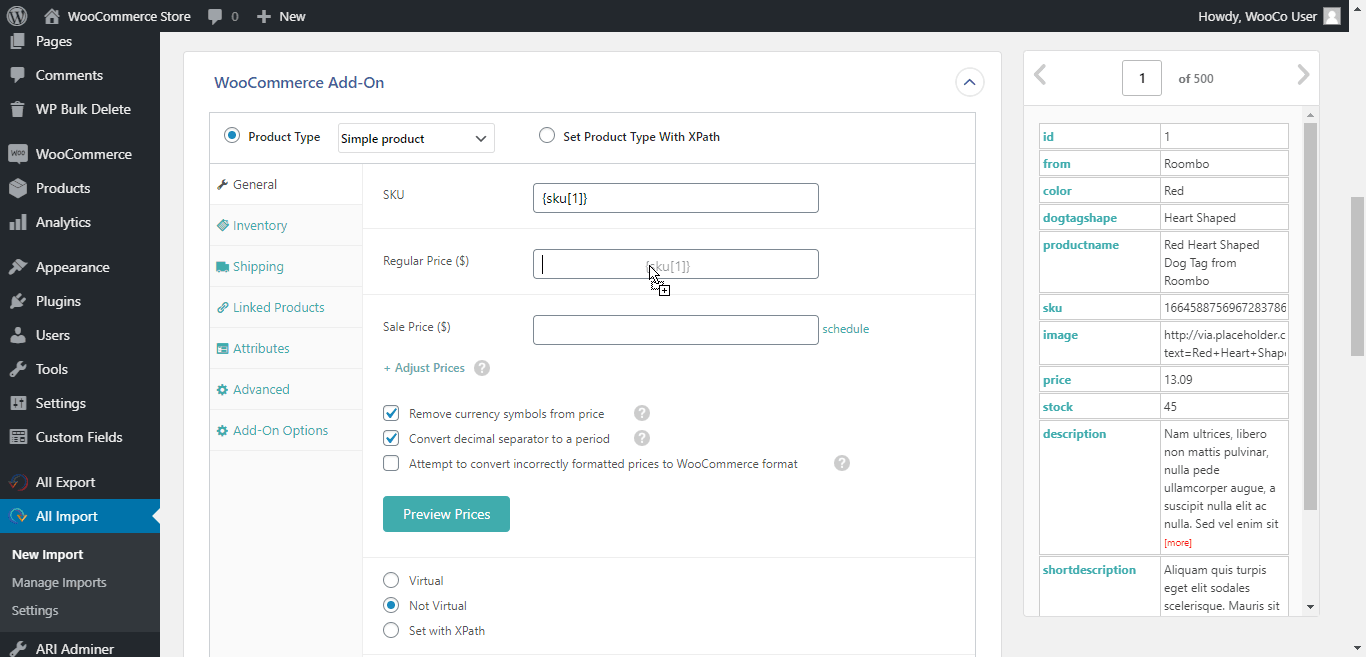
Under the “General” tab of the WooCommerce Add-On, start by importing your regular and sale price. One of the great features of this plugin is that it allows you to schedule your sale price and increase or decrease the prices based on a percentage or set amount under “Adjust Prices”.
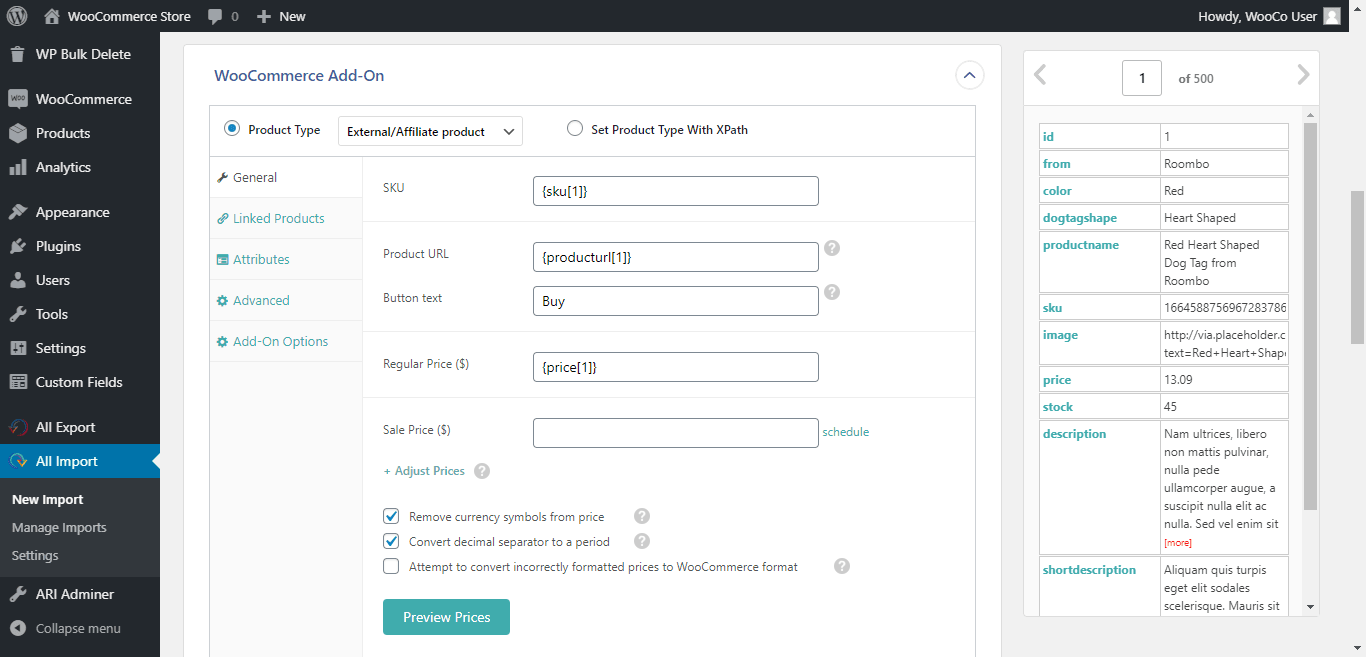
You can also set your product URL and button text. If your data has currency symbols, you can opt to remove them. WP All Import also lets you convert the decimal separator to a period and can also attempt to convert incorrectly formatted prices to WooCommerce format. These options can drastically decrease your time sifting through your data, making sure they’re all perfectly set out.
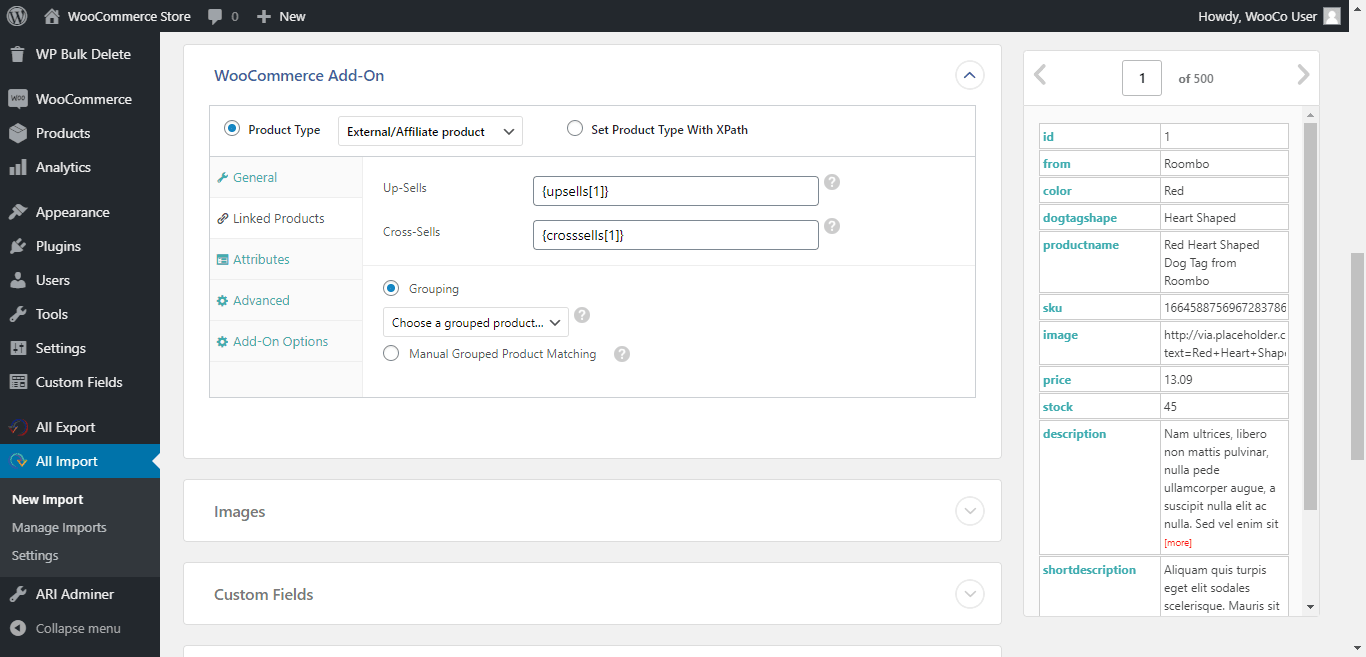
Moving on to the “Linked Products” tab, you can start importing your up-sells and cross-sells. Products can be grouped up by Title, ID, or SKU
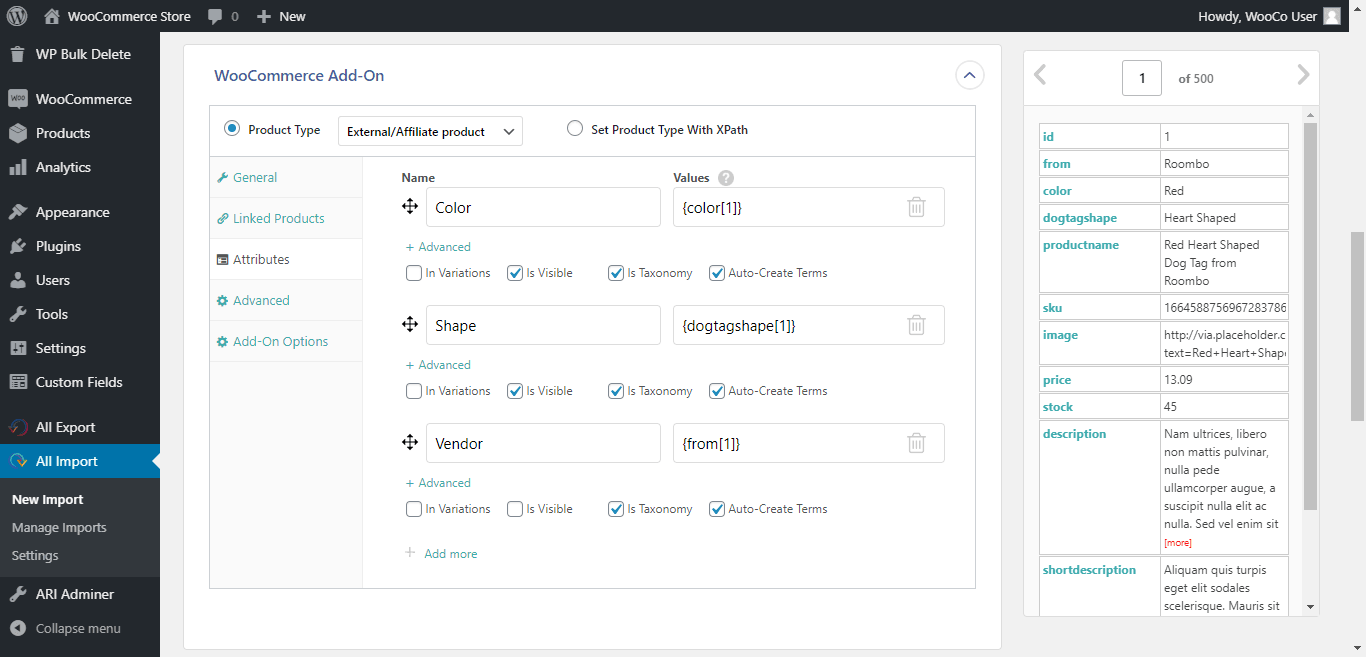
Under “Attributes”, you can assign custom or global attributes to your WooCommerce products. In this example, I’m importing pet products so I’ll be setting attributes such as color, shape, and vendor.
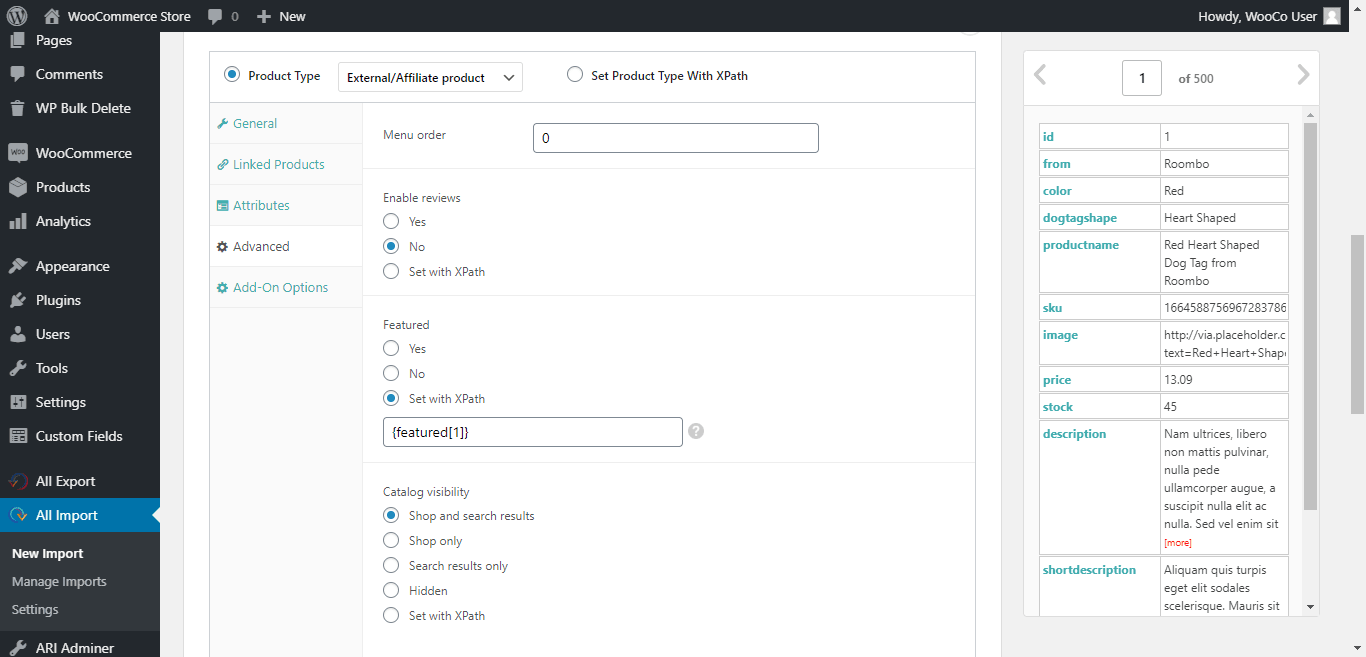
Finally, under the “Advanced” tab, you can set the menu order, enable or disable reviews, select your featured status, as well as catalog visibility.
Step 3: Importing product images and galleries
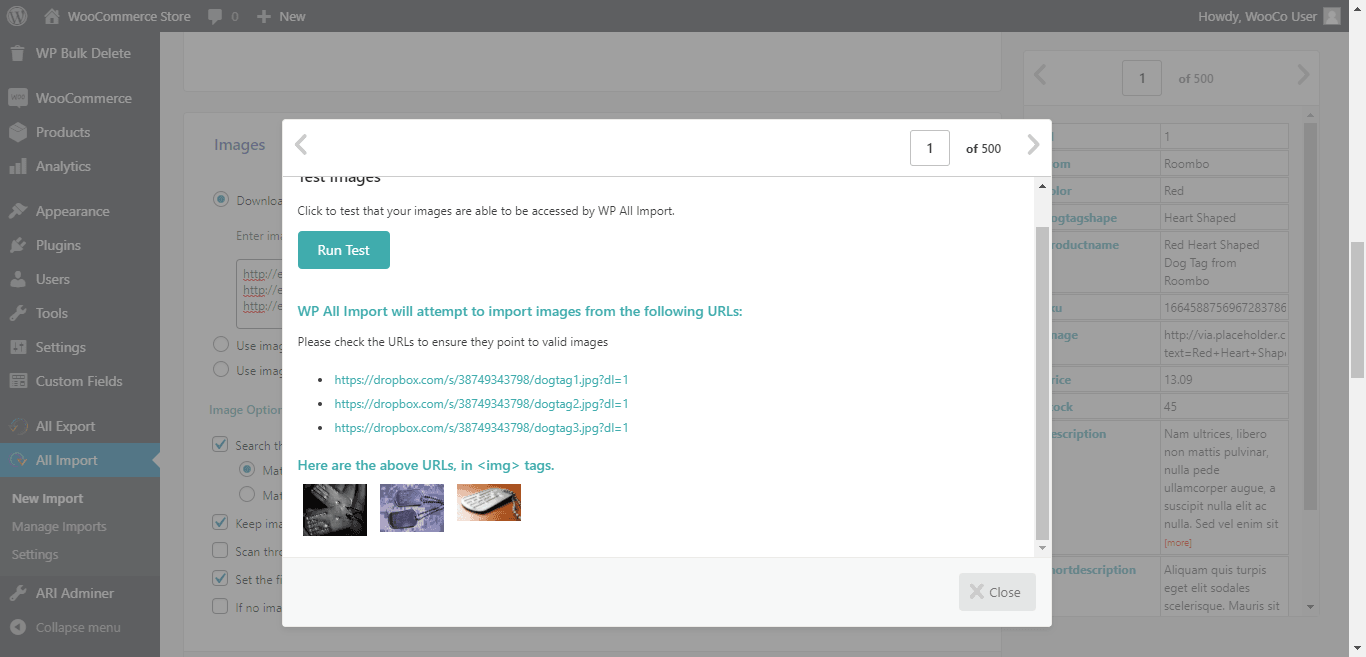
As we’ve explained in our previous posts, WP All Import can import and attach images to your products. These product images can then be placed in a product gallery for each of your items.
Download your images via URL (and match existing ones at the same time) or use existing images from your Media Library. You can also use existing images found on your server.
WP All Import can also scan through post content for images inside <img> tags and import and assign them to your products.

Preview your images by clicking on the “Preview & Test” button to see exactly what you’re importing.
The “SEO & Advanced Options” section lets you import image metadata such as title, captions, and alt text. You can also change file names, should you require it.

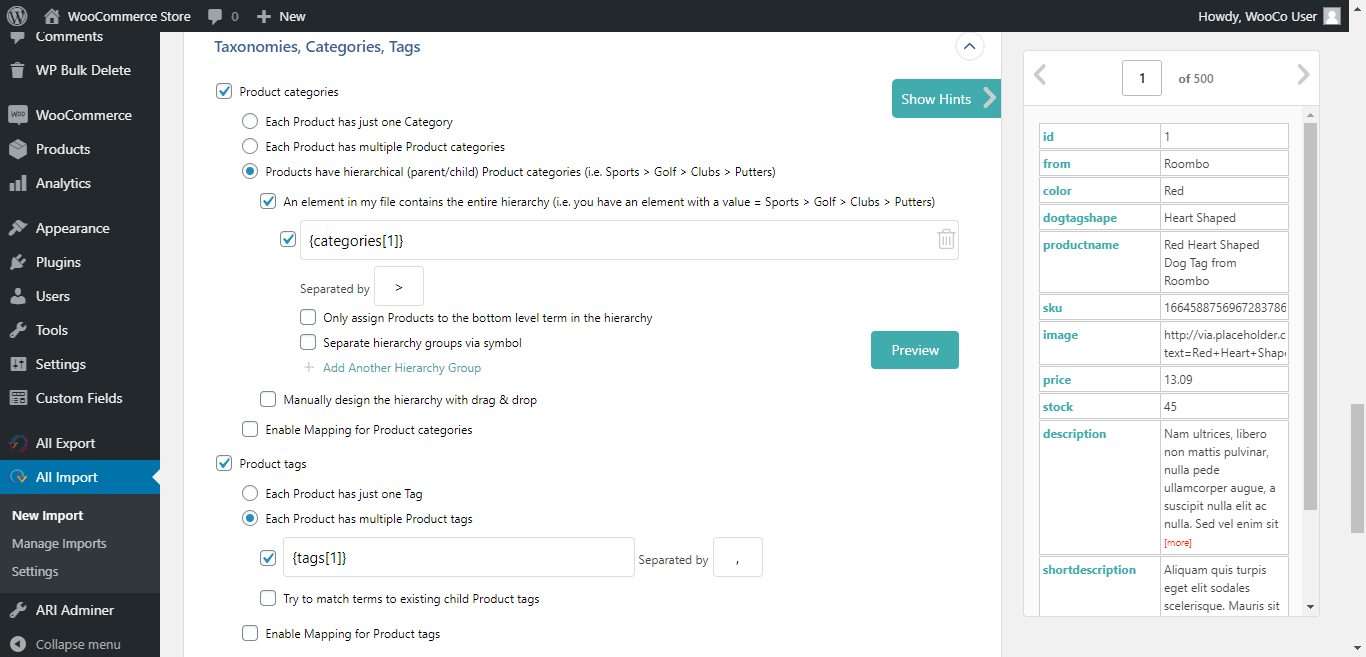
Step 4: Importing Product Categories & Tags
WP All Import makes importing product categories and tags easy and efficient with its extensive number of options. The plugin supports single, multiple, and hierarchical categories and tags, and will use existing categories or tags if found on your database. If you are importing new ones, WP All Import will then create and assign them to your imported products.
Step 5: Finalizing the import
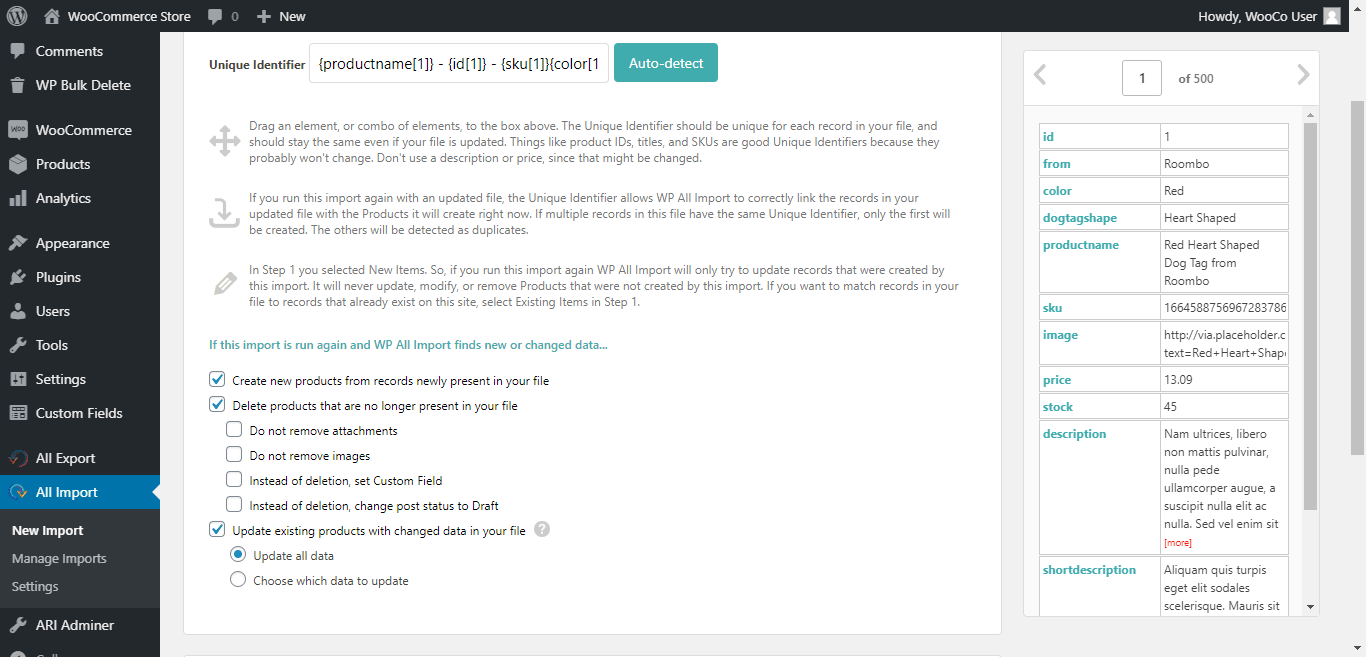
In this last step of the process, you will begin to give the plugin further information that will define your import settings. Firstly, you can either select a unique identifier or let the plugin auto-detect it for.
Next, you can select “Create new products from records newly present in your file” to create products that don’t already exist. The plugin also lets you delete products that are no longer present or update those which have been altered. This last option comes with two choices: You can either update all the data or choose specific data points to update while leaving the rest of the data as is.
Step 6: Scheduled WooCommerce product imports
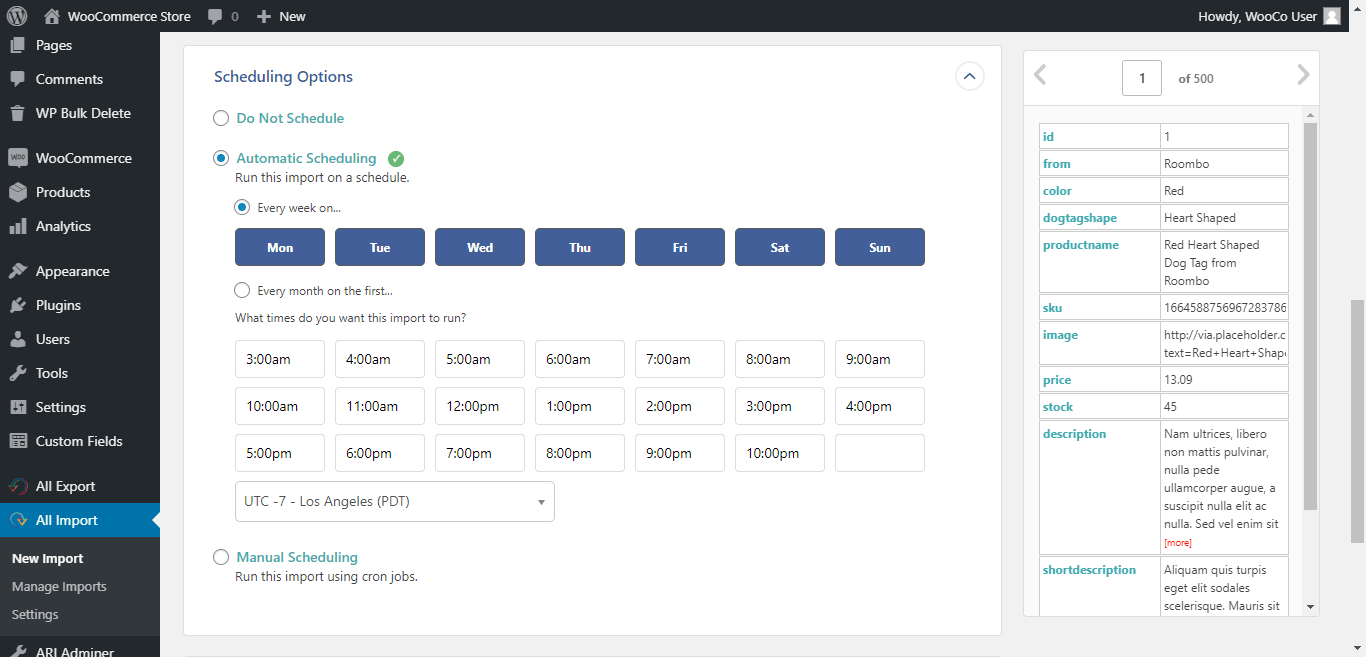
Now that you’ve done all this work, you’ll want to set up a schedule to automatically import and update your products. For this, WP All Import has multiple options which we will go through.
Set the day and time you want your schedule to take place and once that is complete, WP All Import will download the latest version of your feed and update your WooCommerce store. And the best thing is – there is no need for any manual intervention!
Any new products will be automatically created, discontinued products removed, and existing products updated with the latest data. This will save you countless hours of updating!
Step 7: Running the import
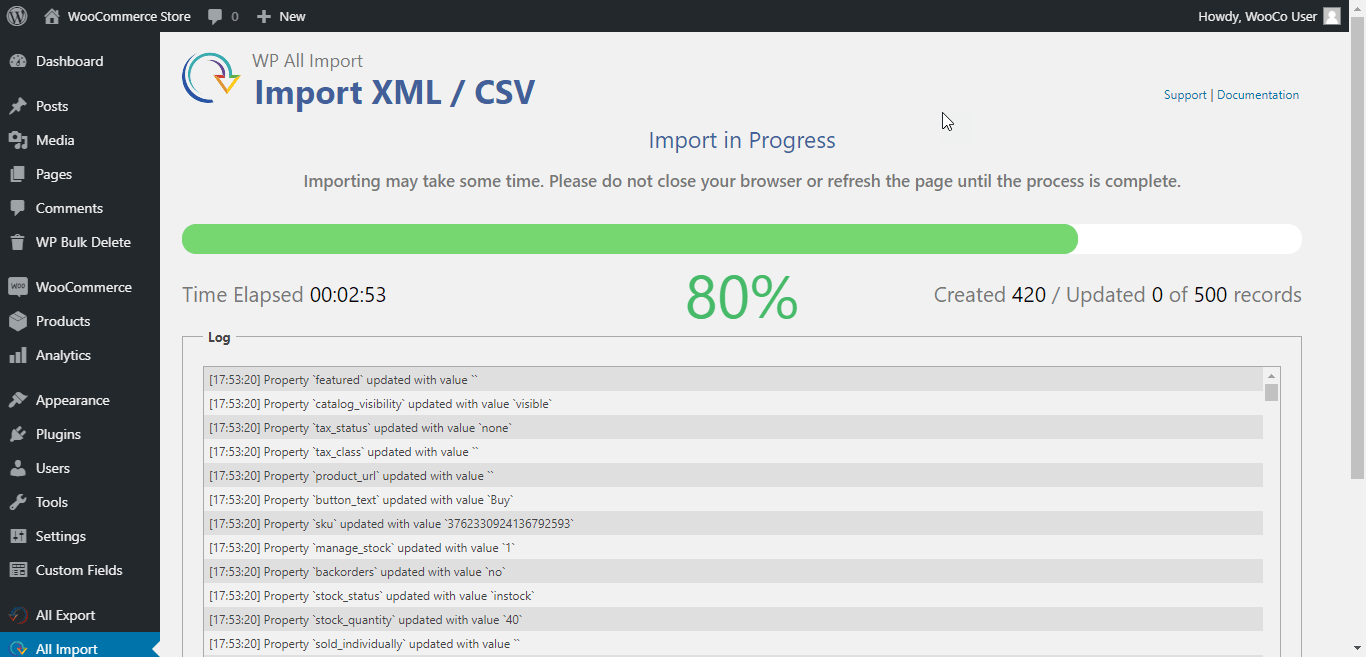
Continue and run the import and WP All Import will work through your data to set up your products in WooCommerce.
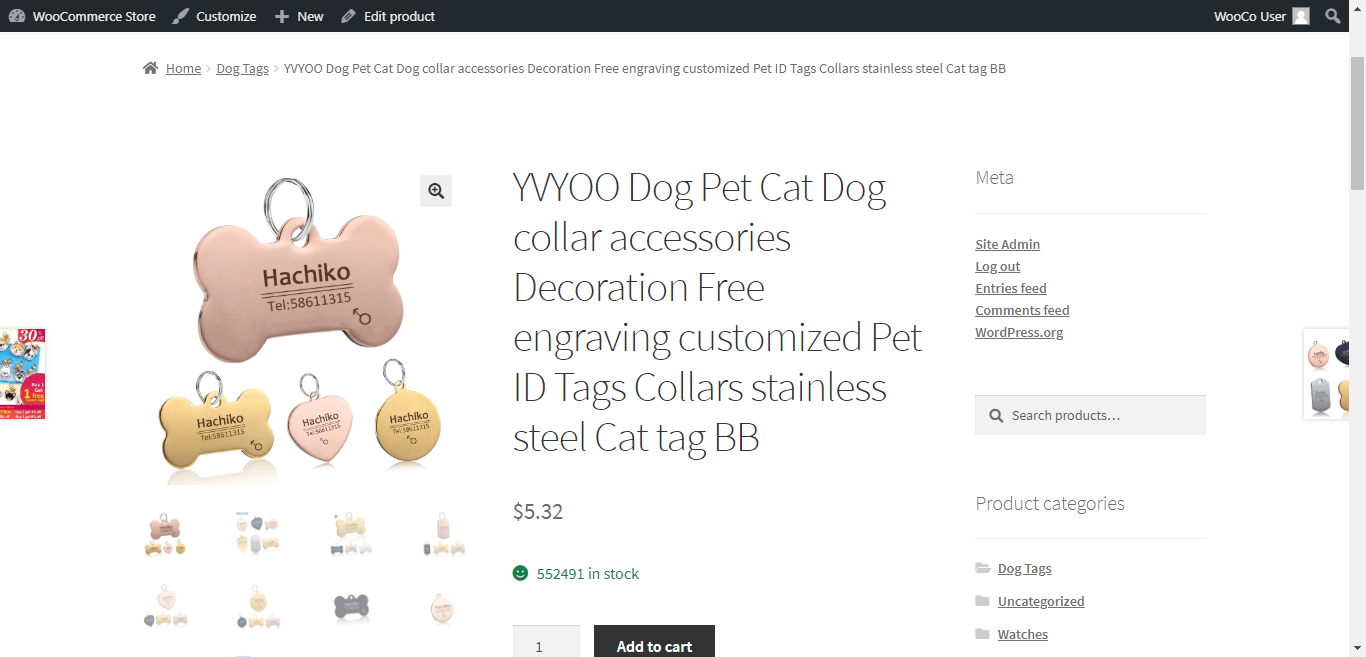
Once the import is complete, you can find your product list under Products in your sidebar.
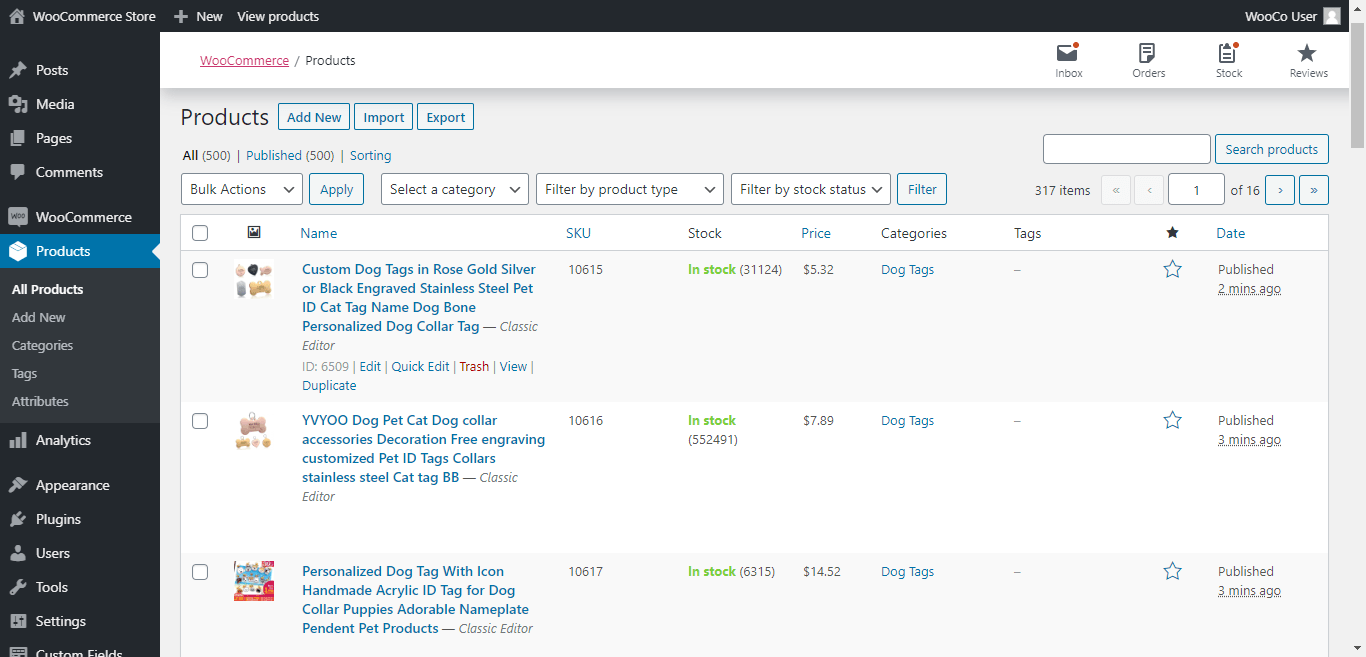
View the products to ensure that all the information is in its correct place and there you have it!
Everything is now set up for WP All Import to continue the process of automatically importing your product feed into WooCommerce on the schedule you set up.
Conclusion
In this article, we’ve gone through the process of importing your products to your WooCommerce store using the WP All Import. More importantly, we’ve seen how you can schedule your imports to automatically update your online shop – saving you time and effort!

One Response
Hello. Is there a solution for importing scheduled products in a multilingual store?