


Are you looking to expand the reach of your online store? By default, WooCommerce shows all the prices of online shops in American dollars (USD). It can be confusing for people outside of the US. Therefore, WooCommerce website owners need to show their prices in the native currency of their users.
If you’re selling products or services globally, you need an efficient way to handle multiple currencies. This is where Multi-Currency for WooCommerce comes in.
This plugin allows you to display prices and accept payments in different currencies with ease. With this comprehensive guide, learn how to get started with Multi-Currency for WooCommerce and enjoy all its benefits!
What is Multi-Currency for WooCommerce?
Multi-Currency for WooCommerce is a powerful plugin that helps businesses manage multiple currencies on their WordPress-based eCommerce stores. It automatically displays the price of each product in the customer’s preferred currency and provides payment gateways to accept payments in different currencies.
This plugin is compatible with dozens of popular payment gateways, making it easy for you to offer a smooth checkout experience to your customers. With Multi-Currency for WooCommerce, you can provide a localized shopping experience and expand your customer base to an international level.
Benefits of Using Multi-Currency for WooCommerce
The benefits of using Multi-Currency for WooCommerce are numerous. Here are just a few:
- It helps simplify the checkout process by displaying prices in the customer’s preferred currency and accepting payments from multiple sources
- It enables businesses to target global customers with localized price displays and payment methods
- It allows businesses to gain insights into their customer’s buying preferences and make informed decisions about their pricing strategies
- It eliminates the need for manual currency conversion, thus saving time and resources
- It helps businesses create a global presence and increase sales.
Getting Started with Multi-Currency for WooCommerce
Now that you’re familiar with the benefits of using Multi-Currency for WooCommerce, let’s look at how to get started. Make sure you have WooCommerce Payments set up correctly. Then Install the Multi-Currency for WooCommerce plugin and activate it.
Navigate to WooCommerce > Settings > Multi-currency and select Add currencies

Here are five simple steps to get you up and running in no time:
Step 1: Choose Your Currency Format
The first step is to decide which currency format you want to use on your site. You can choose between left-to-right formats like USD ($), Euro (€), Pound Sterling (GBP £) or right-to-left formats like Arabic (دولار), Hebrew (שקל). Once you’ve chosen your currency format, click ‘Save Settings’ at the bottom of the page.

Step 2: Configure Your Settings
In this step, you can configure various settings related to Multi-Currency for WooCommerce. This includes setting the default currency, displaying prices in multiple currencies on product pages, enabling geolocation-based currency detection, and more. Make sure to complete all configuration steps before moving on to the next one.
Select the currency you are managing

Default settings are set to the current exchange rate, but can be manually adjusted if you wish to use a fixed rate.

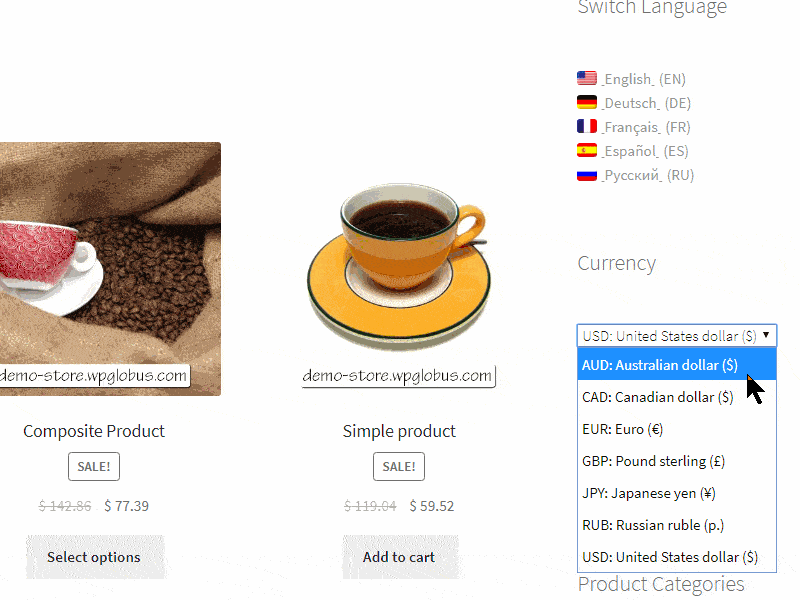
Step 3: Configure the Currency Switcher
Now that you’ve added all the currencies, it’s time to configure the currency switcher. This allows customers to choose their preferred currency while browsing your store. You can customize its look and feel and decide where it should be displayed on your site.
Select Configure Now

To insert the Currency Switcher widget on your page, go to the Appearance > Widgets section of your WordPress Admin dashboard. In the Available Widgets area, you should see the Currency Switcher widget. Drag it to one of the sections on the right – for example Primary Sidebar. In widget settings, you can modify its title. You can also leave the title empty – that way it will not appear above your widget.
The shortcode to display Currency Switcher is [wcumcs_switcher]
Step 4: Finalize Your Settings
The last step is to finalize all settings related to Multi-Currency for WooCommerce. Here, you can review and adjust various parameters such as exchange rates, payment gateways, taxes, and more. Make sure all your settings are correct before saving them.
Conclusion: Get Started Now with Multi-Currency for WooCommerce
Using Multi-Currency for WooCommerce is a great way to provide a localized experience to customers from around the world and make your eCommerce store more accessible. This comprehensive guide has outlined the various steps required to get started with this powerful plugin, from configuring settings to adding multiple currencies. With just four simple steps, you can now offer your customers the convenience of paying in their preferred currency and maximize your global reach!
