


One of the biggest advantages of building your site with WordPress is versatility. You can do anything you want, including creating a fully-fledged membership site.
If you’ve been thinking about starting a membership or eCommerce site to sell digital products or courses, you might be surprised to learn that it’s easier than you think. All it takes is WordPress and the right membership plugin.
In this article, I’ll show you how to do it. Let’s get started!
The ProfilePress Plugin
ProfilePress is a paid membership plugin that allows you to create and sell membership plans on your WordPress site. ProfilePress also helps you create custom registration and login forms on the front end. That means subscribers don’t need to access the WordPress admin panel to manage their accounts or interact with the site.

When you install and activate ProfilePress, you’ll be able to:
- Accept one-time and recurring payments
- Sell subscriptions
- Restrict content and control user access
If you can imagine it, you can build it. There are multiple ways you can utilize the plugin.
Sell Services and Digital Files
If you create downloadable content like PDFs, music, podcasts, photos, or videos, you can sell them through your website. ProfilePress helps you quickly set up payment integrations like Stripe or PayPal to accept payments.
Let’s say you want to offer tutorials on your website. You can sell one-time payment courses or let your students register for a recurring subscription if you like. You can also provide templates and other downloadable add-on content for an additional fee.
Create a Member Directory
Creating an online community where users interact can be rewarding and a potential source of income. ProfilePress lets you create custom registration forms, searchable member directories, and fully customizable user profiles.
Restrict Content with a Paywall
If you’re a regular publisher of content, you can create a premium paywall where only subscribers can access specific posts, pages, categories, and even custom post types.
The ProfilePress access restriction settings are based on the rules you set up. It’s very flexible, and you’re in control.
ProfilePress offers customizable templates for everything from registration and login to profile forms and the member directory for the front end. In addition, premium addons allow you to extend the plugin’s functionality. They include:
- Custom Fields
- Email Confirmation
- User Moderation
- Social Login
- Two-Factor Authentication
- WooCommerce
That’s the overview of ProfilePress, which looks to be a pretty robust solution. Let’s get into the nitty-gritty and see how it all works!
How to Get Started with ProfilePress
In a process similar to WooCommerce, the ProfilePress plugin will extend the functionality of your WordPress site. However, because many more features and capabilities are available, there are a few more things to set up. For this section, we’ll cover installation and then create a membership plan and some custom forms.
Install ProfilePress
Start by downloading the ProfilePress plugin directly from its WordPress.org page.
After you’ve downloaded the plugin zip file, navigate to the Admin Dashboard of your WordPress site. Select Plugins>Add New. Click Upload Plugin and browse for the .zip file you saved. Click Install Now, then activate it.
You can also search for the plugin right from your WordPress site. In the Admin Dashboard, select Plugins>Add New. In the search bar, look for “ProfilePress,” and you’ll see it appear as an option. Click Install Now and then activate it.
As soon as it’s activated, it will open a welcome screen. This screen is the Settings menu.
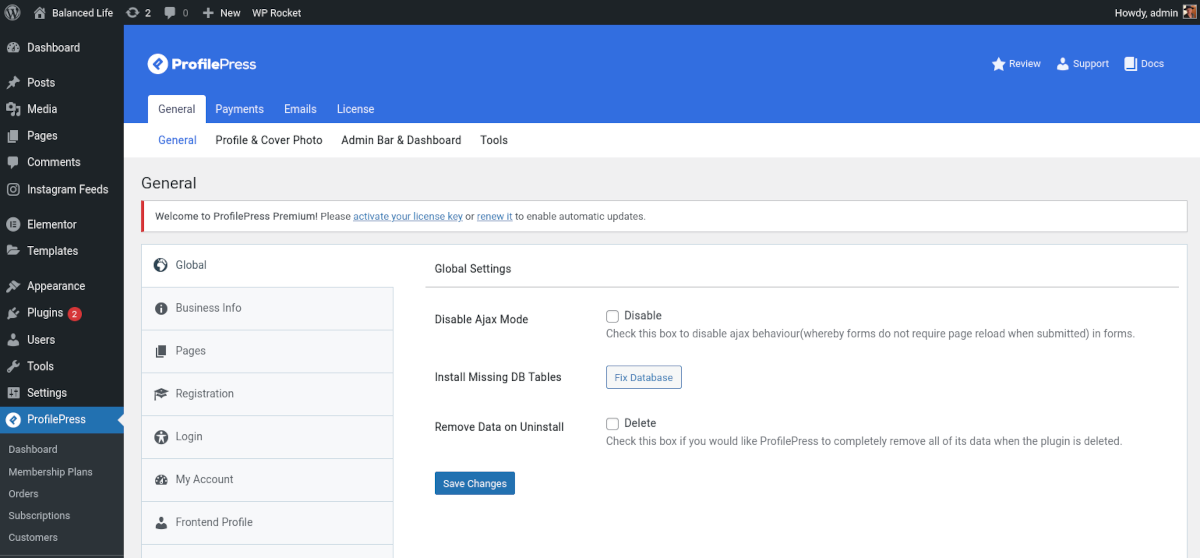
In your dashboard left-side menu, you’ll also see a new item called ProfilePress. You can access the settings from there at any time.
At the top, you’ll see a notification that ProfilePress needs to create several pages. You’ll want to click that Create Pages button to ensure everything is set up correctly.

With the initial setup out of the way, let’s create some things.
Creating a Membership Plan
ProfilePress allows you to create as many membership plans as your heart desires. For this article, we’ll just make one.
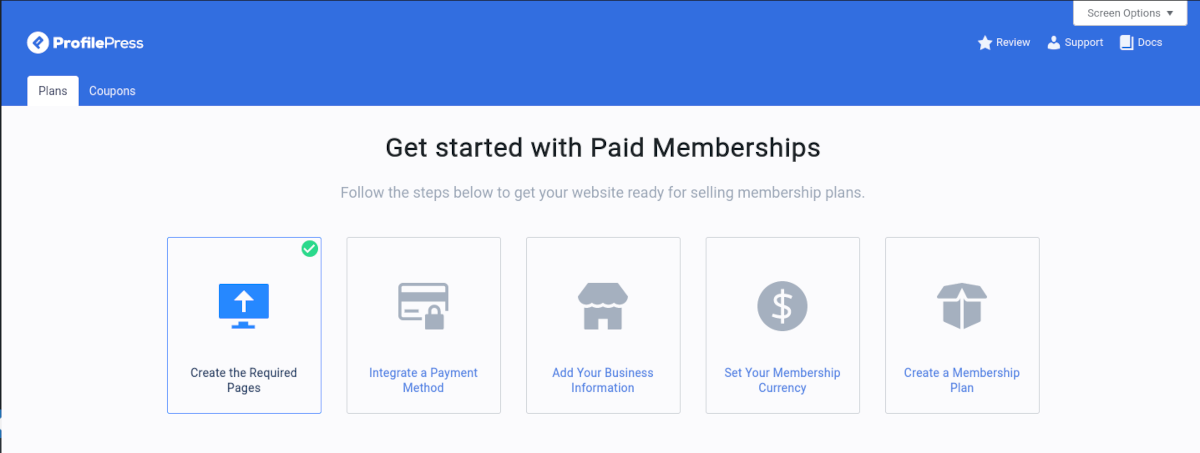
First, navigate to ProfilePress>Membership Plans. You’ll notice that the first step has already been done for you — creating the required pages I mentioned earlier.
Creating a membership plan is easy. To create a plan, click the Add New Plan button. On the next screen, fill in the fields for your plan name, description, etc.
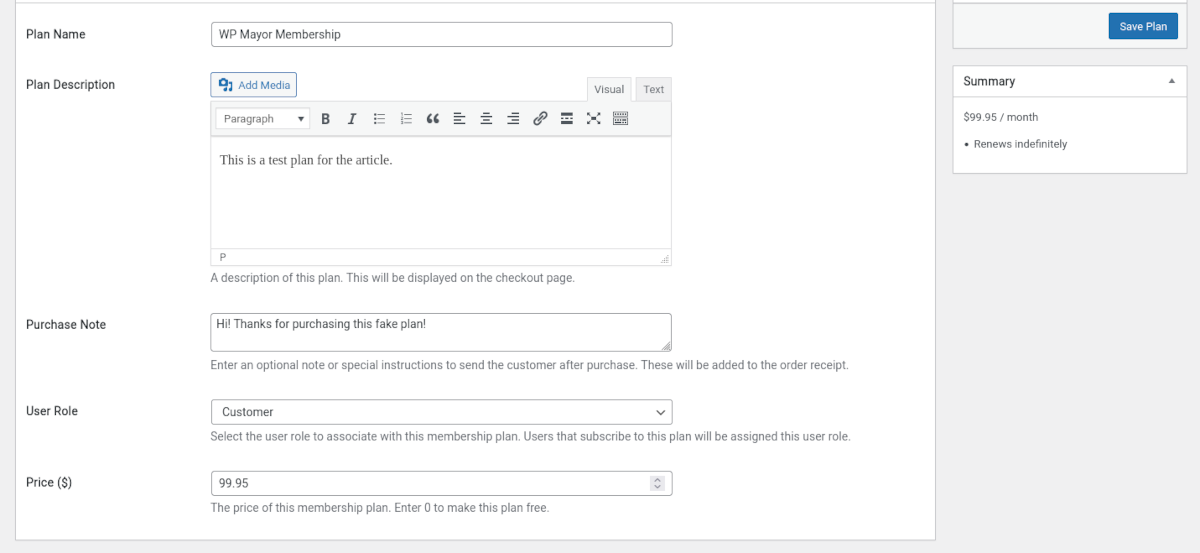
You’ll also need to choose a role for new subscribers. As the ProfilePress documentation states, “This is particularly useful if you use plugins that offer a conditional display of elements and contents or trigger certain actions based on user roles.”
In the next section, under Subscription Settings, you can determine the Billing Frequency, Subscription Length, and Signup Fee and decide if you want to offer a free trial. This section is where you would determine if you want to provide a recurring subscription or a one-time purchase.
You can always go back and edit these settings later.
The last section, Downloads & Integrations, allows you to add any digital files you’d like to include with the membership plan. Even if you hadn’t originally planned on providing any files, it’s worthwhile to consider. First, it’s a significant value-add and can increase customers’ trust in your offering. It can also be a way to upsell a particular product or service you offer on your site.
After filling out all the fields, click the blue Save Plan button at the top of the page. It will appear in your list of Membership Plans, and you can check out the URL to see the checkout page.

The default checkout page is pretty bare bones. However, you can customize this page as much as you like. Later on we’ll get into customizing forms and pages to match your site’s branding.
Integrate Payment Method
If you want to charge money for your plans, you’ll need to set up at least one payment method. This is super easy to do. On any of the ProfilePress menus, you’ll notice the boxes at the top, one of which says “Integrate Payment Method.” Once you click that, you’ll see the Payment Methods menu.

As of this writing, the three current methods are:
- Store Payments
- Stripe
- PayPal
The configuration for each method is simple and intuitive. If you want to process payments manually or process free orders, you’ll want to enable Store Payments.
For configuring Stripe and PayPal, it’s a good idea to have your account info handy during setup. There’s also a handy Test Mode feature so you can test purchases without processing payments.
Creating new Membership plans is easy. Now let’s talk about customization!
Creating a Custom Registration Page
ProfilePress creates a default registration page after installation — as long as you clicked that “Create Pages” button earlier. You can see it by navigating to Pages>Sign Up and clicking Preview.
Note: If you’re logged in, it will say you’re already signed up. Just copy the link and open it in a private browser window to preview the page as it would appear to a customer.
The default page looks fine, but you’ll likely want to make it your own. Let’s do that now.
Create a Custom Form
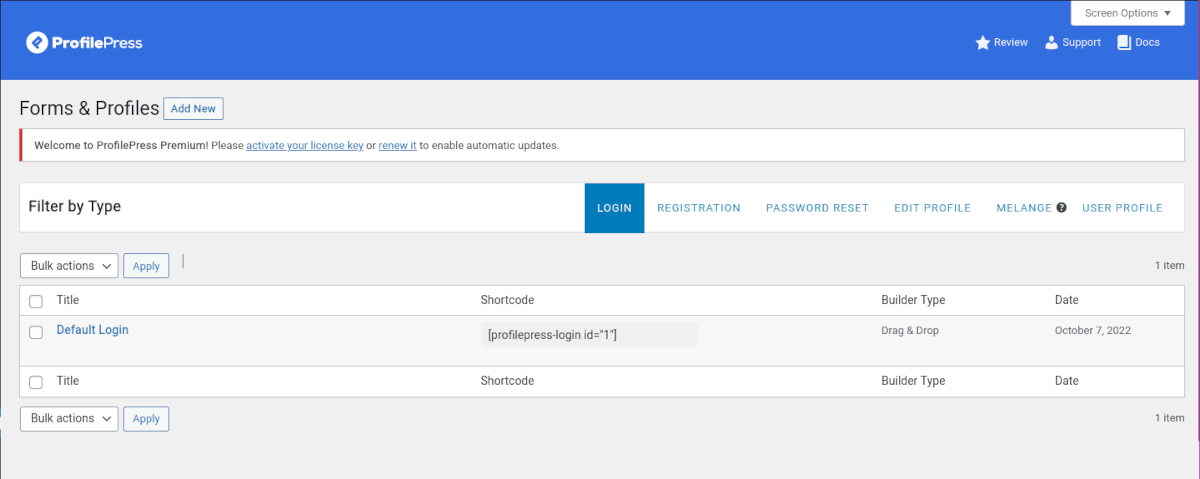
The first thing you need to do is create a custom registration form. Navigate to ProfilePress>Forms & Profiles.
Click Add New Form. You have the option of using a Drag & Drop builder or coding your own from scratch. For now, let’s choose Drag & Drop to make it easy. Under Form Type, make sure you choose Registration.
There are several templates to choose from, or you can create one from scratch. Now you can customize your form by dragging and dropping in the fields you want. Under Form Settings, you can choose colors, fonts, and field shapes to match your site’s branding.

Save the changes and preview the form. A shortcode will be generated — copy it and keep it handy for the next steps.
Create the Custom Page
Create a new page as you usually would in your WordPress dashboard. In the block editor, add the shortcode block and paste the shortcode you copied earlier. Voila! You now have a custom registration page. You can add as much content or styling to the page as you like. Just make sure you have that shortcode in there.
More Features of ProfilePress
There are features in ProfilePress that I didn’t have room to cover in detail for this article. The Content Protection feature gives you powerful options for setting up a paywall or controlling your site’s access. It’s worth exploring.
You also get Popups and Optins to maximize sales during checkout. And there are detailed analytics provided in the main dashboard of the plugin.
Pricing
ProfilePress is free to install and use. However, you can move beyond the core features with one of the three annual subscription tiers available:
Standard = $99
Plus = $199
Agency = $399

In addition to the added features, they remove the extra 2% Stripe fee. They also offer a 14-day money-back guarantee, so there’s no risk in trying it out.
Build a Powerful eCommerce and Membership Site with ProfilePress
If you’ve been considering starting a membership site or offering digital products for sale, you don’t have to use twenty different plugins or code it yourself. The functionality you need is contained in one plugin, ProfilePress.
