


If you use WordPress long enough, you’ll almost certainly encounter a situation where you need to migrate a WordPress site.
You might be changing hosts, moving a site from your local environment to your live hosting, working with client sites, or something else. The point is – migrations are a pretty common thing to do, but they can be frustratingly difficult, especially if you need to move a large site.
Transferito makes migrations a lot easier and faster by using a cloud-based approach to move your site to its new destination. It can handle both small and large sites, with advertised plans that have up to a 50 TB transfer size limit.
In our Transferito review, we’ll share more about what this plugin does and show you how it works to migrate a site using Transferito.
Transferito Features
Transferito’s most unique feature is that it uses a cloud-based approach to migrate your site. It’s not the only plugin to do this, but this feature is notable because I find this cloud-based approach to be a lot simpler than the more manual approach that a lot of the popular WordPress migration plugins use.
With those other plugins, you typically export your site as one or two files. Then, you need to manually upload those files to your destination and you’ll get some sort of feature to turn them into a working version of your site.
This manual approach is workable for small sites, but it can really bog down if you have a large site because it’s a pain to manually download and upload those files. Most other migration plugins offer a cloud integration with S3 or Google Drive to get around this, but it’s still not super convenient.
With Transferito’s cloud-based approach, you get to completely skip the “download → upload” part of migrating a WordPress site. Instead, all you do is:
- Install the Transferito plugin.
- Enter the FTP or cPanel details for your destination server.
- Wait for Transferito to directly move your files for you – no downloading and uploading!
It’s much simpler – especially for larger sites.
Beyond that cloud-based approach, Transferito also offers some other features to make your migrations go smoother, especially if you migrate a lot of WordPress sites:
- Partial migrations – in addition to migrating your entire site, Transferito also lets you only migrate your files or just migrate certain folders.
- Database URL replacements – Transferito will automatically run a search/replace on your database to make sure your migrated site uses its new URL. It will also handle database serialization issues to ensure no problems.
- Privacy-friendly – Transferito automatically deletes all your credentials ASAP so that it’s never storing your FTP/database/cPanel credentials.
If you pay for the premium version, you also get some unique features that I haven’t seen in other migration tools:
- 100% cloud-based migrations – migrate sites without even installing the WordPress plugin.
- Local migrations – you get a desktop tool to help you migrate sites between local and live environments. Great for agencies or freelancers.
- Saved credentials – you have the option to save credentials if you want to save some time.
How to Migrate a WordPress Site With Transferito
Now, let’s go hands-on and I’ll show you what it’s like to migrate a WordPress site with Transferito.
Again, here’s the basic high-level process:
- Install the Transferito plugin from WordPress.org.
- Enter your destination site details (FTP or cPanel).
- Wait while Transferito does its work.
Transferito should work for any WordPress host without any special configuration on your part.
However, if you’re running your own hosting setup on DigitalOcean or something similar (as I was for my test site using RunCloud), you should make sure you’ve enabled exec on the destination server if you hit any issues with your migration. This shouldn’t be an issue at most shared hosts and most normal WordPress hosts in general – it’s just something to remember if you’ve gone the route of configuring your own hosting rather than using an actual hosting provider.
1. Install the Plugin and Create a Transfer
To get started, you need to install the free Transferito plugin from WordPress.org. Once you activate the plugin, you can go to Transferito → Create Transfer to start a migration.
When you do this, Transferito will calculate the size of your site. The free version lets you translate sites up to 1 GB*, while the paid options let you go way beyond that (more on pricing later):
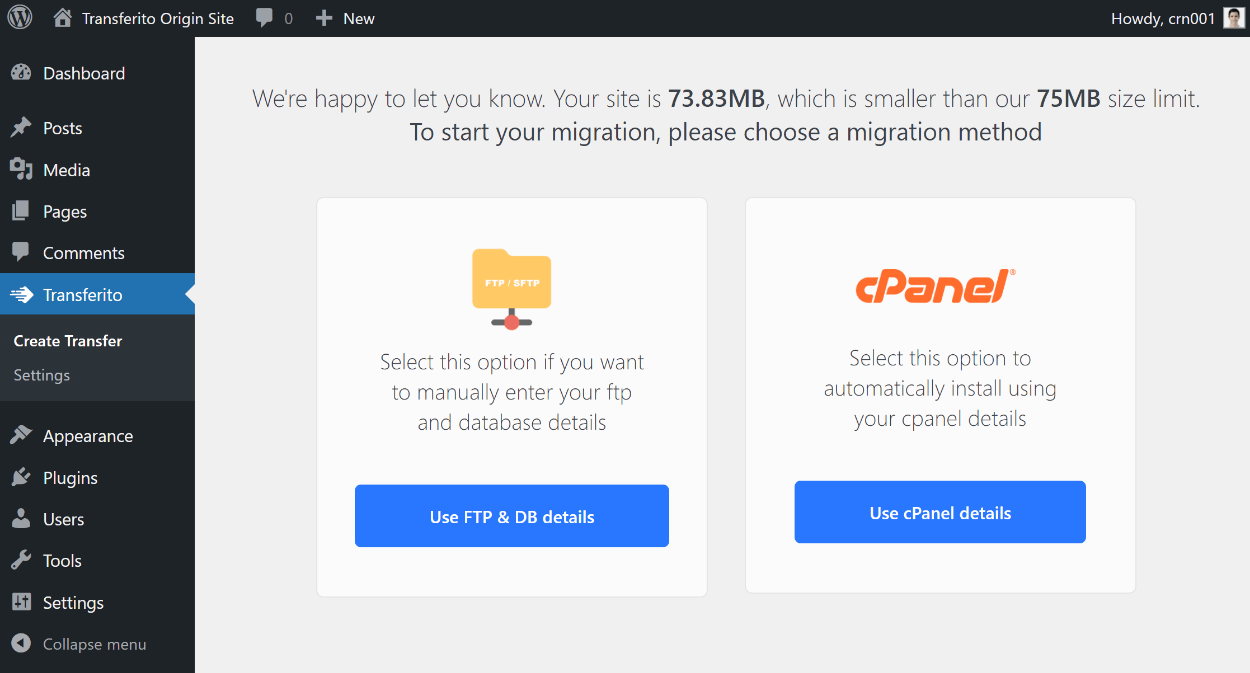
* When we originally wrote this review, the limit was 75 MB, which is why you see that in the screenshot above. However, Transferito has since expanded the limit to 1 GB.
If your site exceeds 1 GB, you would first need to pay for a plan and enter your API key (Transferito → Settings).
Once you’ve done that (or if your site is under 1 GB), you can move to the next step.
2. Enter Your Destination Site Details
As you saw in the screenshot above, Transferito gives you two different options for entering your destination site details:
- FTP and database credentials – you’ll need to enter your FTP credentials, choose your destination server directory, and enter the details for the empty database that you want to use for your migrated site.
- cPanel – you can enter your cPanel domain, your site’s destination URL, and your cPanel username/password.
If your destination host uses cPanel, the cPanel option is simpler because you don’t need to manually create a database or mess around with server directories.
I’ll show you how it works for FTP because that method is universal – but I recommend using the cPanel route if it’s available to you.
To get started, you’ll need to enter your destination host’s FTP credentials at the top. You can also optionally use the Selected folders checkbox to only migrate certain folders (for example, you could exclude the uploads folder):
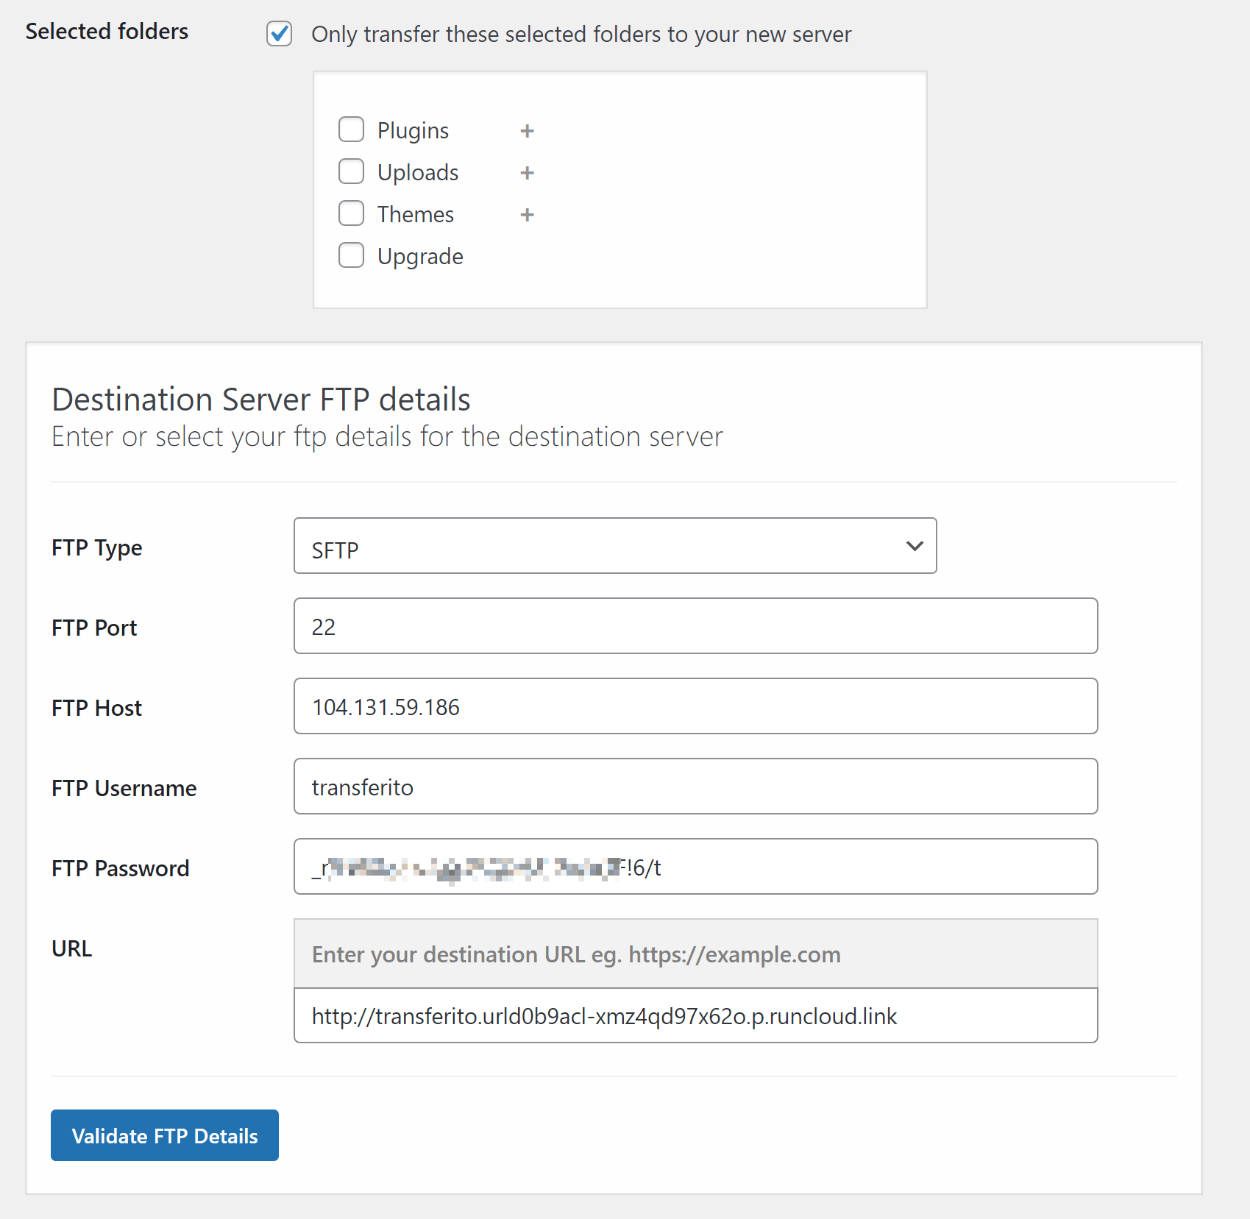
Once you click Validate FTP Details, Transferito will attempt to connect to your destination server. If all goes well, you should see your server’s information appear in the Destination Server Directory box below.
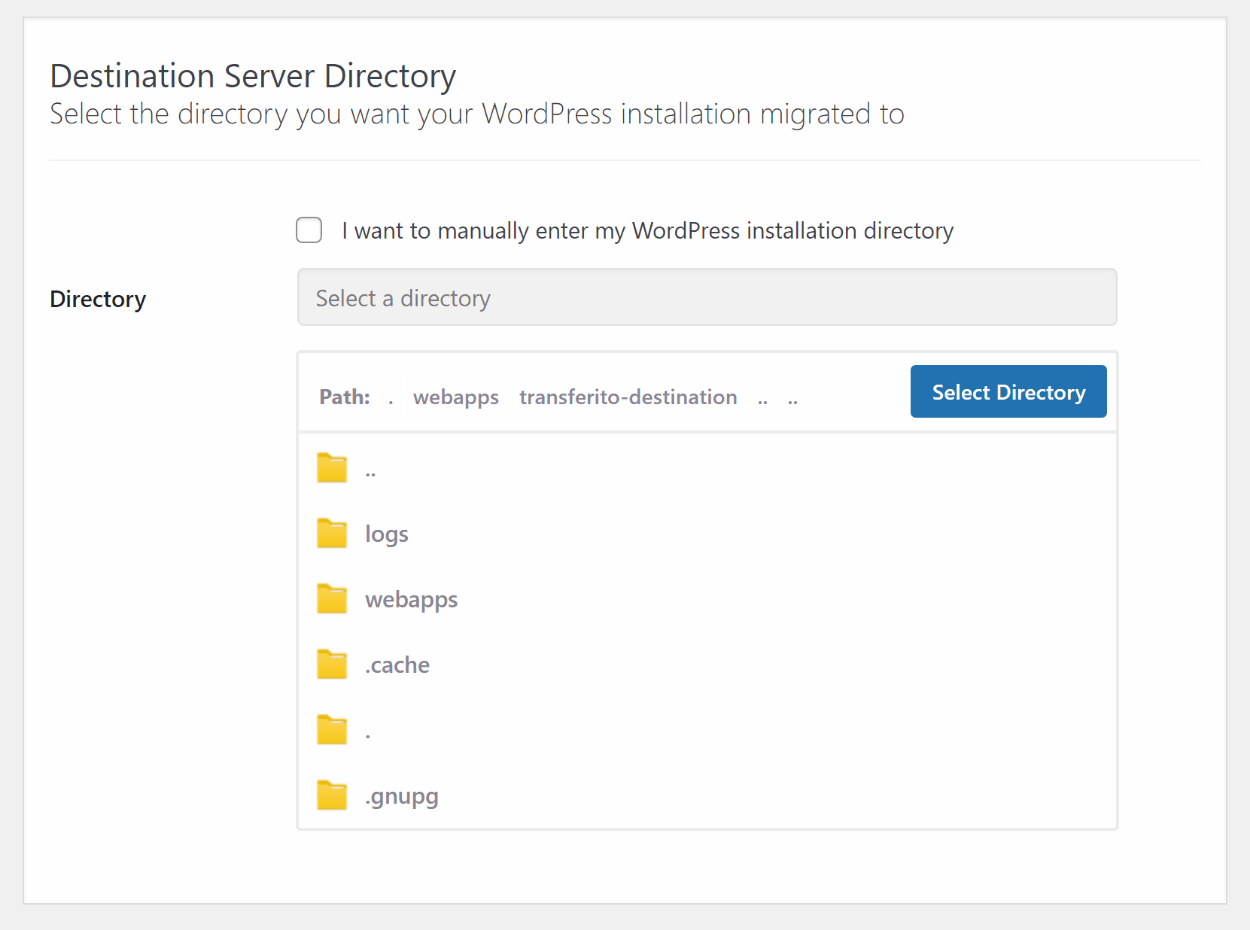
You can either choose your destination directory using the folder browser interface or you can manually enter the direct path to the directory that you want to use:
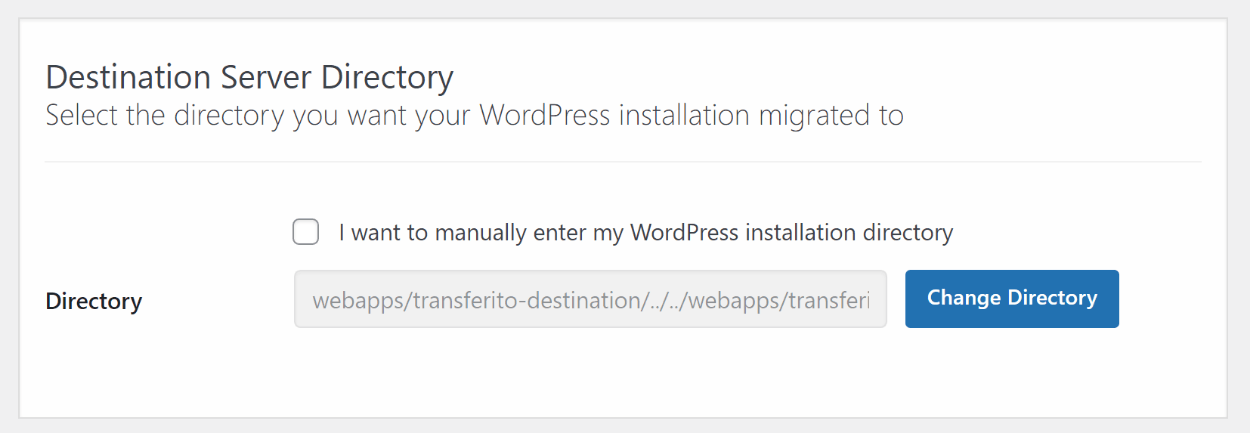
Once you’ve made your choice, you should see the direct path to the directory in the box:
To finish things out, you need to enter the database credentials for the database that you want to use at your destination server. If you haven’t already done so, you’d first need to create an empty database to use.
Or, if you only want to migrate your site’s files but not the database, you can also check the Exclude Database box to only transfer your site’s files to the new server:

And that’s it! You’re pretty much done. All you need to do is click the Start Migration button and Transferito will handle the rest.
3. Wait for Transferito to Do the Work
Once you click the Start Migration button, Transferito will first make a backup of your current WordPress installation. This might take a couple of minutes for larger sites – it only took about 40 seconds for my small test site:
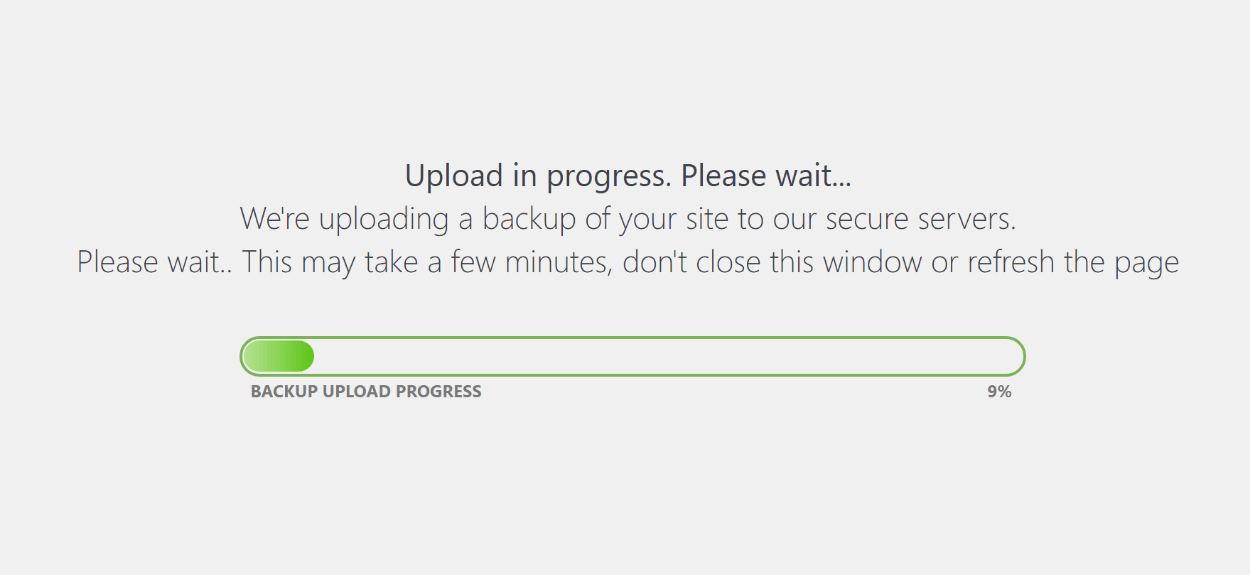
Then, it will move on to migrating your site to your destination. How long this process takes also depends on the size of your site, but it should be pretty quick for smaller sites.
And that’s it! If you go to your destination site, you should see:
- A working WordPress site using your new domain name if you migrated both the files and the database.
- The files on your server if you migrated just the files.
Thoughts on the Transferito Migration Process
Overall, the Transferito migration process was quite easy and I think experienced WordPress users or developers will have zero issues setting it up.
All you do is plug in some credentials, choose what you want to migrate (e.g. your entire site or just some/all of the folders/files), and then Transferito handles the rest while you sit back and sip some coffee.
However, for beginners, it can be a little complicated to have to manually set up the database first. Some other similar plugins use a different approach where you just install a fresh WordPress install at your destination and then enter your FTP credentials. This approach eliminates the need to manually create a database and enter database credentials because the migration can just use the existing database for the blank WordPress install.
Again, if you feel comfortable setting up a database yourself, there’s no issue. My suggestion is just a way to make the tool more friendly to beginners who might feel a little overwhelmed at that step.
However, I think the target market for Transferito is primarily WordPress freelancers and agencies, so this might not be a big deal and advanced users might actually prefer creating the database manually.
Transferito Pricing
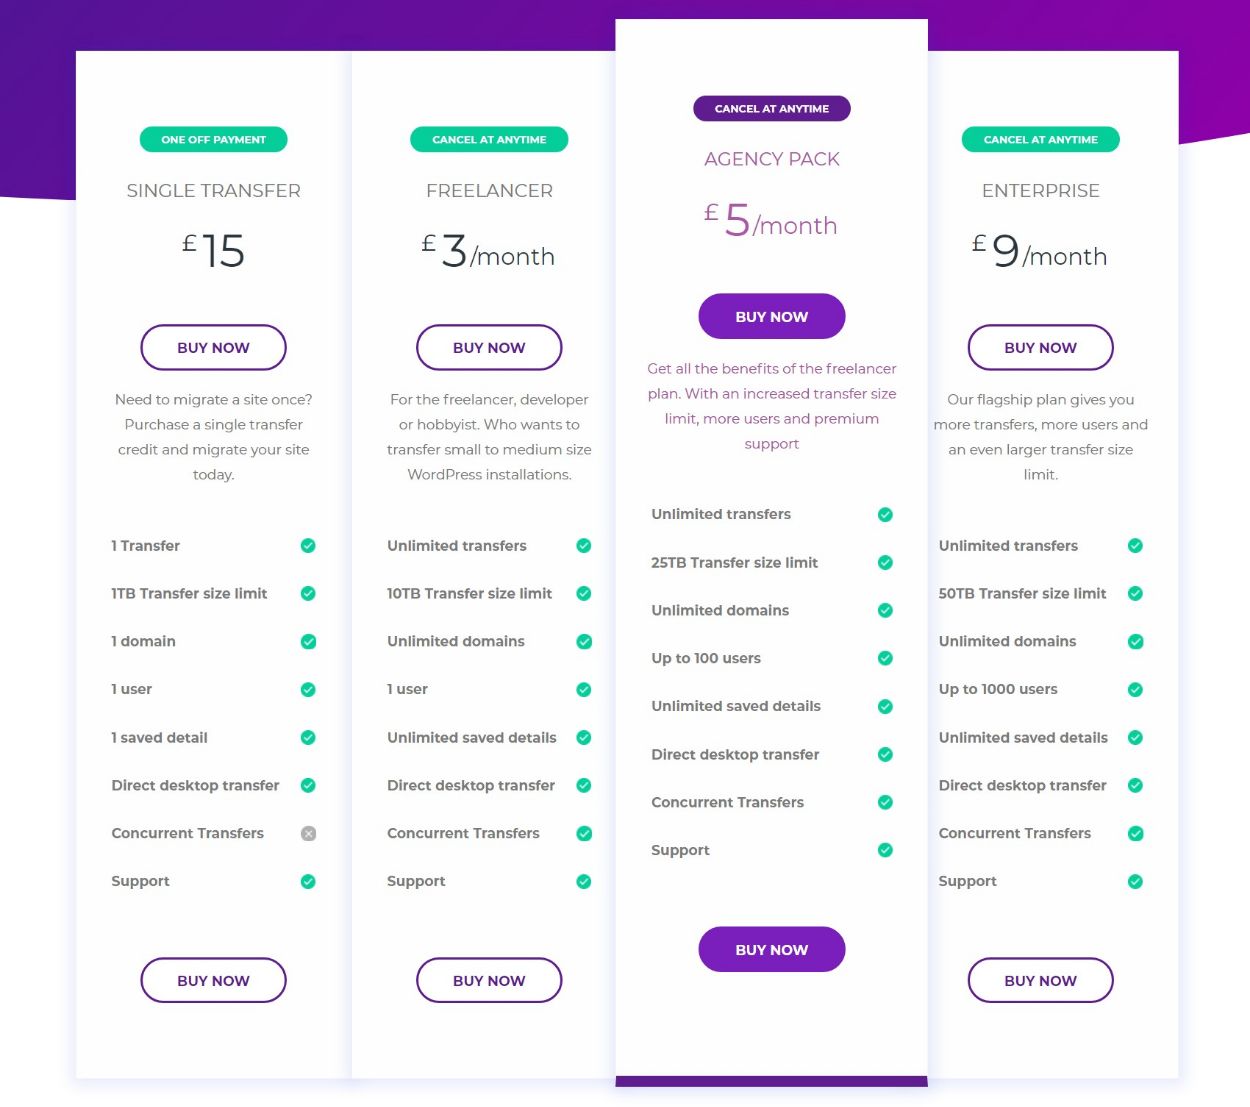
Transferito has pricing options for everyone.
First off, there’s a limited free plan that works for sites up to 1 GB. This should work fine for most static portfolio sites or brochure websites, as well as small blogs (especially if you don’t upload a lot of images/videos).
If your site exceeds the free tier, you can either purchase one-off credits or pay for a monthly plan. The one-off credits are aimed at an individual that only needs to migrate a site once, while the monthly plans are more aimed at freelancers and agencies who have a regular, ongoing need to migrate WordPress sites.
For one-off transfers, you can pay £15 one-time to transfer one site that’s up to 1 TB in size.
Personally, I think the value is a little iffy for a one-off transfer when you can find 100% free tools that use the same cloud-based approach for migration. Of course, the benefit of paying is that you get access to Transferito support to help with the migration, which might be worth the £15 to you. Transferito offers 24/7 support and a migration guarantee (Transferito will refund the money if your site can’t be migrated for some reason).
Additionally, Transferito will still be a better option for one-off migrations for very large sites, as the other free tools that I’m aware of cap out more around 200 GB.
Where I see the premium plans as offering better value is for freelancers and agencies who are constantly transferring sites and are willing to pay for an improved workflow. You get:
- Unlimited transfers.
- 10 TB to 50 TB transfer limits depending on your plan.
- Concurrent transfers.
You’ll also get other goodies like direct desktop transfers, saved details, and multiple users. For an individual or team transferring a lot of sites, I think those convenience features could definitely be worth £3 to £9 per month.
If you’re transferring a few sites per week, having a tool that can save you even just five minutes per migration will easily pay for itself even if you’re on the top-tier £9 plan.
Final Thoughts on Transferito
Personally, I think the cloud approach that Transferito uses is the most convenient way to migrate WordPress sites. I find it much simpler than the “download and upload” approach that a lot of the other WordPress migration plugins use, which can be especially troublesome for large WordPress sites.
Overall, I think Transferito is best for people who migrate a lot of WordPress sites (e.g. agencies or freelancers) and are willing to pay a few dollars per month for convenience. If it can help you save even just 30 minutes in a month (which it probably can), it will have already more than paid for itself.
If your site is under 1 GB, you can see how it works for you for free. Or, if your site is over the 1 GB free limit, I recommend setting up a test install and migrating it using the free version, which will give you a chance to test out the experience and see if it works for you.
If it does, you can consider upgrading to one of the paid plans according to your needs:
