


If you have a WordPress site with lots of content and regular traffic, you might be wondering how to grow it from there. The only way to do this is by selling access to your content using a WordPress membership plugin.
In this article, we’ll get into what a membership plugin can do for your site.
The Need for a WordPress Membership Plugin
Creating a membership site in WordPress can help generate both revenue and a loyal following. Using free content as a lead-in and restricted content that requires a membership is a great strategy. If visitors already love your content, they’ll likely pay for content that’s exclusively available to them as members.
Setting up these features on your existing site only requires a WordPress membership plugin.

The Restrict Content Pro plugin from StellarWP is the perfect tool for the job. It’s simple to use and developer-friendly. The plugin allows you to restrict post and page content on your site that you choose, based on membership levels.
For example, if you have a site where you share cooking tips and recipes, you could share easy recipes available to everyone and create a members-only area where you provide pro tips and exclusive recipes.
You can set up varying membership tiers and define which levels can access certain content. It’s free to install and get started.
How to Set Up Restricted Content on Your Site
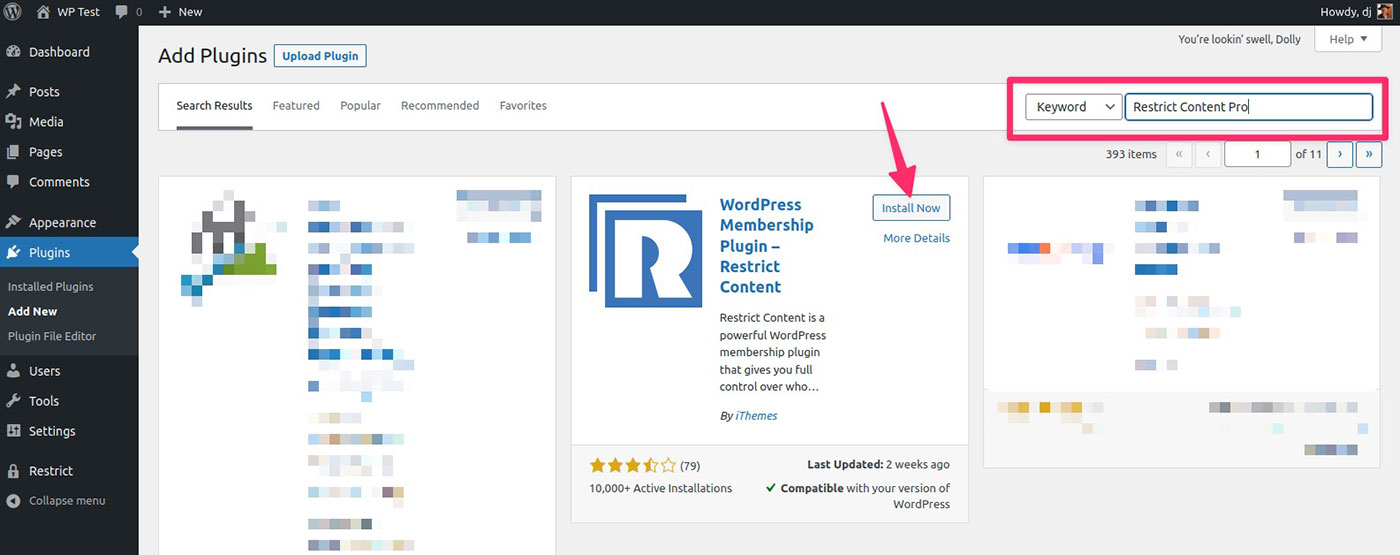
The Restrict Content Pro plugin is available for download on their site or you can install it from within your WordPress dashboard. Navigate to Plugins>Add New and search for “Restrict Content Pro.”
Once you have the plugin installed and activated, let’s go over the different areas to configure. To access the Restrict Content Pro settings, navigate to Restrict in your WordPress dashboard side menu. We’ll visit these in the order that it makes sense to begin rather than in order of how they appear in the list.
Settings
The first thing you see in the settings menu is the General tab, which shows a list of pages. These pages were created for you when you activated the plugin. You can use the template pages or choose to direct visitors to pages you have set up yourself. If you use the templates, you’ll want to edit some of the text so the messages are tailored for your audience.

The settings for the remaining tabs — Payments, Emails, Invoices, and Misc, are intuitive and contain descriptions for each configuration area.
It’s worth mentioning that under Payments, you can connect directly to a Stripe account or set up payments using PayPal or Braintree. If you’re going to accept payments for restricted content, you may as well configure payments while you’re here.
Membership Levels
Restrict Content Pro allows you to create multiple levels of membership. You can choose settings for:
- Access Level
- Duration
- Maximum Renewals
- Free Trial Duration
- Price
- Signup Fee
- User Role

The Access Level setting refers to a tiered system where you allow access to certain content based on the number of their level. For example, a user with a membership at level 5 will have access to all content at level 5 and below, while a user at level 1 will only be able to view content at level 1.
Memberships
The Memberships menu allows you to add members to your site manually. This is useful for when you’d like to give away a membership or if someone paid you before registering through your site.

When you select the membership level, the plugin will automatically update the membership’s billing cycle and expiration date. The Memberships menu also has filtering tools, making it quicker and easier to sort and find certain members if you have a long list.
Customers
Whether a user registers through your site or you create their account manually, they are added as a customer automatically.
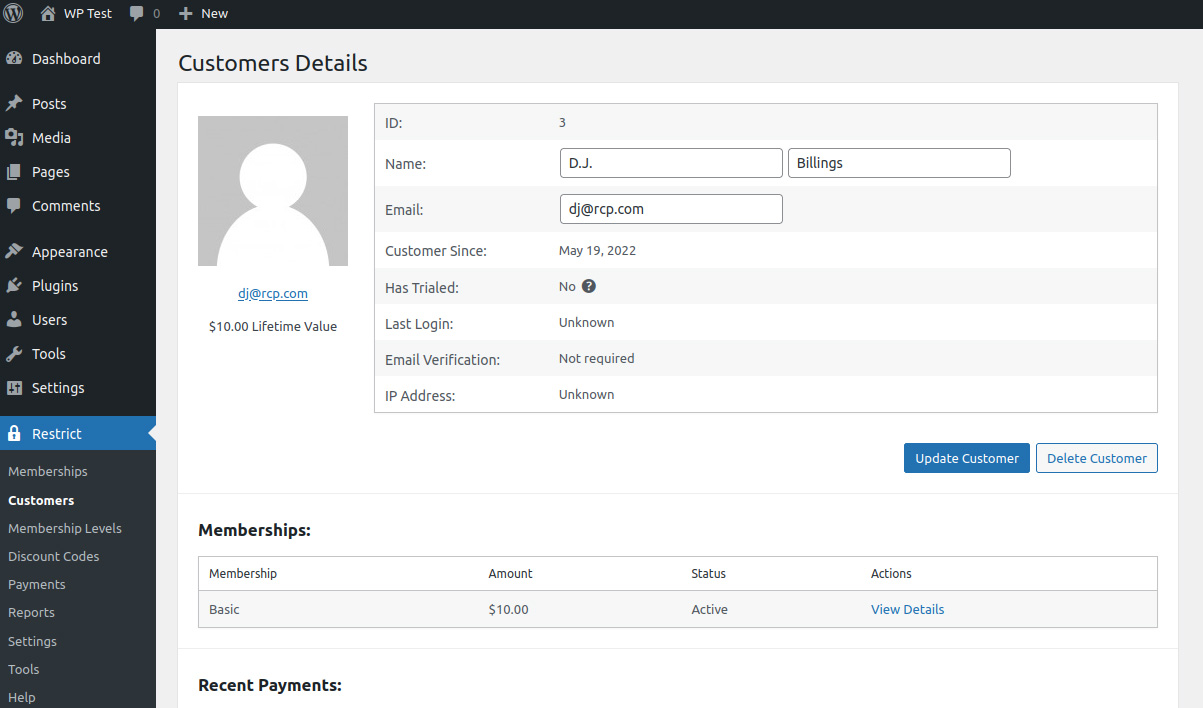
When you click on a customer in the list, you can see data about them such as Last Login, Memberships, and Recent Payments.
Discount Codes
You can create multiple discount codes and apply them only to specific membership levels or all. There’s also a selection to apply the discount only to the first membership payment.
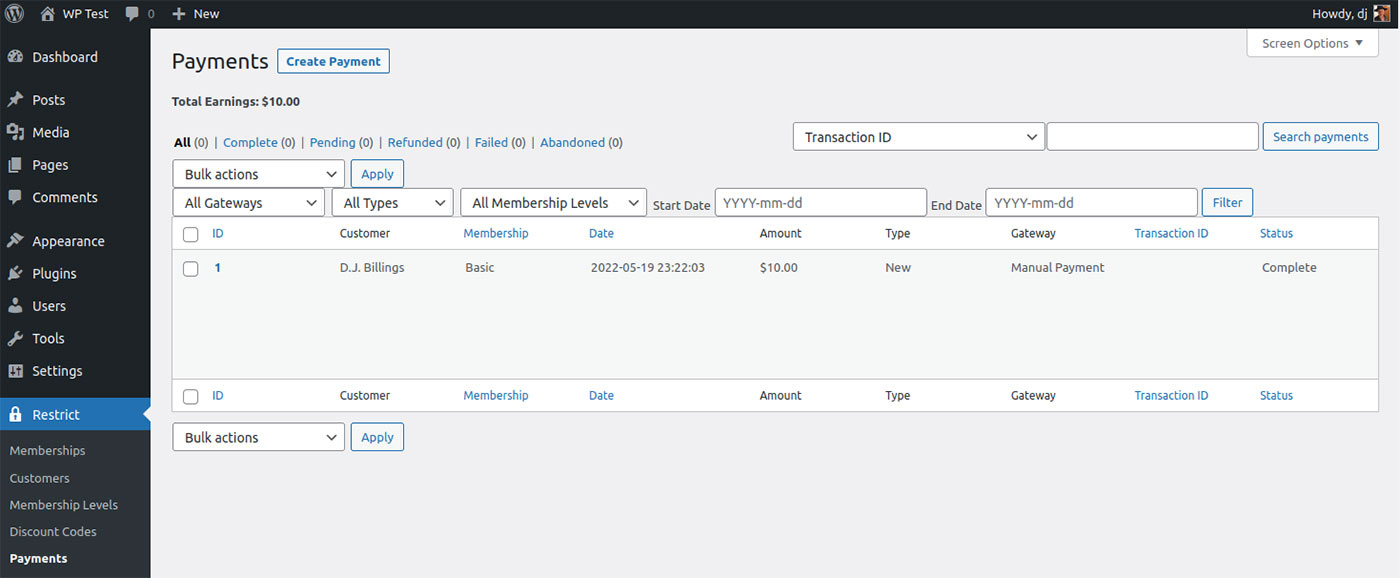
Payments
Restrict Content Pro lets you record payments manually for existing users. This method doesn’t charge the customer through your payment gateway, it only creates a record. You can also track pending payments and refunds in the same way.
Reports
Reports are a handy tool for analyzing how well your membership site grows. Here you can track Earnings, Refunds, Signups, and Membership Counts.
Tools
Restrict Content Pro Tools gives you system info about your entire site which you can download. There is also a Debugging log. These both come in handy when you’re troubleshooting something on your site and a support technician asks for details.
There is also an Import tool that allows you to upload a list of memberships or payments from a CSV file. Restrict Content Pro provides a tutorial and a sample CSV file to get you started. You also have the ability to export your memberships and payments.
How to Restrict Your Content
Now that we’ve covered the basic settings, let’s get into the nitty-gritty of restricting content. There are a couple of areas you’ll need to configure.
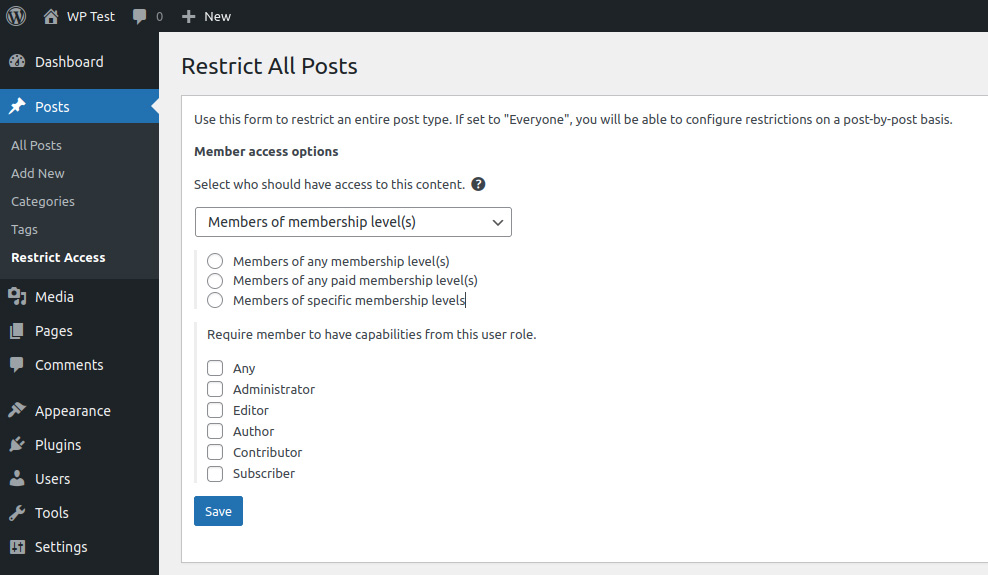
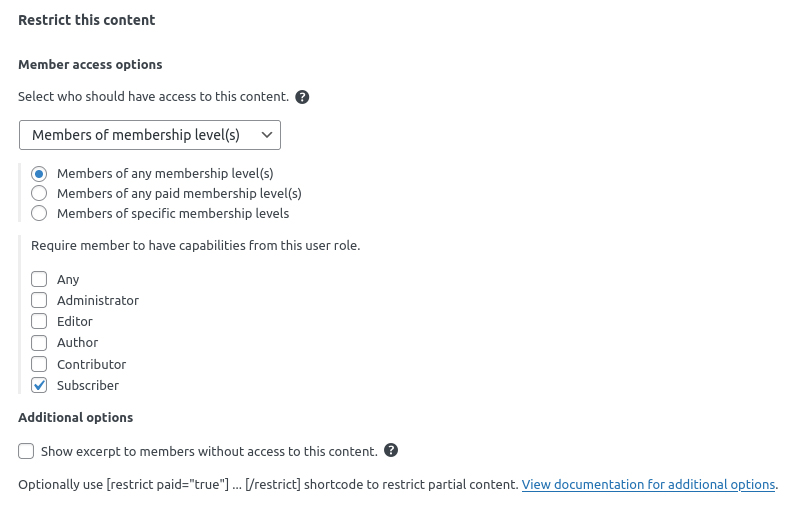
In the WordPress dashboard, under both the Posts and Pages menus, you’ll notice a Restrict Access menu. Click into that menu, and you’ll have options for settings that apply to all posts or pages.
If you prefer to handle content restrictions for each individual post or page, then keep Member access options set to “Everyone.” Otherwise, you can restrict according to Membership level, access level, or Membership role.
Suppose you’ve decided you’d like to set restrictions individually. You can do that within each post in edit mode by scrolling to the bottom and managing the settings there.
That’s all there is to it. You can change the restriction settings any time you like, which you may decide to do as your site grows or you add new Membership levels.
Using a WordPress Membership Plugin Makes Restricting Your Content Easy
As you get started, a clever strategy could be to offer free trials to your existing audience, either on your website or through social media. Once they’ve registered as members, the chances are likely they’ll renew to keep getting access to your best content.
Experiment by creating varying access levels and adjusting the Restrict Content Pro settings. As you analyze the data from your reports, you can make changes that help retain your existing members and bring in new ones.
You can easily create a membership site to generate revenue and grow your audience. When you add the Restrict Content Pro plugin to your existing WordPress site, you control how your content is shared with users.
In the comments below, ask questions or share your experiences managing membership sites using a WordPress membership plugin.
