


Ever wished that you could automate actions on your WordPress site? You could improve your marketing, streamline your admin, sell more products…all without lifting a finger.
WP Webhooks is a freemium WordPress plugin that helps you get closer to that dream by letting you automate your WordPress site in a ton of different ways, including both:
- Sending data from WordPress to other services (like a CRM, Google Sheets, etc.).
- Receiving information from other services and using it to perform actions on WordPress, like creating a new WordPress user when someone signs up for your Teachable course.
As the name suggests, it does all of this using the power of webhooks.
In our WP Webhooks review, I’ll start by explaining what webhooks are in the first place. Then, I’ll show you how the plugin can help automate your site.
What Are Webhooks?
Before I get to WP Webhooks itself, I think I first need to introduce the concept of webhooks, because you might not be familiar with them unless you’re a developer.
In a nutshell, webhooks let apps pass information between one another using a special webhooks URL format. You can use webhooks to connect one or more apps together and automate actions.
For example, let’s say you have an email opt-in form on your website and you want to pass the information that people submit in your opt-in form to your favorite email marketing service. Your WordPress form plugin might collect a user’s details and then send that data to the email marketing service using the webhook format.
You don’t really need to know the format itself. The important thing is just that webhooks let you connect different plugins/apps/tools.
WP Webhooks Review: What the Plugin Does
Now that you know what webhooks are, you can probably guess that the WP Webhooks plugin is focused on helping you use webhooks to automate your WordPress site in tons of interesting and useful ways.
It takes what would be a complicated thing – setting up webhooks – and makes it accessible via a graphical interface and built-in integrations.
I wouldn’t necessarily say it makes the process totally simple, but it does make the process accessible to non-developers, which is already quite useful.
You can use WP Webhooks to help in two directions – you can use other tools to send information to your WordPress site and you can use your WordPress site to send information to other tools:
- Triggers – send data to specific webhooks URLs when something happens on your site.
- Actions – receive data from other webhooks URLs and perform certain actions/logic on your WordPress site based on that information.
You’ll get mapping tools to help you easily connect the data between your triggers and actions. And you’ll also get testing tools to make sure your configuration will work.
Beyond that, you’ll get other useful features like:
- Added authentication for triggers and actions
- IP whitelisting to only allow certain IPs or IP ranges to use the plugin
- Detailed logging to keep track of all the triggers and actions that have happened on your site
Integrations
The value of WP Webhooks comes in its integrations, so let’s talk about those next.
First off, WP Webhooks has dedicated integrations with the popular third-party webhooks/automation services. These include:
- Zapier
- Integromat
- Pabbly
- Integrately
WP Webhooks is also compatible with other tools that use standard webhooks, such as IFTTT and Automate.io.
Through these integrations, you can connect to any one of the thousands of apps that these services support.
On the WordPress front, WP Webhooks also has dedicated integrations for the following WordPress plugins:
- WooCommerce
- Easy Digital Downloads
- Gravity Forms
- WPForms
- Contact Form 7
- WP Reset
Of course, it also has integration with the WordPress core itself.
Examples of Automations With WP Webhooks
One of the nice things about WP Webhooks is that it’s really flexible, so I can’t list every single possible WordPress automation that you could set up.
Here are the usage examples that the developer provides on the WordPress.org page:
- Add a WordPress user when someone signs up to your Teachable course
- Create a WordPress post using a voice assistant (like Alexa)
- Add a bunch of WordPress users from an Excel/Sheets list
- Create a user via data from Airtable
- Send data to your CRM when a user logs into your WordPress site
- Fire custom PHP code based on incoming data
- Fire a custom webhook whenever a WordPress shortcode is called
And here are a couple more examples that I came up with:
- Pass data from a form to your CRM, webinar service, email marketing service, help desk, etc.
- Start some order fulfillment task when a user makes a payment via Gravity Forms or WPForms.
Basically, if it involves the WordPress core, one of the plugins above, or an app that’s on Zapier and co., you can probably set up the automation.
Hands-On With WP Webhooks
Now, let’s go hands-on with the plugin and I’ll show you what it’s like to set up an automation with WP Webhooks. For reference, I’m using WP Webhooks Pro for this example, but the same basic principles will apply to the free version.
To get started, you can access the plugin’s dashboard by going to Settings → WP Webhooks Pro. It looks like this:
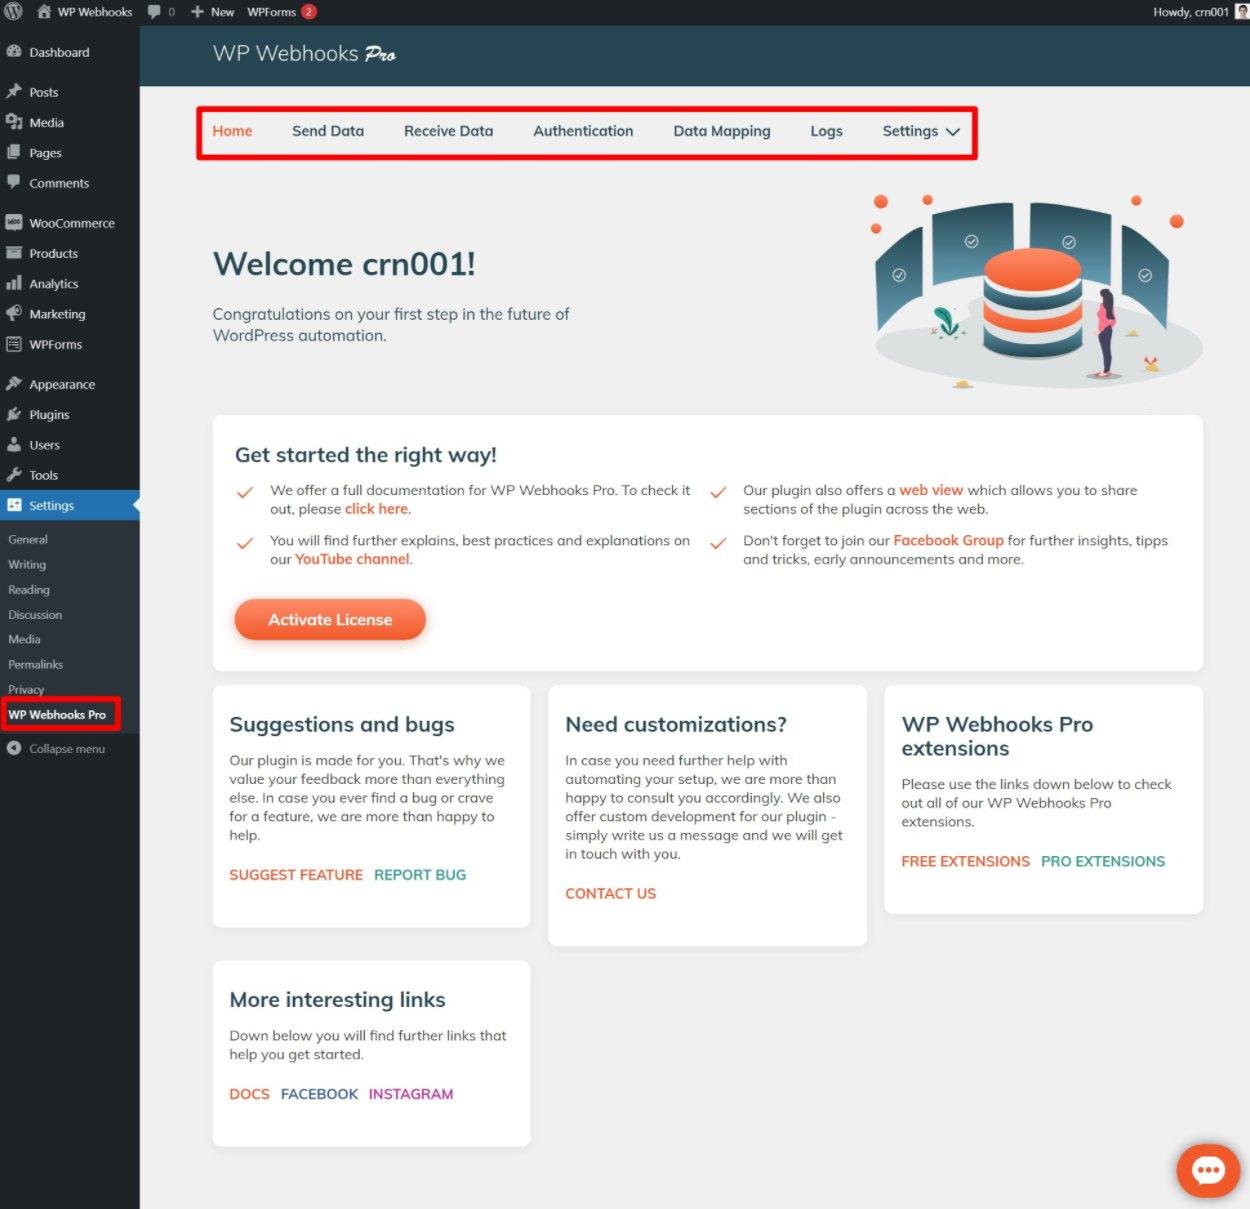
The two most relevant areas to start are:
- Send data (trigger) – this lets you send data from your site/plugins to other tools.
- Receive data (action) – this lets you receive data from other sites to perform an action.
Let’s look at them…
Send Data
From the Send Data area, you can send data to another service based on a trigger on your site.
On the left, you’ll see a list of all the potential triggers, along with an option to search them. You’ll see triggers for core WordPress actions, as well as integrated plugins that you might be using.
Below, you can see that I’ve selected New user as my trigger:

For each trigger, you can click the Description accordion to expand a detailed explanation of how that trigger works.
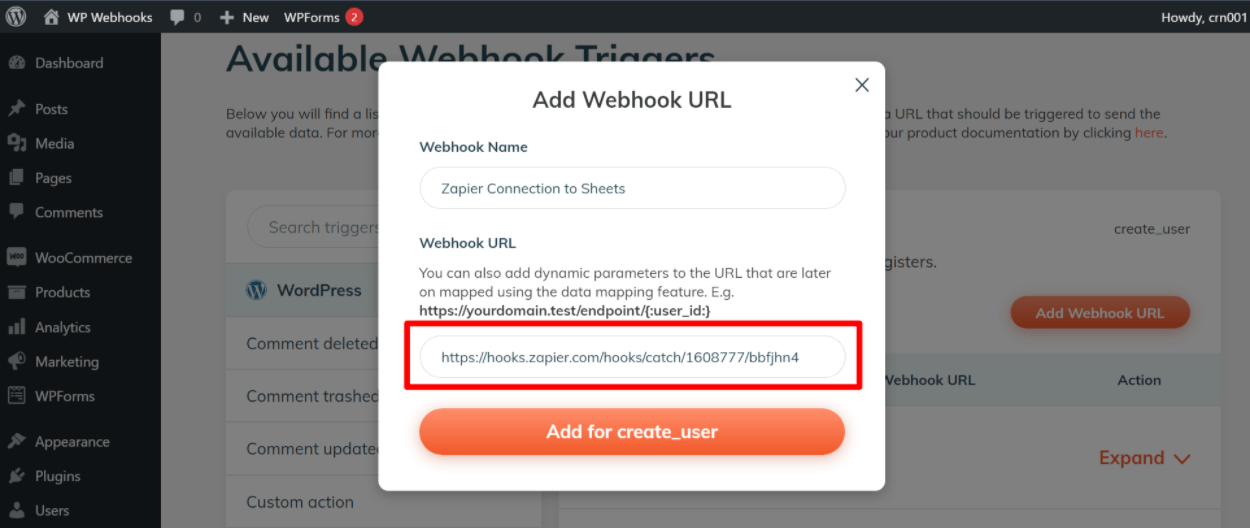
From there, you can click the Add Webhook URL button to add the destination webhook URL. Typically, this will be the URL from a service like Zapier or Integromat (though it doesn’t have to be – those services are just the easiest way to get started).
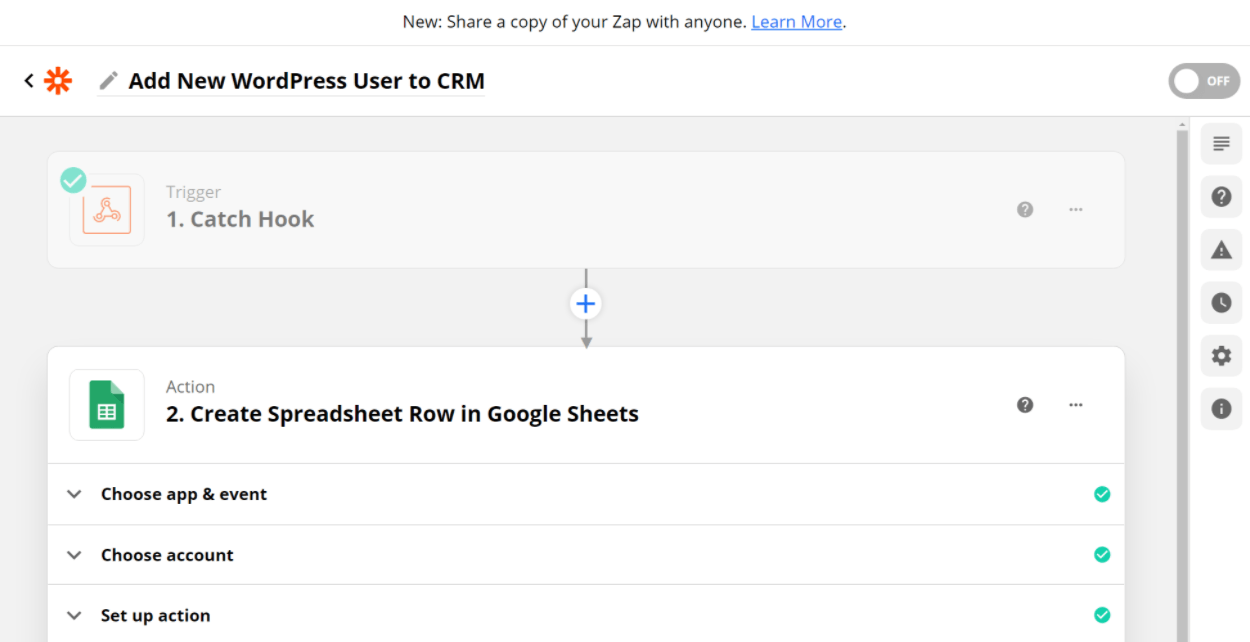
For example, let’s say I want to use Zapier to add details on new users to a spreadsheet in Google Sheets. First, I would set up a recipe in Zapier. I would set the trigger in my Zapier recipe to be Zapier webhooks. The recipe might look something like this, with the trigger being to “catch a hook” and the action being to create a new row in Google Sheets (or add a contact to your favorite CRM, etc):
In your Zapier recipe, you’ll see the custom webhook URL:
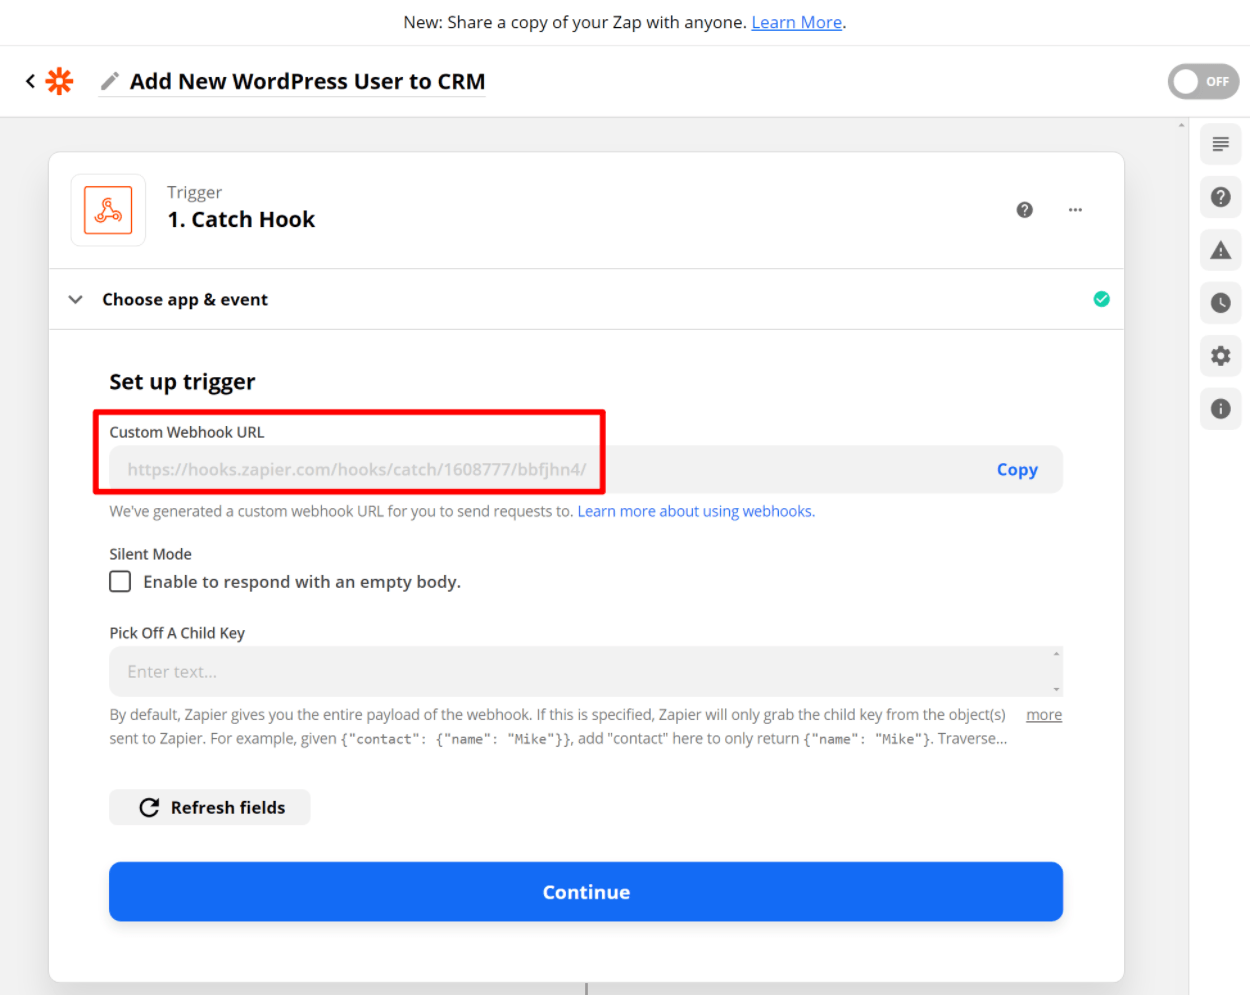
This URL is what you would need to add to WP Webhooks so that the plugin can pass information to your Zapier recipe.
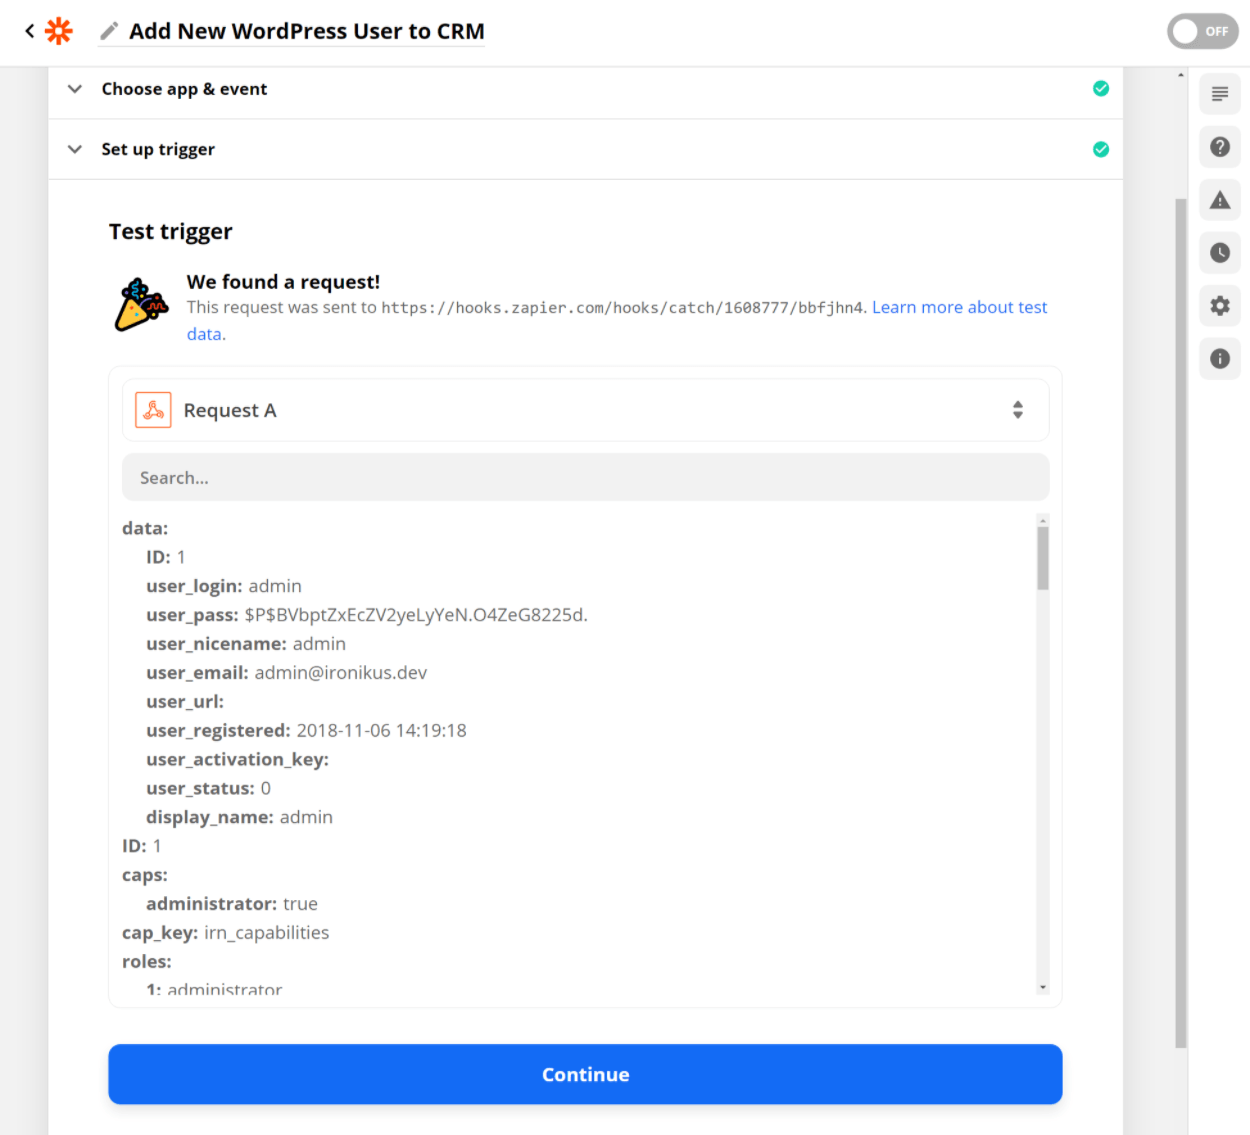
You could then send some demo content to Zapier to test, and you’ll see a bunch of user information that Zapier received from the webhook:
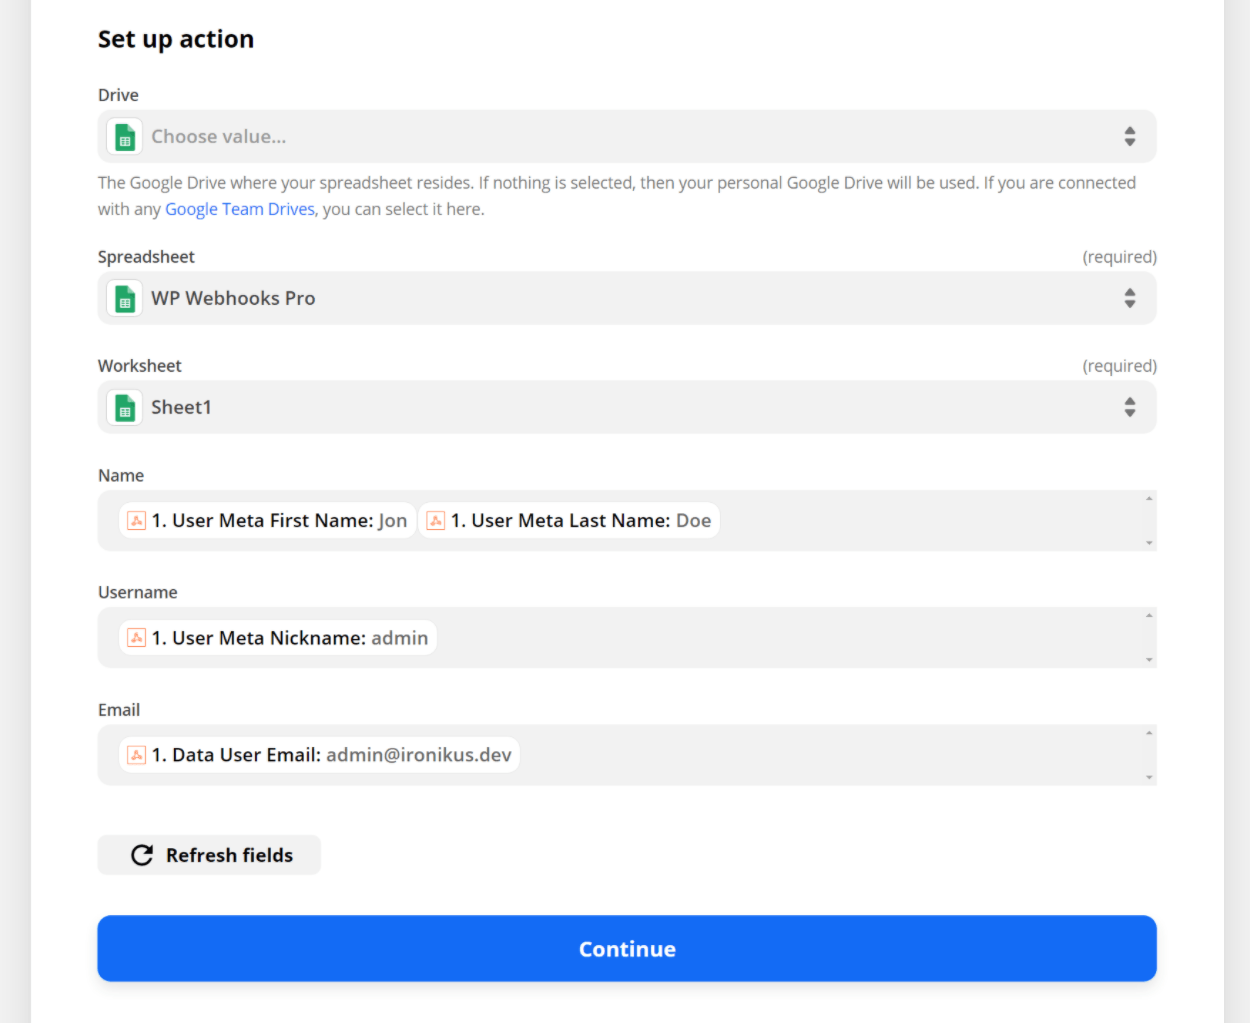
Then, you could use Zapier’s interface to map the data from the webhook to your action.
Below, you can see that I’ve mapped the data that WP Webhooks sent from my WordPress site:
And that’s it! Now, here’s how it will work:
- New user registers on your WordPress site.
- WP Webhooks detects that and uses the Zapier URL to pass that information to Zapier.
- Zapier adds that information to your target app. In this example, that’s creating a new row in Google Sheets, but it could also be creating a contact in HubSpot, or anything else.
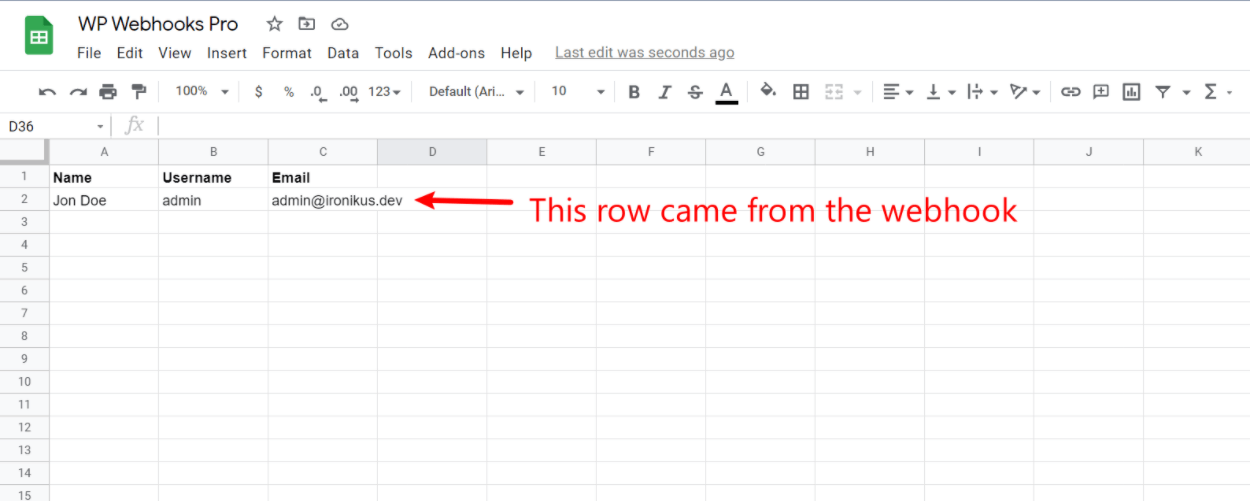
And voila – you can see the dummy user information in my Sheet:
Receive Data
The Receive Data tab follows the same principle as sending data, but in reverse. This time, you’ll send data to a special URL on your WordPress site and use that data to perform an action. For example, you could connect another app to Zapier and then have Zapier pass information to your site’s webhook URL.
There are two parts to the Receive Data tab:
- Webhooks URLs – these let you manage your receiving URLs.
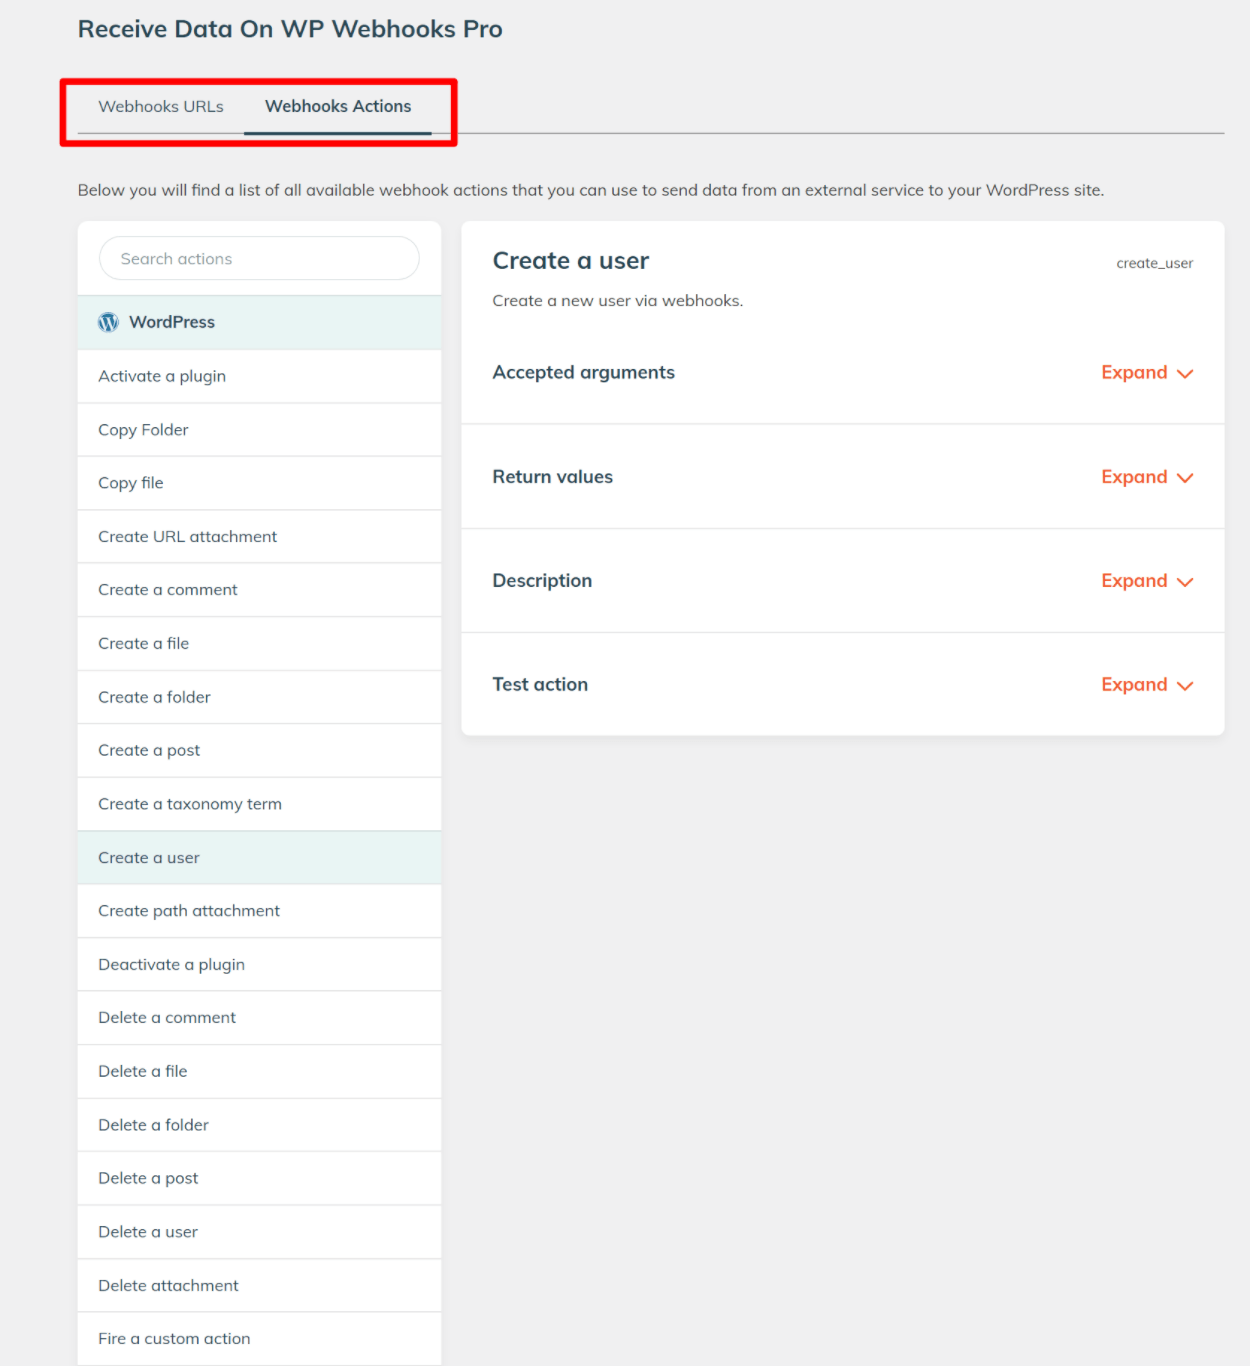
- Actions – these are actions that you can take based on the webhook data that you receive.
In the actions area, you’ll see actions for both core WordPress functions as well as any integrated plugins that you’re using. For example, if you have WooCommerce, there are actions to create a WooCommerce order or make a WooCommerce API call:
I won’t show the whole process again because it’s the same basic idea, just in reverse. But I will highlight a few useful features and key details.
First, when you add a webhook URL, you can limit it to certain request methods or actions on your site. This is useful if you want to make sure a service can only perform a very limited set of actions on your site:

When you set up actions, there’s also a really useful Test action feature that lets you test the data that you’ll pass to the webhook:

Finally, as for the webhook itself, you’ll need to actually set it up using the action information that I highlighted in the previous screenshot. You can do this by copy and pasting – it might look something like this:

Data Mapping
Data mapping is a useful feature that does what the name says – it lets you map different pieces of data to one another. You can do this by mapping keys to values:
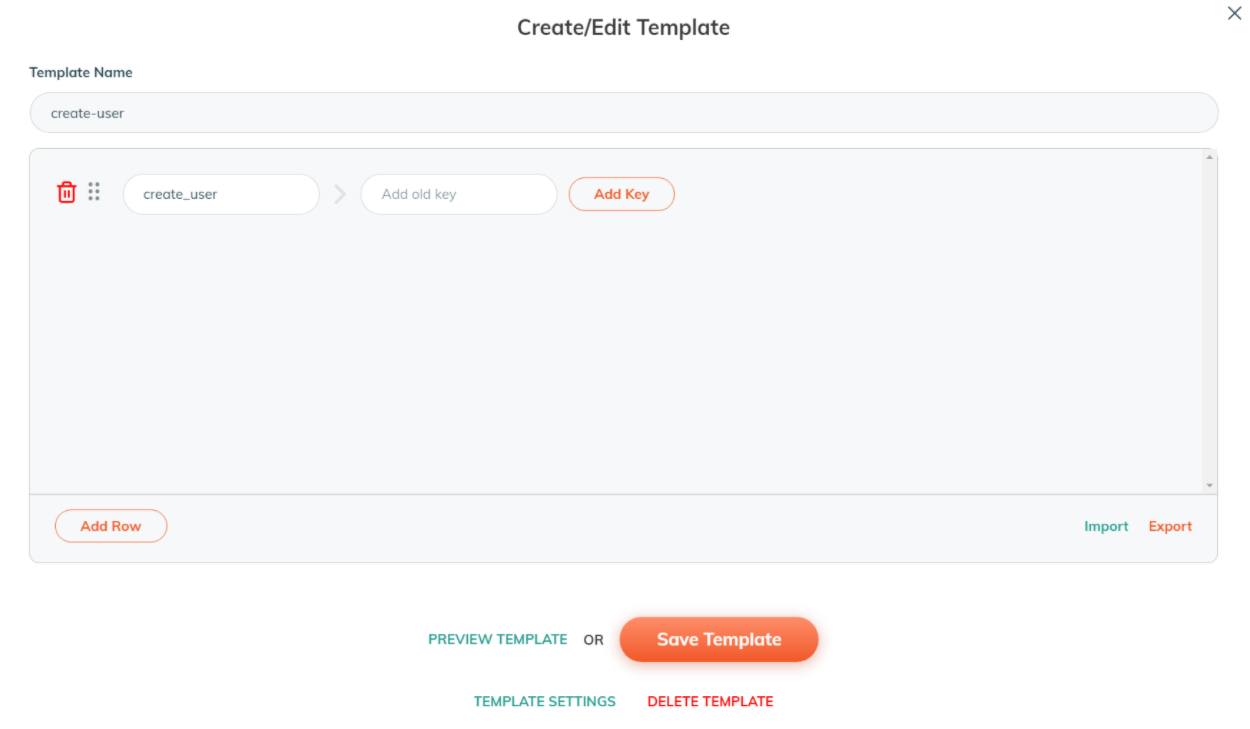
When you add an old key value, you’ll get a popup with more details:

I think this is mainly for advanced use cases where you’re not using something like Zapier in the middle, as Zapier lets you set up the mapping already when you create a zap. You can learn more here.
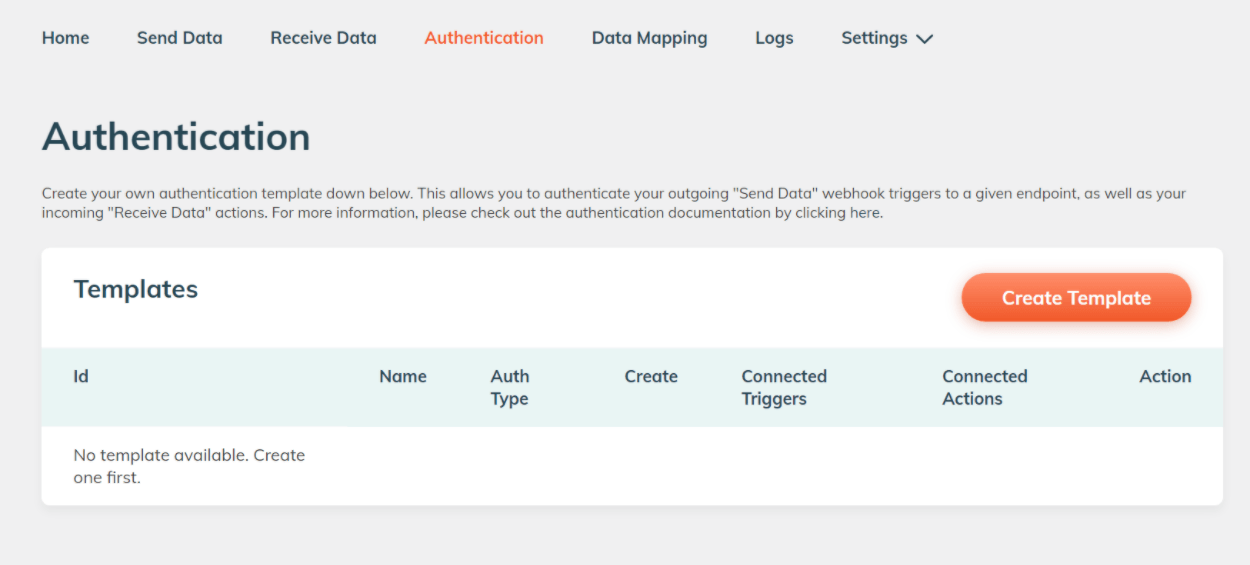
Authentication
The Authentication tab lets you authenticate your outgoing “Send Data” webhook triggers to the endpoint or your incoming “Receive Data” actions. You can learn more here.
Logs
The Logs tab shows a log of all the requests that were triggered by a trigger or valid action:

WP Webhooks Pricing
WP Webhooks comes in both a free version at WordPress.org as well as a premium version with more features.
To learn about the feature differences between the free and paid versions, the developer has a very detailed feature comparison table that you can view here.
If you need the premium version, there are three pricing plans. All three pricing plans give you access to all the core features, but the highest-tier plan also adds white-label support. You’ll also get priority support if you upgrade beyond the entry-level plan.
Other than those differences, the main difference is the number of sites on which you can activate the plugin:
- Starter – 1 site for $149
- Business – 10 sites for $249
- Unlimited – 75 websites for $499
To save some money, you can use our exclusive coupon code:
Final Thoughts on WP Webhooks
Overall, I think that WP Webhooks is super flexible, but I also think that WP Webhooks is best suited for advanced users. You certainly don’t need to be a developer to benefit from it, but it does help to have some basic technical understanding so that you can follow along with what’s happening.
I would consider myself to be a power user but not a developer. I was able to figure WP Webhooks out fairly quickly, but I would say some of the features are pushing my technical limits (like data mapping and authentication).
However, I was able to figure out the core features of sending and receiving data without any issues. If you know your way around WordPress, you can probably do the same, even if you’re not a developer.
I have used some other automation plugins that are a little more beginner-friendly, but where I think WP Webhooks stands out is that it’s very flexible because you can use webhooks for literally anything, whereas some other tools might limit you to built-in automation.
If you can figure out how webhooks work, the possibilities of what you can set up with WP Webhooks are pretty endless. I focused mostly on using Zapier as an intermediary because that’s where my technical knowledge caps out, but you could set up your custom implementations if you have the technical know-how.
WP Webhooks also offers quite good value because even other tools that do support webhooks usually only do so in the premium version.
If you want to get started, you can play around with the free version and then consider upgrading to WP Webhooks Pro to access more features:

2 Responses
I’ve recently tried what is possibly a similar plugin called Zapier for WordPress and with to that plugin I met seemingly insurmountable problems passing authentication through Cloudflare. I’m loathe to try again with this more complex plugin until I’m sure the same issue with Cloudflare won’t resurface. From the bulletin boards there seems no urgency at Cloudflare to facilitate these type of plugins, which presumably will become more widely used as the no-code movement progresses.
Hey there I am looking to set up a webhook between WordPress and flowlu. Flowlu is like a crm. So when someone submits a form with their contact details on the site I want that info to get sent to flowlu and get added as a contact. The problem is that the form was custom built by a developer because the site is for real estate and the form is custom to each page I.e when someone looks at a listing and they want to submit their details, it was made that the details of the listing get submitted with their details. So what I want is for those details to be sent to flowlu (the crm) and I am not sure if this plugin can do that.