


Website popups seem to be ubiquitous these days. Just about every site you visit has a popup to subscribe to an email list, get a discount, or accept the GDPR-regulated cookie warning. We’re all used to seeing them, and sometimes we’re even annoyed by them.
You may have tried using popups on your website and come to the conclusion that they don’t work. Maybe you’re not getting clicks on them and decided that they just don’t convert. Or maybe you’ve heard that no one uses them anymore because of the annoyance factor.
It’s only partly true. Most likely, the method you’ve been using to show popups on your site is outdated and they’re not very useful for your visitors.
There’s a way to create popups on your website that are actually useful and won’t make your visitors click away. In this tutorial, we’re going to show you how.
Popups Without The Annoyance Factor
If you’ve tried creating popups on your WordPress site before, you know that it can feel like a big gamble. Sure, there are plugins to help you create the prettiest little popups on the planet, but somehow they just don’t get any traction.
That’s likely because while they might look amazing, you have little control over where, when, and how they pop up on the page.

Nelio Software has created a plugin that allows you to create great-looking popups with full control over when and how they are displayed.
The Nelio Popups plugin is also fully integrated with the WordPress block editor. That means you can use the tools you’re already familiar with to build attractive and effective website popups.
Get Started Creating Popups with Nelio
Installation and setup
First, install Nelio Popups just as you would any other WordPress plugin. You can download it at WordPress.org or through your WordPress dashboard.
Once it’s installed and activated, you’ll see a new menu item in the sidebar of your dashboard. There’s no other setup required. Simply click Nelio Popups>Add New to get started.
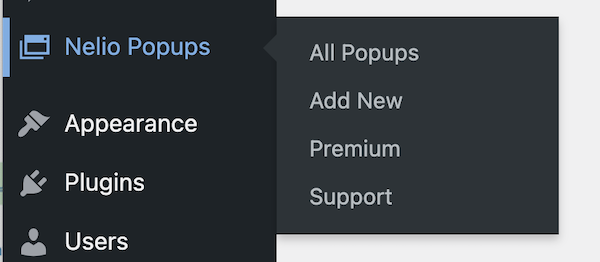
Creating a popup
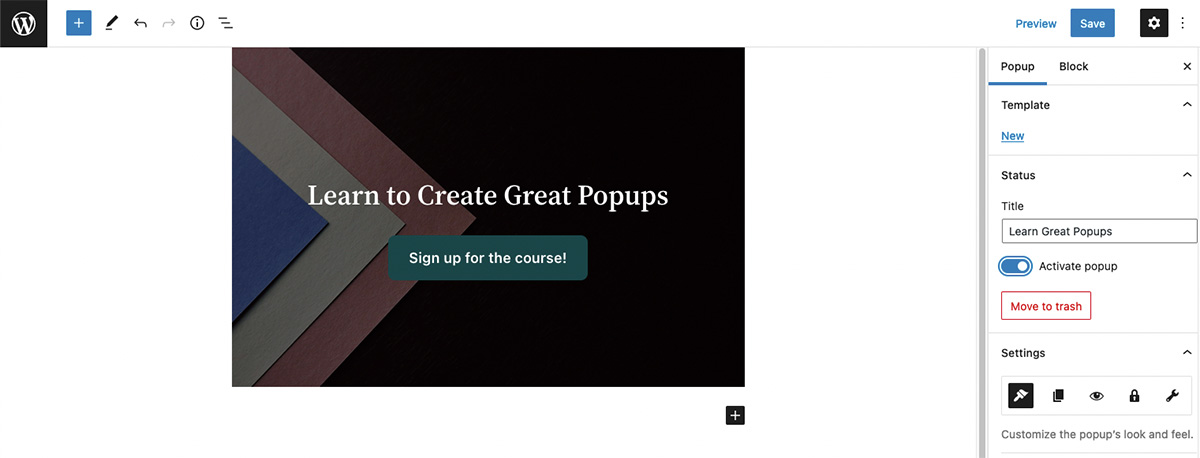
One great part about using Nelio Popups is that there’s no new interface to learn. Once you click Add New, you’re taken to the block editor UI. This is where you’ll build your popups, just as you would any post or page in WordPress.

While the main editor area looks familiar, you’ll notice that the settings sidebar has tools specific to Nelio Popups. This is where you’ll find all the settings for your popup’s style, placement, timing and more. Let’s start with the style settings, which are intuitively placed in the tab with the paintbrush icon.
First, you’ll want to create the popup itself. Again, this is just like adding blocks to a post or page. In our example, we added a simple cover block with heading text and a button.

You can style the elements using the usual block editor tools. In the sidebar, you have options for customizing the popup’s size and location. Rather than experiment with random choices, let’s talk about how to make strategic decisions when designing your popup.
Strategic placing and timing
One of the most important decisions you can make with your popups is their location and timing. Covering the entire window with a huge popup while a visitor is just getting into your content can be extremely annoying. Because you have the tools available, you can be strategic about where the popup appears and how big it is.
For example, if you want a popup to appear on a particular post without blocking the content, you might want to place it in a bottom corner and make it a smaller size:
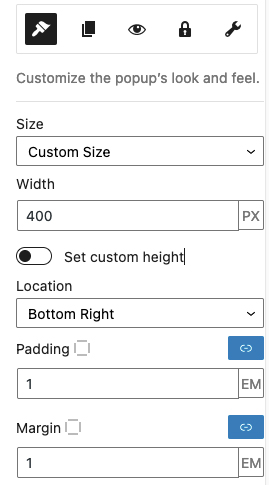
You can also choose to deselect “overlay,” so that the post’s content is still visible.
Then, in the Pages tab, you can select the pages where the popup can appear:
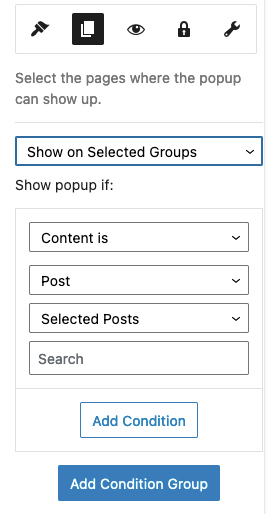
Now that we have our popup styled and the location and size are set, let’s go over some additional settings that will make it even better.
Make It Easy on Your Visitors
Creating a beautifully-styled popup is essential, of course – but that’s only part of the package. You also need to make sure it appears at the right moment and allow your visitors to close it. Let’s cover the settings for handling both.
Showing the popup at the right time
Have you ever visited a site and before you can even get into the content, a popup appears, asking you to subscribe or click to another page? It’s not only annoying, it’s counterproductive. You want your site visitors to get a good picture of who you are and what you’re offering before interrupting their visit.
It’s easy to set this up in Nelio popups. In the settings sidebar, navigate to the Triggers tab – it’s the eyeball icon. You have several triggers to choose from:
- Mouse Action
- Page View
- Scroll Offset
- Time Delay
Under Mouse Action, you can choose to click or hover. You’ll need to have a CSS selector ready to type in the field to make the action work.
The Page View trigger performs exactly as it sounds, no additional settings are required.
For Scroll Offset, you simply need to add the percentage of the page that’s viewed before the popup appears. This is particularly handy when you want to make sure your visitors can read your content before being interrupted.
Time Delay is similar in that you just need to add the amount of time in seconds before the popup displays on the page.
With the premium version, you can also set other advanced rules. For example, you can choose to show a popup after inactivity or when a visitor is about to abandon a page.
Let them close it!
Going back to the style settings, you’ll see that you also have the option of adding a close button. A close button is highly recommended to give your visitors an easy way to dismiss the popup if that’s their preference. In our example, we also added a text label to make it even more obvious.


Additional Settings
Under the Constraints tab, you’ll find settings that let you limit where, when, or how often a visitor will see the popup. They make the options self-explanatory and easy to understand.
Under Advanced, you can choose options such as Close on ESC, Close on outside click, and Lock body scroll.
Once you have your popup created and all your settings configured, give it a title, activate it, and click the big blue Save button at the top.
You’ll be able to view and edit any of your saved popups from the Nelio Popups menu in the dashboard.
Total Control of Your Website Popups
Creating website popups that actually convert is partially about the design, and mostly about when, where, and how they appear.
The Nelio Popups plugin is 100% free to download, install, and use. You get some amazingly powerful tools with the free version. There’s also a premium version that gives you advanced features like Ad-block Detection, Exit Intention, Advanced Support, and more.
We hope this tutorial gets you creating amazing popups on your WordPress site. Leave a comment below if you’ve struggled with popups in the past.
