


Do you like starting over every time you go to build a landing page or create a quick upsell?
Me, neither. Thankfully, there’s a way to streamline the process of creating sales funnels by setting up reusable templates using FunnelKit and Elementor.
In this article, we’re going to focus on creating and using templates using FunnelKit and Elementor and use them for your FunnelKit sales pages. Specifically, I’m going to show you how to build a sales page template that you can use over and over, customizing it for each product. For this article, we’ll assume that you’re already somewhat familiar with using Elementor and WooCommerce.
Creating New Sales Funnels Can Be Time Consuming
Designing new landing pages and upsell promotions can be a time-consuming process. It typically goes something like this:
- Create the page
- Design the layout
- Add product information
- Create a call-to-action
When you regularly create sales funnels, that process can get tedious pretty fast. By leveraging the ability to create sales funnels in FunnelKit and creating templates in Elementor, you can significantly cut down the tedium in that process. You’ll be much more efficient, and if you work with a team, you can even make sure they have pre-existing templates to start from to ensure that your branding is always on target.

If you don’t already know about FunnelKit, it’s a WordPress plugin that integrates with WooCommerce to create a feature-rich eCommerce site. Once you have your store set up with WooCommerce, you can take advantage of the FunnelKit features to drive customers to your landing pages, and create one-click upsells. You can also create order bumps and take care of that pesky abandoned cart problem.
FunnelKit is free to install and use. They also offer a Pro version that gives you access to more templates to use in designing your sales funnels. It’s a powerful way to build campaigns and create custom, branded opt-ins, checkout, and thank you pages on your WordPress site.
How to Create FunnelKit and Elementor Templates
Even if you’re familiar with using Elementor for page layout, you may not have had the opportunity to create or use custom templates. I’m going to walk you through that process and show you how to combine it with FunnelKit to make your life easier.
Install and configure FunnelKit
First, because FunnelKit works in tandem with WooCommerce, you should install WooCommerce as your first step. Additionally, you should have Elementor installed as well. While Elementor is not necessary to use FunnelKit, it makes designing your sales funnel pages much easier, and it is necessary to create the kind of reusable templates we’ll be covering here.
Once you have that installed, you can find and install FunnelKit right from the WordPress dashboard plugin menu. Simply search for “FunnelKit” and install it as you would any other plugin.
I recommend having your WooCommerce store configured with at least a few products before starting with FunnelKit. FunnelKit automatically makes your products available for any sales funnels you want to create. Having some products set up in advance makes it easier to play around with all the features that FunnelKit offers.
As soon as you activate FunnelKit, a wizard pops up to help you get things configured. From there, you can start creating your funnels or tweak your settings.

Create a Sales Funnel
Creating funnels is as easy as adding new pages or posts. In the dashboard, click on FunnelKit>Funnels, then click the big Add New button in the top right of the menu.
In the next menu screen, you’ll have a bunch of pre-made templates available for Sales Pages, Optins, Checkouts, One-Click Upsells, and Thank You pages. For this example, you can choose any template just to see how this works. Let’s say you chose the Persuader Sales Page template. Once you choose Import, you’ll be presented with options for Sales Page, Checkout Page, and Thank You Page. Click the three dots to the right of the Landing Page section. Choose edit.
You’ll see that you have options for editing the page using Elementor or switching to the WordPress editor.
You can edit the template to suit the specific landing page you want to create. Once you click Update, your new page will be saved. The original template you imported won’t be affected. You can repeat these steps for your other funnel pages, designing them to your heart’s content.
While you can continue to do these steps for any new sales funnels you want to create in the future, you’ll have to go back and repeat the process of designing from scratch or redesign an existing FunnelKit template.
Now that you know the basics of creating and editing new funnels, you can make this process more streamlined by setting up your own templates.
Create a Reusable Sales Funnel Template
Let’s create a custom template preset using Elementor and FunnelKit. This time we’re going to focus on creating a single Sales Page template that we can use over and over.
Step 1: Add a funnel
Just as you did previously when creating a test sales page, you’ll go to FunnelKit>Funnels, then click Add New.
You can choose a template to start from if you like. In this case, we’re going to choose Start From Scratch. Click Add New Step. Then, in the menu that pops up, choose the Sales Page option.

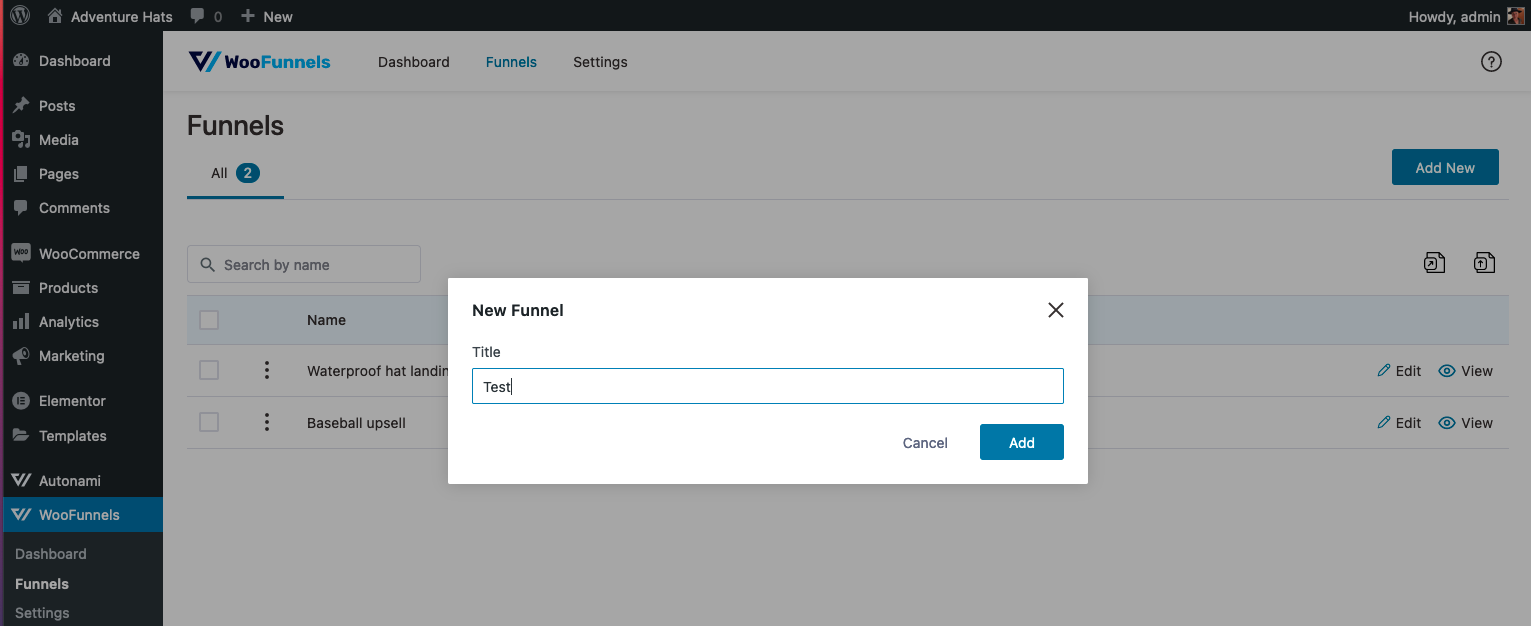
In the next screen, name your Sales Page.
Step 2: Design the Custom Sales Page Template
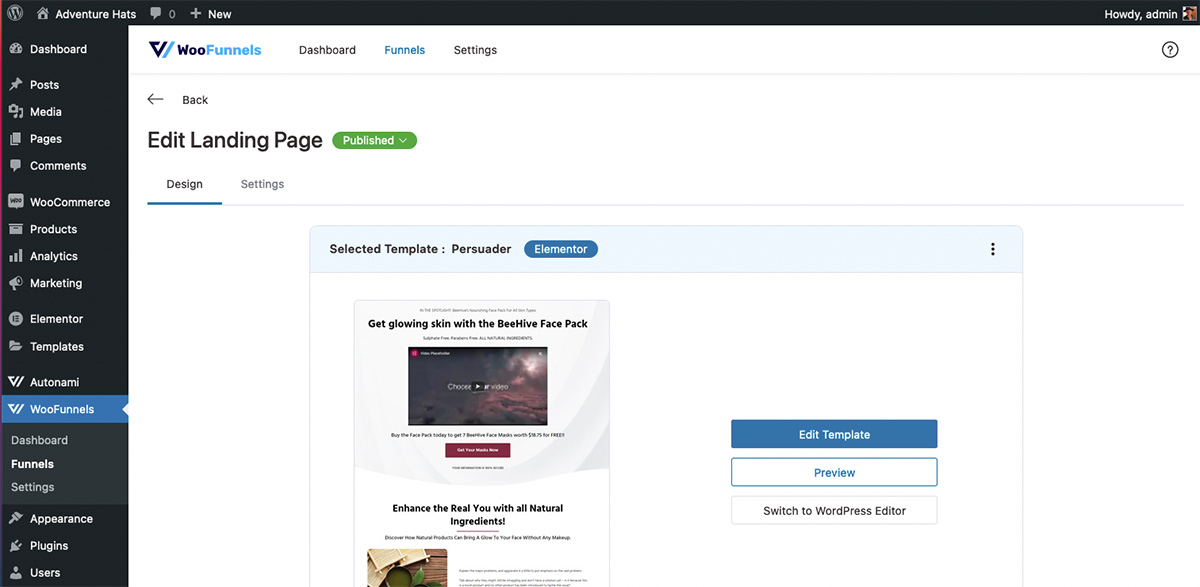
Once you’ve created your page and you see it listed on the next screen, click the three dots on the far right and choose Edit. Once again, you can choose the Start From Scratch option or choose a pre-made FunnelKit template to get you started.
Click Edit Template and you’ll be taken into the Elementor editor. Now you’re free to build or edit your design as you like. Keep in mind that since you’ll be using this as a template for future sales pages, you don’t have to be too specific with copy or images. You’ll be able to change these per product later.
Step 3: Save the Custom Template
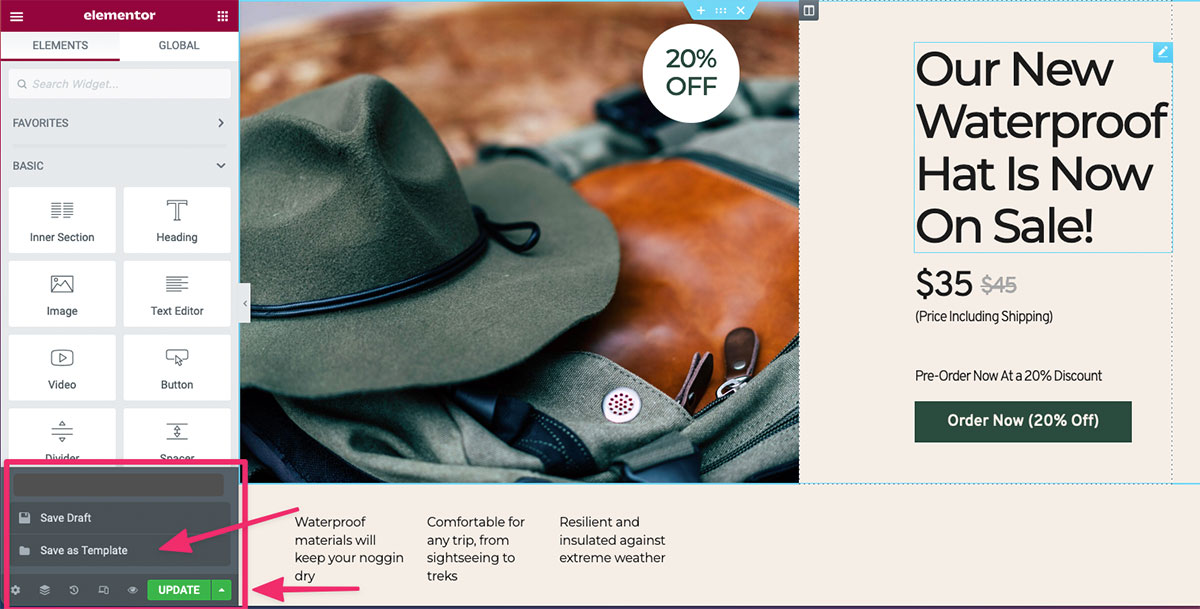
When you’re finished designing and editing, click the green arrow next to the Update button. Choose Save as Template. Give your new template a name and save it to your library. Exit to the WordPress dashboard.
Now you have a custom template that you can use for any new products or sales you create. No more reinventing the wheel every time you have a new campaign. In the next section, I’ll show how you can use it!
Using the Custom Elementor Template in FunnelKit
Sure, you have a brand new custom template – but how do you use it? Let’s say you have a new product and you want to kick off the launch with a sale. It’s a similar sale to the one you’ve done in the past, so you can use that custom template you’ve created. Let’s go over the steps for implementation.
Step 1: Add a funnel
Sound familiar? This is exactly what we did before. Repeat Steps 1 and 2 above for creating a funnel.
Step 2: Insert the Template
At this point, you should be inside the Elementor editor, ready to design your new sales page. It should like this:
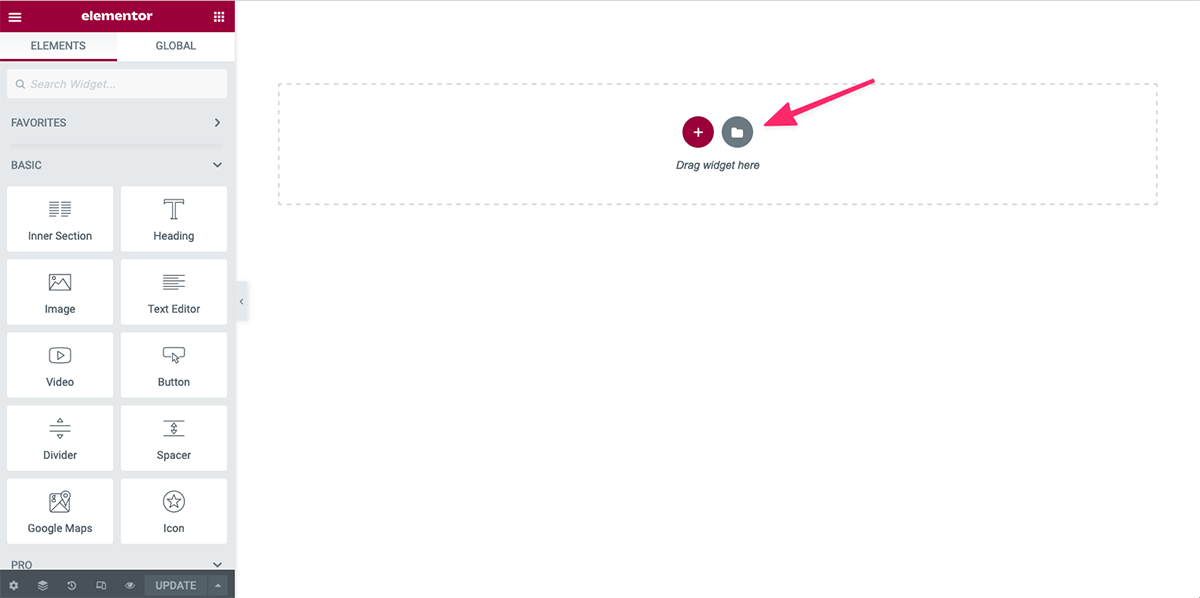
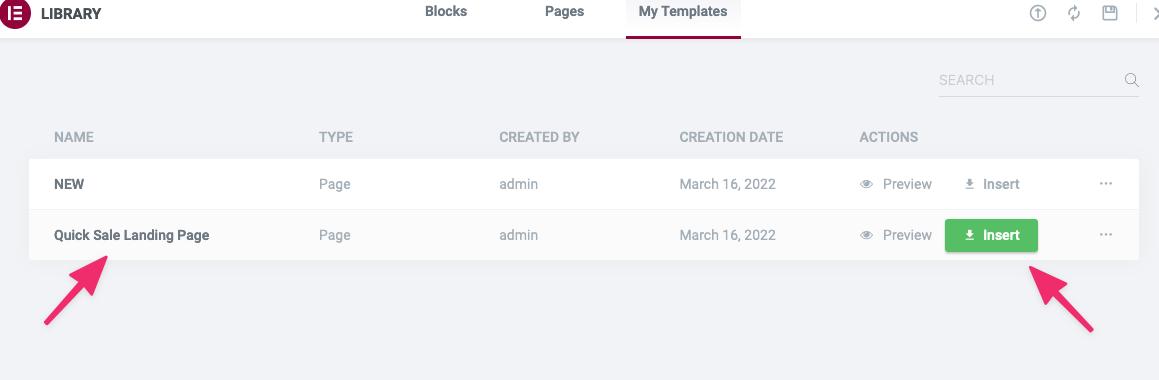
Click the folder icon. In the pop-up menu, navigate to My Templates. You’ll see a list of all templates you’ve saved. Browse to find the one you want and click the green Insert button.
Step 3: Edit and Save
Because you’re working on the Sales Page, you can edit the layout however you want and it won’t affect the template. You’ve merely imported the template and it will remain exactly as it was for the next sales page you create. That’s the beauty of creating and using custom templates.
When your page is ready, click Update and that’s it!
We also have an exclusive FunnelKit discount that can make the price more attractive. Click on the link below to get an extra 15% off your order!
You Just Built an Elementor Sales Funnel
Congratulations, you just created a custom Elementor template that you can use again and again to create sales funnels.
We focused on creating custom templates using FunnelKit and Elementor and implementing them in your FunnelKit sales pages. I showed you how to build a sales page template that you can use over and over, customizing it for each product.
You can see how simple it can be to create reusable templates in Elementor. Even if you don’t have stellar design skills, you can leverage the pre-made templates that FunnelKit offers. Just edit them to fit your particular need or branding and use them over and over, customizing them for each individual sales funnel you create.
If you frequently create sales pages, you now have a streamlined process for all your new products and campaigns. Using three powerful plugins – WooCommerce, FunnelKit, and Elementor, you have a solution that makes it significantly more efficient for your whole team to create sales pages that stay on brand.
Whether you’re a web designer or you manage your own eCommerce site in WordPress, you now have new skills that will free up your time to focus on your business.
Let’s hear from you! Do you struggle with reinventing the wheel every time you create a sales funnel? Let us know in the comments!
