


If you’re interested in launching a website, you’ve probably heard about this “WordPress” thing. That’s because self-hosted WordPress now powers over 40% of the known web, making it by far the most popular tool to build a website.
But despite that popularity, many beginners still find it difficult to get started with self-hosted WordPress. You can opt to work with WordPress agencies, but that can get expensive.
So to help you out, I’m going to show you everything you need to create a website with WordPress for less than $50.
In this post you’re going to learn all about:
- Picking a domain (free)
- Signing up for hosting (paid)
- Installing WordPress (free)
- Choosing / customizing a theme (free or paid)
- Adding plugins (free or paid)
- Writing posts and pages (free)
Ready to go from WordPress zero to WordPress hero?
Let’s get started!
Step 1: Pick a domain name
Think of your domain name as your WordPress site’s permanent address on the Internet. It’s a standardized format that allows anyone around the world to easily find your website.
For example, no matter where you are in the world, you can easily get to WP Mayor by going to “wpmayor.com”.
Tips for Choosing a Standout Domain Name
Choosing a domain name isn’t always easy and deserves some time and consideration. It should provide both context and brand-ability.
For example, wpmayor.com provides context through the “wp” part (WordPress) and brand-ability through the “mayor” part. This formula of “Context” + “Brand” is a great way to structure your domain.
Here are some other tips to help you out:
- Stay short – shorter domains are easier to remember and therefore preferable to longer domains.
- Don’t use hyphens – while they’re more available, domains with hyphens can be confusing.
- Try to get a .com – other domain extensions are becoming more popular, but .com is still the most recognizable domain extension.
Where to Purchase a Domain Name
To actually buy your domain name, you’ll need something called a “domain registrar”. Your registrar is licensed to register and manage your domain name.
Most hosting providers double as registrars and offer a free domain name as a signup incentive. We’ve partnered up with Bluehost, the best affordable hosting provider around, to get you a free domain registration when signing up to one of their hosting plans.
But you can also purchase a domain name through a third-party registrar, such as Namecheap or NameSilo.
If you want the simplest solution, we recommend that you get started with Bluehost.
Full transparency: When purchasing hosting, plugins or otherwise through our links on this page, we earn a small commission at no additional cost to you. This doesn’t influence our selection – we’d get paid a commission by almost every host we recommend due to the strong relationships we’ve built with them over the years. Nevertheless, we only recommend products and services that we use and believe in.
Step 2: Sign Up for Reliable Hosting
While domain names help direct traffic, web hosts are the services that actually serve up all that pretty content you see in your web browser. In order to make your WordPress site available to visitors from around the world, you’ll need a web host.
You’ll install WordPress on this host and use it to store and deliver all of your posts and content.
While high-performance web hosts can easily cost hundreds of dollars a month, you don’t need to spend anywhere near that as a beginner. Instead, you can get affordable web hosting for basically the price of a latte or a pint of beer. Usually $3-10 per month.
Our Recommended Budget Hosting for Beginners
For beginners, we recommend Bluehost once again. Not only is Bluehost incredibly affordable to get started, it also has excellent performance and uptime. The former is important because your readers will demand fast page load speeds. And the latter is important because you want your WordPress site to always be available.
Bluehost offers a free SSL certificate and free CDN, which are essential to keep your site safe from hackers. And they’ll even throw in a free domain for the first year. Now you can see why they’re an easy recommendation for us.

How to Sign Up For Bluehost Hosting
To sign up for Bluehost Hosting, you first need to go to Bluehost.com. Then, scroll down to see the list of available plans for either Shared Hosting or WordPress hosting.
Once you select your plan, you’ll be prompted to create a new domain or use an existing one that you already own. If you purchased your domain name through a third-party registrar, choose the “Use a domain you own” option. Otherwise, choose “Create New Domain” and enter your desired domain name.

Next, you’ll need to enter your account and payment information.
Further down the page, you’ll find a few optional extras that are worth considering. This is where your cost might rise above $50, so keep an eye on the total price.

The extras include Domain Privacy and Protection, SiteLock security, and more. Although not absolutely essential to run your site, if you afford a few extra dollars a year, it’s better to be safe than sorry.
Next, enter your payment information and complete your purchase.
Other (More Expensive) WordPress Hosting Options
While Bluehost is great, it’s not the only quality web host out there. If you’d like to weigh your options and afford to pay a little more for added benefits, here are some other hosts we recommend:
Step 3: Install WordPress in one click
Assuming you’ve gone ahead and gotten started with Bluehost using one of our links, you’ll be able to install WordPress in seconds thanks to their simple one-click WordPress installer.
Installing WordPress will give your website its basic form. While you’ll still need to add themes and plugins to truly personalize your WordPress website (that’s next!), you will have a fully functioning WordPress site after you complete this step.
How to Install WordPress via Bluehost
Once you’ve gained access to your Bluehost account, you’ll see a button to “Log in to WordPress” for your new site. click on that button and everything will be set up for you in no time at all.
It’s really that simple.
If you ever want to access your website without going to your Bluehost account first, go to yoursite.com/wp-admin/ (replacing “your site” with your own domain) directly from your browser.
If you’ve chosen to use another hosting provider, there are two ways to install WordPress:
- Automatically through your host’s dashboard (differs per host)
- Manually using something called FTP (not recommend for beginners)
How to Install WordPress With Other Hosts
If you’re using a different host, you’ll need to go to your host’s knowledge base or contact their support to find the specific process for your host. But if your site uses cPanel, here’s a general guide for how to install WordPress.
Go to your cPanel dashboard and find the Autoinstallers section. Then, select WordPress:
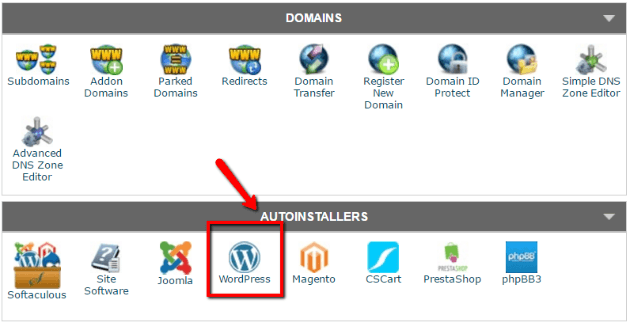
On the next screen, click Install Now and follow the instructions:

How to Install WordPress Manually
If you need to install WordPress manually, you’ll have to dig into your site via FTP and MySQL. Rather than reinvent the wheel, I’ll direct you to the official wordpress.org guide.
While the installation process is simple if you’re familiar with basic web technologies, it’s still intimidating to most beginners. That’s why I recommend going with your host’s automatic installation process whenever possible.
Step 4: Pick a Beautiful Theme (Design)
Your WordPress theme dictates how your site looks. Think of it like your website’s “clothing”.
You can choose from both free and premium themes. While free WordPress themes are a nice way to minimize startup costs, they’re often less feature-rich and not as user-friendly as a quality premium theme.
If you’re ok with those trade-offs, you can find heaps of free themes at the official WordPress Theme Directory.
If you want to go with a premium theme or something that you’re sure will be supported for a few years to come, we recommend looking at more reliable theme developers. There are various theme shops that focus on specific niches, so here’s a list of theme types to get you started:
- Affiliate marketing themes
- Animation themes
- Aggregator themes
- Booking & reservation themes
- Classifieds themes
There are a ton of other theme types out there so you can start your search in our WordPress themes section. We’ve reviewed and written about a number of the top themes that are out there.
You may also want to consider a page builder if you’re feeling a bit more adventurous.
Nowadays, builders like Elementor and Divi have made designing your own website as simple as can be. In fact, if you’ve found a site design that you like and want to clone it, check out these different ways you can clone any website with the right tools.
How to Install a WordPress Theme
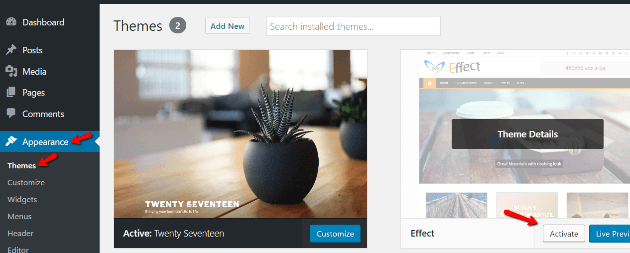
Once you’ve chosen your theme, you need to actually install and activate it. If you chose a free theme from the official WordPress.org Theme Directory, you can install it directly from your WordPress dashboard by going to Appearance → Themes → Add New and searching for the theme name:

If you’re using a premium theme, you’ll need to upload the .zip file through a similar interface. Go to Appearance → Themes → Add New → Upload Theme:

No matter which method you use, make sure to Activate your theme after you install it:
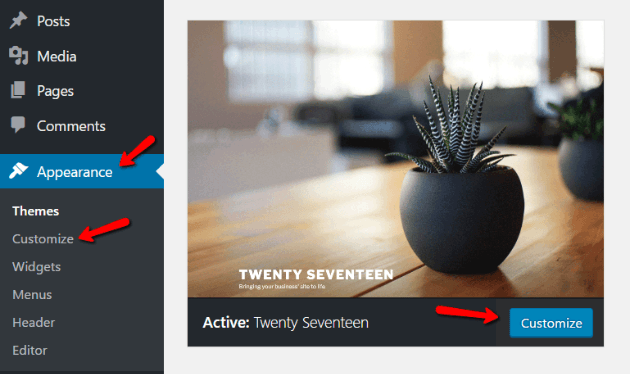
Customizing Your WordPress Theme
Once you activate a theme, you can customize it to make it your own. For most themes, you can do this by going to Appearance → Customize.
In the WordPress Customizer, you can make changes and preview them in real-time:
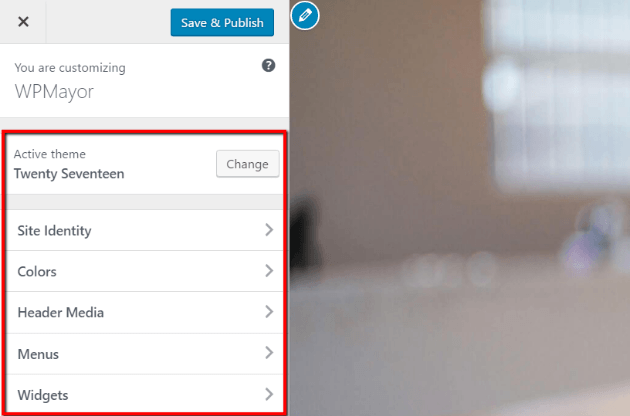
Some themes might also use custom interfaces for theme customization or rely on page builders.
Step 5: Activate Some Basic Plugins to Add Functionality
Plugins add extra and/or improved functionality to the default WordPress software. They’re incredibly versatile. Plugins can add minor tweaks like a new menu item or full-scale site changes like turning your WordPress site into a social network.
The specific plugins that you add to your site will depend on your exact goals. But there are some all-purpose plugins that all sites can benefit from.
Essential Plugins for All WordPress Sites
Here are the types of plugins all sites should consider along with a few recommendations. Some of these plugins are premium options so they’ll come at an additional cost, but they typically also offer free versions.
- Backups: Blogvault
- Security: Malcare or Sucuri
- SEO: RankMath or Yoast SEO
- Forms: WPForms or Gravity Forms
- eCommerce: WooCommerce
There are many more types of plugins you could consider depending on what you want to do with your website. Check out our list of more recommended WordPress plugins for even more ideas.
Where to Find Additional WordPress Plugins
If you want to add additional functionality specific to your niche, here are some good sites to find both free and premium plugins:
- WordPress.org Plugin Repository – the largest directory of free plugins
- WP Mayor Reviews – we’ve personally reviewed hundreds of plugins over the years
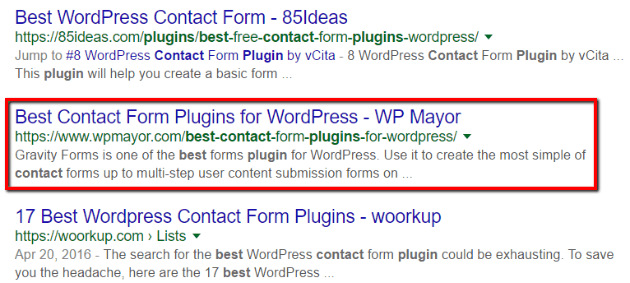
- Google – you can use Google to find plenty of plugin roundups which feature the best plugins for specific uses
How to Install a WordPress Plugin
Installing a plugin is almost identical to installing a theme. Just go to Plugins → Add New:
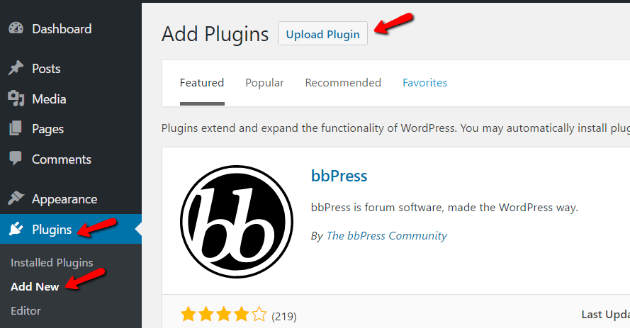
If you’re installing a free plugin listed in the wordpress.org plugin repository, you can add it directly here. If you’re installing a premium plugin, you need to click the Upload Plugin button to upload the .zip file.
As with themes, you need to make sure to Activate the plugins that you install before you can use them.
Step 6: Add Some Content to Your Site
Now that you have your theme and plugins all set up, you’re ready for the fun part…
Creating and publishing content.
There are two basic types of content you can create:
- Posts – these are blog posts. Older posts will get pushed down by newer posts, so they’re strictly to be used for blog content.
- Pages – these are permanent pages. They’re good to use for static content like your About and Contact pages.
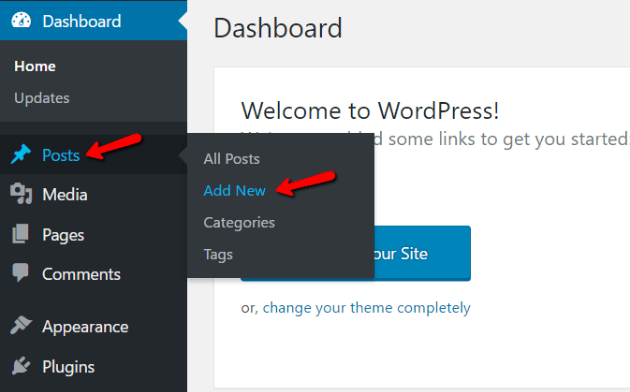
You can create posts by going to Posts → Add New:
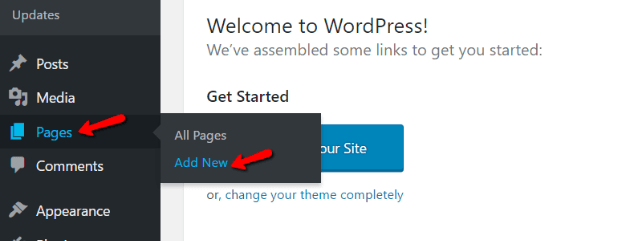
Similarly, you can create pages by going to Pages → Add New:
Both posts and pages use the WordPress Block Editor which allows you to design them in an interactive block building experience. You can also upload images or other media by clicking on Add Media:
Once you’re finished with your content, just click Publish to share it with the world.
Enjoy Your New WordPress Site
And that’s it! You’ve just learned how to create a website with WordPress. You’ve got your own domain name, your own theme, and you’ve customized your site with some essential plugins.
If you need help tweaking your WordPress site, we always recommend Codeable for WordPress customizations.
We’ve also put together a detailed list of WordPress resources if you want to learn more about the best WordPress tools out there.
I hope you enjoyed this guide and don’t hesitate to ask any questions in the comments!

4 Responses
The guide was extremely useful. I loved how you picked each and every detail about WordPress and presented it with precision. I’ve read several guides on WordPress but most of them were cut short and difficult to understand. Yours really stood out and did an exceptional job.
We’re glad you’ve found it helpful, Aman!
One of the best guides I have ever read on WordPress website creation, thank you wpmayor for this amazing guide.
Thanks a lot Colin for this detailed step by step guide.
It was really helpful