


Email marketing is the perfect complement to your WordPress blog.
It’s now trendy to consume content in inboxes as newsletters, and there’s a good reason why. Across all industries, email newsletters have a 17% open rate – that’s an engagement rate significantly higher than any social media platform.
If you already have a WordPress website, it’s best to publish all your content from there – including your newsletters! This lets you streamline your workflow. You’ll be able to focus on publishing more newsletters and building consistency over time.
My goal today is to help you send your first email marketing campaign using WordPress. In less than half an hour, we’ll get the fiddly technical stuff out of the way so you can send weekly newsletters to drive readers back to your site, again and again.
There are four parts to this guide; the setup, sending your first newsletter, adding a subscriber form, and the key to long-term newsletter success. Let’s dive in.
Step 1: Set-up (13 minutes)
We’ll do this with Newsletter Glue: a simple plugin that allows you to write emails in the same Gutenberg block editor. Write once, publish twice: first as a post to your blog and then directly as a newsletter to your subscriber’s inbox.

Select & Connect Your Email Marketing Service (5 minutes)
The first step is to select an email service provider (ESP) to manage your mailing list and send emails for you. Trust me, this beats personally emailing every subscriber yourself.
If you’re just starting out, we recommend signing up with Mailchimp. You can manage up to 2,000 contacts and send 10,000 emails per month, and it works with Newsletter Glue.
Watch this simple video for a step-by-step guide on getting started with Mailchimp.
Once you fill in your details, you’ll be sent a confirmation email and you’ll need to validate your email by clicking the link inside. Done!
Install Newsletter Glue (8 minutes)
Head directly to NewsletterGlue.com to purchase a license. There’s a 14-day money-back guarantee, so you’ll have two weeks to experiment.
Get 15% off your first purchase.
Get 15% off your first purchase. Show Less
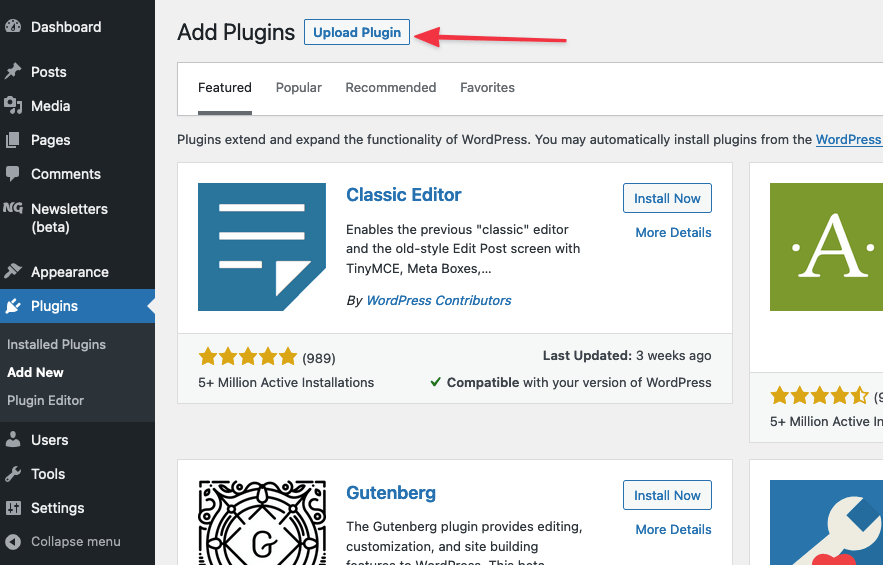
Once you make your purchase, you’ll receive a zip file as a download. Head to Plugins → Add New and select Upload Plugin to upload the file.
Once installed, you’ll be able to see Newsletter Glue Pro in your list of plugins.
Click ‘Activate’ to start the Onboarding Wizard. From there, it’s just six simple steps:
Onboarding Step 1: Fill in Your Plugin License Key
After your purchase, your license key will be in the purchase confirmation email in your inbox. Paste your license key and hit Activate your copy.

You can read more about finding your license key in this help article.
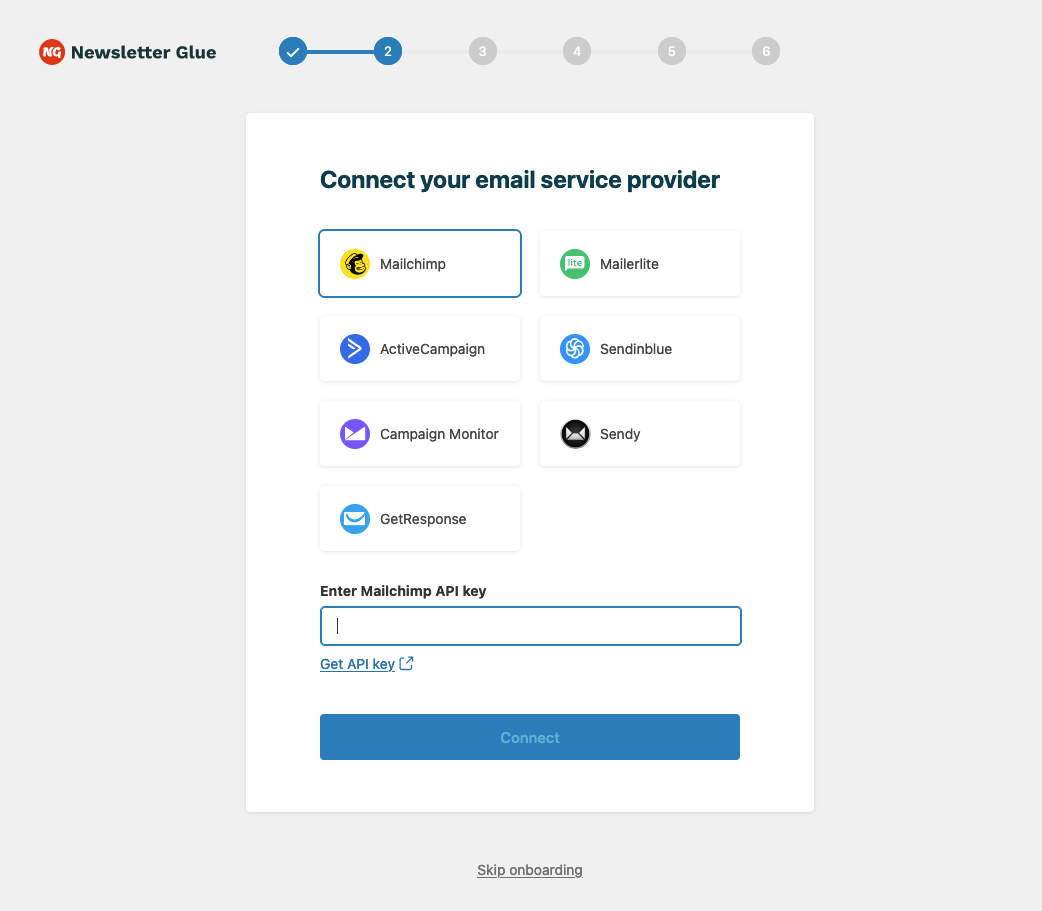
Onboarding Step 2: Connect your ESP.
Select Mailchimp from the list of options.
A dialogue box opens, prompting you to paste your API Key. Simply click ‘Get API key’ and copy and paste the API key to connect.
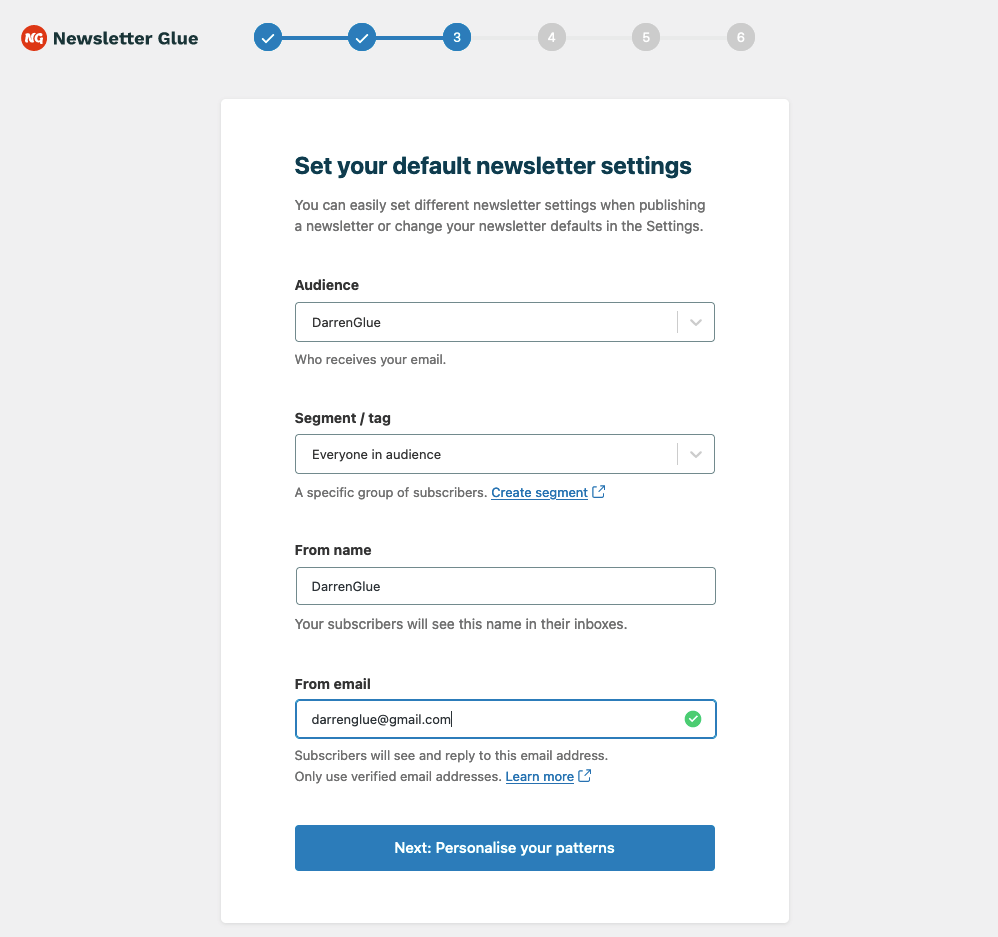
Onboarding Step 3 & 4: Set Default Newsletter Settings
Steps 3 & 4 are straightforward; just fill in the forms. Many of these fields will already be pre-filled, and you can leave them as default.
Onboarding Step 5: Add a Logo
This helps your readers recognize you, and adds a nice touch of branding.
You can also add your social media tags in Onboarding step 6: Add your social media accounts and they’ll appear as social sharing buttons in the footer of your newsletter. If not, you can skip that step.
That’s it, you’re done! As soon as you’re ready, hit the blue button and you’ll leap straight into Step 2: Send your first test email and add subscriber form!
TOTAL TIME TAKEN SO FAR: 13 Minutes for Step 1: Set up
Step 2: Send Your First Email (5 minutes)
Right after you finish onboarding, you’ll land on a demo post. This is a sample post created in the Newsletter Editor that shows you all the different blocks you can use to design your newsletter.
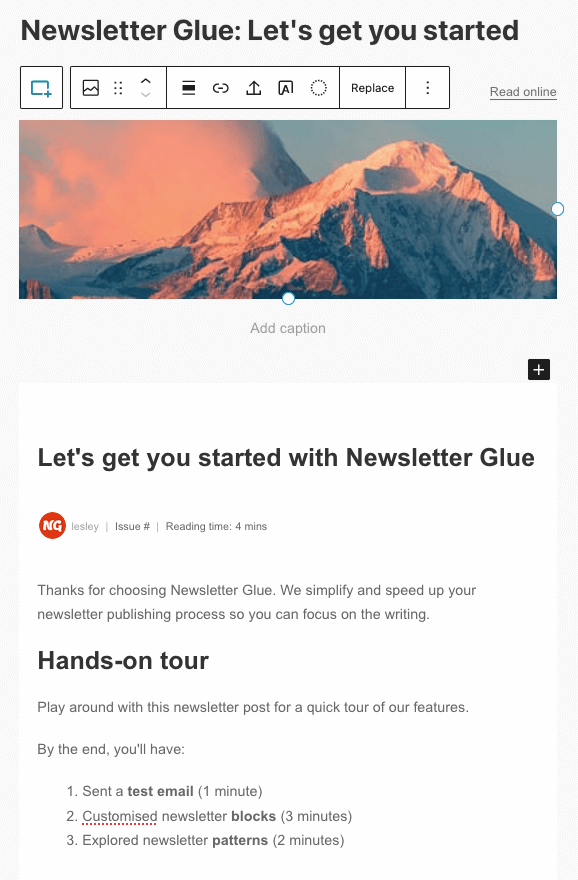
It’s worth reading through the short post to get a feel of all the cool features of the Newsletter Glue editor. It’s based on the Gutenberg block editor, but with some special blocks we’ll get to later.
For now, explore sending yourself a test email to preview what a newsletter will look like.
Test-Send Your First Email (1 minute)

At the bottom of the Newsletter Glue editor, you’ll see a section like in the screenshot. You can click the Send button to ‘Send test email’ to yourself to get a preview of what it looks like in your inbox.
Play Around With Newsletter Glue’s Custom Blocks! (This can take as long as you need)
Finally, it’s time to play around with the post and explore all the features. You can take as long as you need to customize the post to your liking.
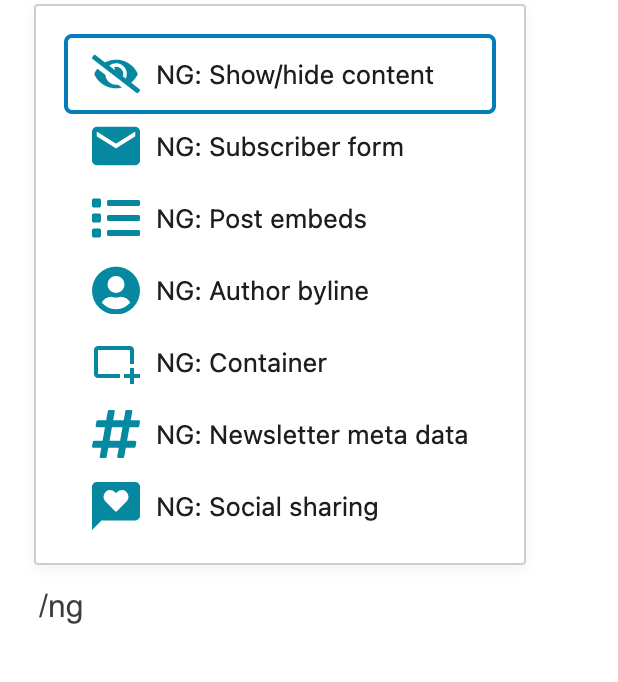
It’s worth exploring the custom Newsletter Glue blocks, which you can do by typing /NG:
If you’re familiar with Gutenberg, you can also play with the Pattern Editor for easier formatting of future newsletters.
When you’re ready, send yourself a test email to preview and check everything.
In the future, once you’ve prepared the posts, you can select the option to SEND AS NEWSLETTER. Once you hit Publish on a post, Newsletter Glue will connect in the background to Mailchimp and send the post as an email to your subscribers.

But wait, you don’t have any subscribers for now.
You can start by setting up a subscriber form. Luckily, that’s easy to do…
TOTAL TIME TAKEN SO FAR: 18 Minutes for Steps 1 & 2 (plus however long it takes you to write a post).
Step 3: Add a Subscriber Form (2 minutes)
While editing the demo post, you can type in /NG to find the Subscriber Form Block. It’ll look something like this:

On the right sidebar, you’ll see a list of options to customize this block, including colors and button details.
Under the section Mailchimp Integration, you’ll be able to select which Mailchimp audience to add new subscribers to.
You’ll also be able to control whether to Show/hide block in the blog post or email newsletter. For now, you’ll want to set it to Show in blog post (so blog readers can subscribe to your newsletter) and hidden from your email newsletter.
For more customization options, check out this tutorial video:
You can now add subscriber form blocks to any of your future blog posts.
TOTAL TIME TAKEN SO FAR: 20 Minutes for Steps 1, 2 & 3.
Step 4: Keep Sending Emails!
If you’ve reached this stage, take a moment to congratulate yourself. You’ve taken the first step into the world of email newsletters, hooray!
But the journey’s just beginning. For email campaigns to succeed, you’ll need to send emails regularly. You’ll also need to grow the number of email subscribers over time, play around with subject headers and calls-to-action to improve your open and click rates.
To help you on your journey, here are some resources I found useful in growing my subscriber list:
- 7 ways to be consistent with a weekly email newsletter (Step 1 is to make sending easy!)
- 9 tips that get more people to subscribe to your email newsletters
- How to start a newsletter from 0 subscribers (I wrote this!)
And good luck!
It’s easy to send your first email campaign with Newsletter Glue
In total, the technical set-up took just 20 minutes to set up – not as hard as it looked originally.
And in the future, you’ll be able to save more time, by using the pattern editor or duplicating some of the layouts from the previous post.
